Here’s How to Build a Stylish Fence Gate
Your property’s outdoor gate (and the entire fence, for that matter) illustrate how exceptional design is a marriage of form and function. A one-of-a-kind gate allows you to deliver a bold design statement while providing privacy and security. This DIY wooden gate, for example, is a doable weekend project that will instantly refresh the look of your backyard entryway. Made using resilient weather-resistant cedar, it features a decorative diagonal design that adds contemporary style to your home’s overall curb appeal.
What You'll Need*:
Supplies
(6) 2" x 2" Cedar (8' lengths)
(3) 2" x 4" Cedar (8' lengths)
(12) 1" x 6" Cedar (8' lengths)
1/4" Scrap Plywood
3" Deck Screws
1-1/4" Deck Screws
4 Piece Black Gate Hardware Kit
*Our full assortment of building supplies is available at Home Building Centre and Home Hardware Building Centre locations. To unlock our catalogue of building supplies online, please select your local Building Centre.
Here’s How
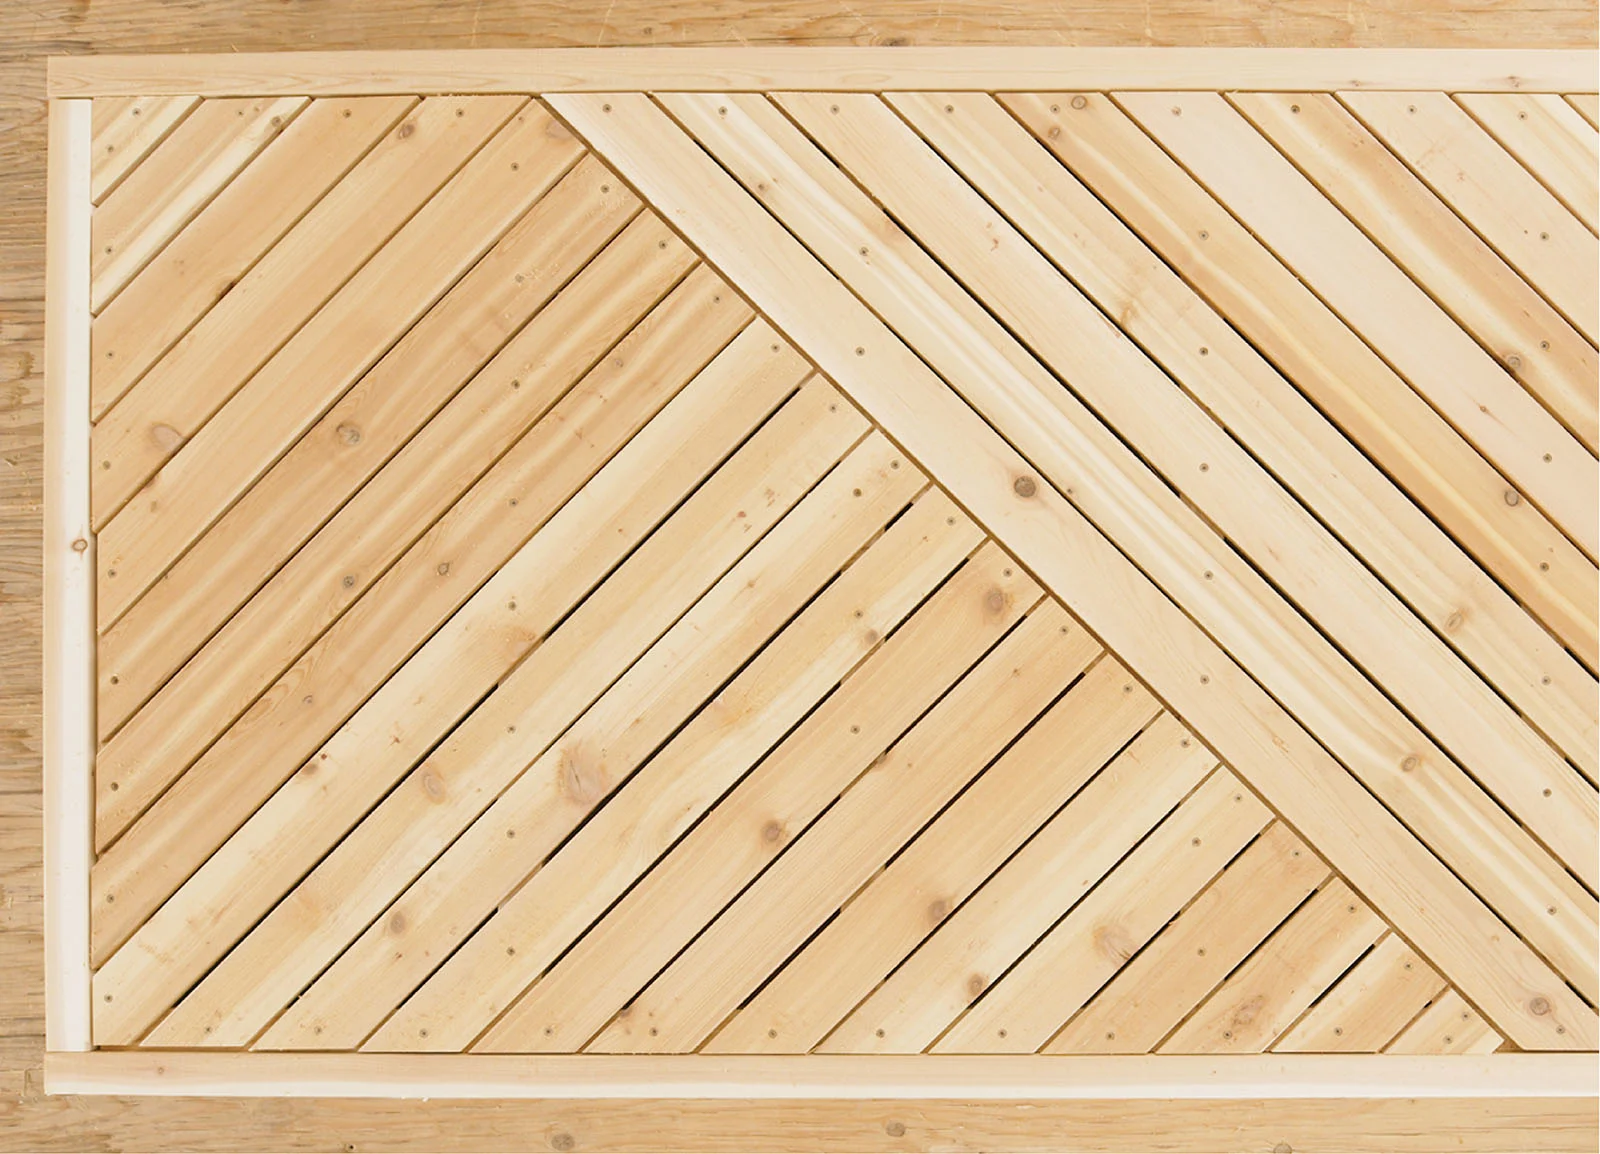
For this project, we’re creating a cedar fence gate with final measurements of 36" wide x 72" tall. The pattern we have created is based on the overall gate being divided into three frames with the 1" x 6" cedar boards laid snugly together on the diagonal to create an asymmetric pattern.
Steps:
1. Assemble all the materials and tools for your project.
2. Measure, mark and cut your cedar.
You will require the following pieces:
For the cedar frame:
(2) 1" x 6" x 36" Cedar
(2) 1" x 6" x 72" Cedar
For the 2" x 4" frame:
(2) 2" x 4" x 72"
(2) 2" x 4" x 32-3/4"
(12) 1" x 6" Cedar Fence Boards cut in half length-wise, to create 1" x 3"
For the 2" x 2" frame:
(5) 2" x 2" x 32-3/4"
(2) 2" x 2" x 68-3/4"
(3) 2" x 2" x 14-1/2"
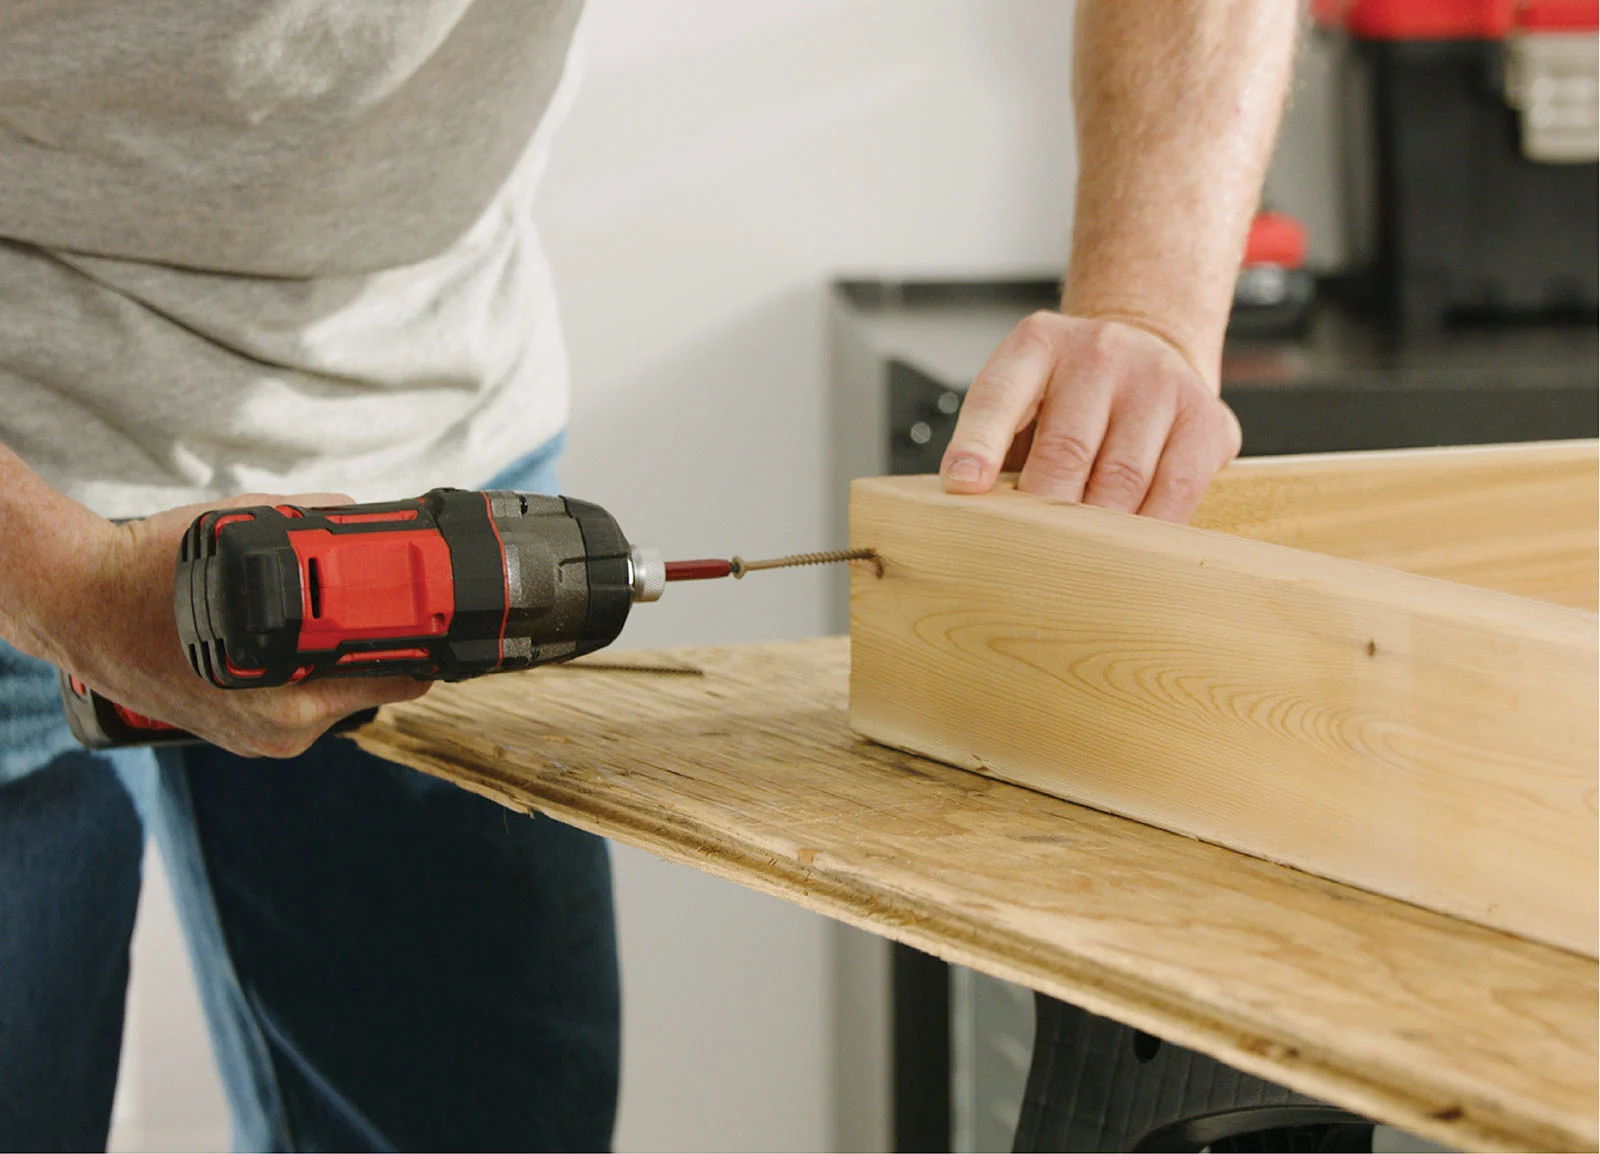
3. To begin, build the 36" x 72" frame for your gate out of 2" x 4"s. Attach the two 32-3/4" pieces to the two 72" pieces by countersinking and screwing the short lengths into the longer pieces from the sides to create your rectangle.
4. Measure the inside dimensions of your frame.
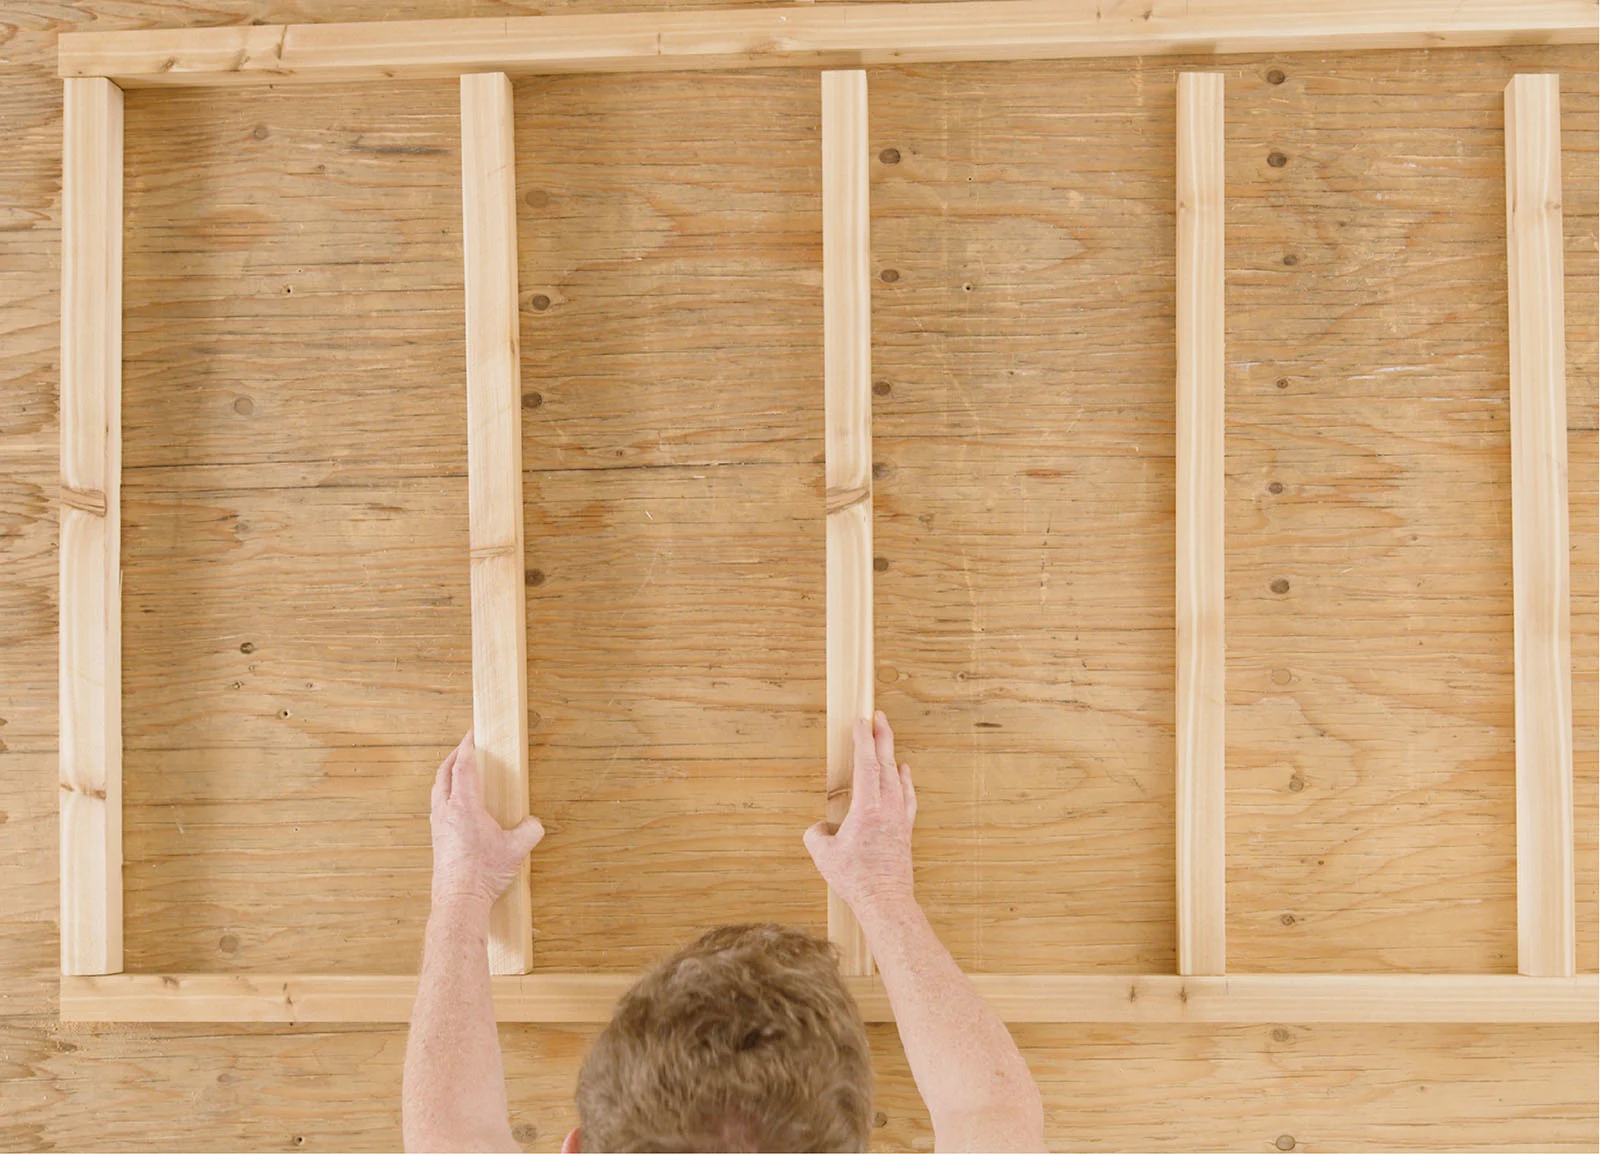
5. Make a ladder frame with 2" x 2"s to fit inside the 36" x 72" frame with three equidistant cross braces. Start by countersinking and screwing together one long side of the 2" x 2" frame.
6. Measure out the distance between the cross braces. Mark it on both long sides of your frame.
7. Space out the cross braces according to the measurements.
8. Countersink and screw the cross braces in from the side. And around the entire frame.
9. Place the 2" x 2" ladder frame inside the 2" x 4" frame.
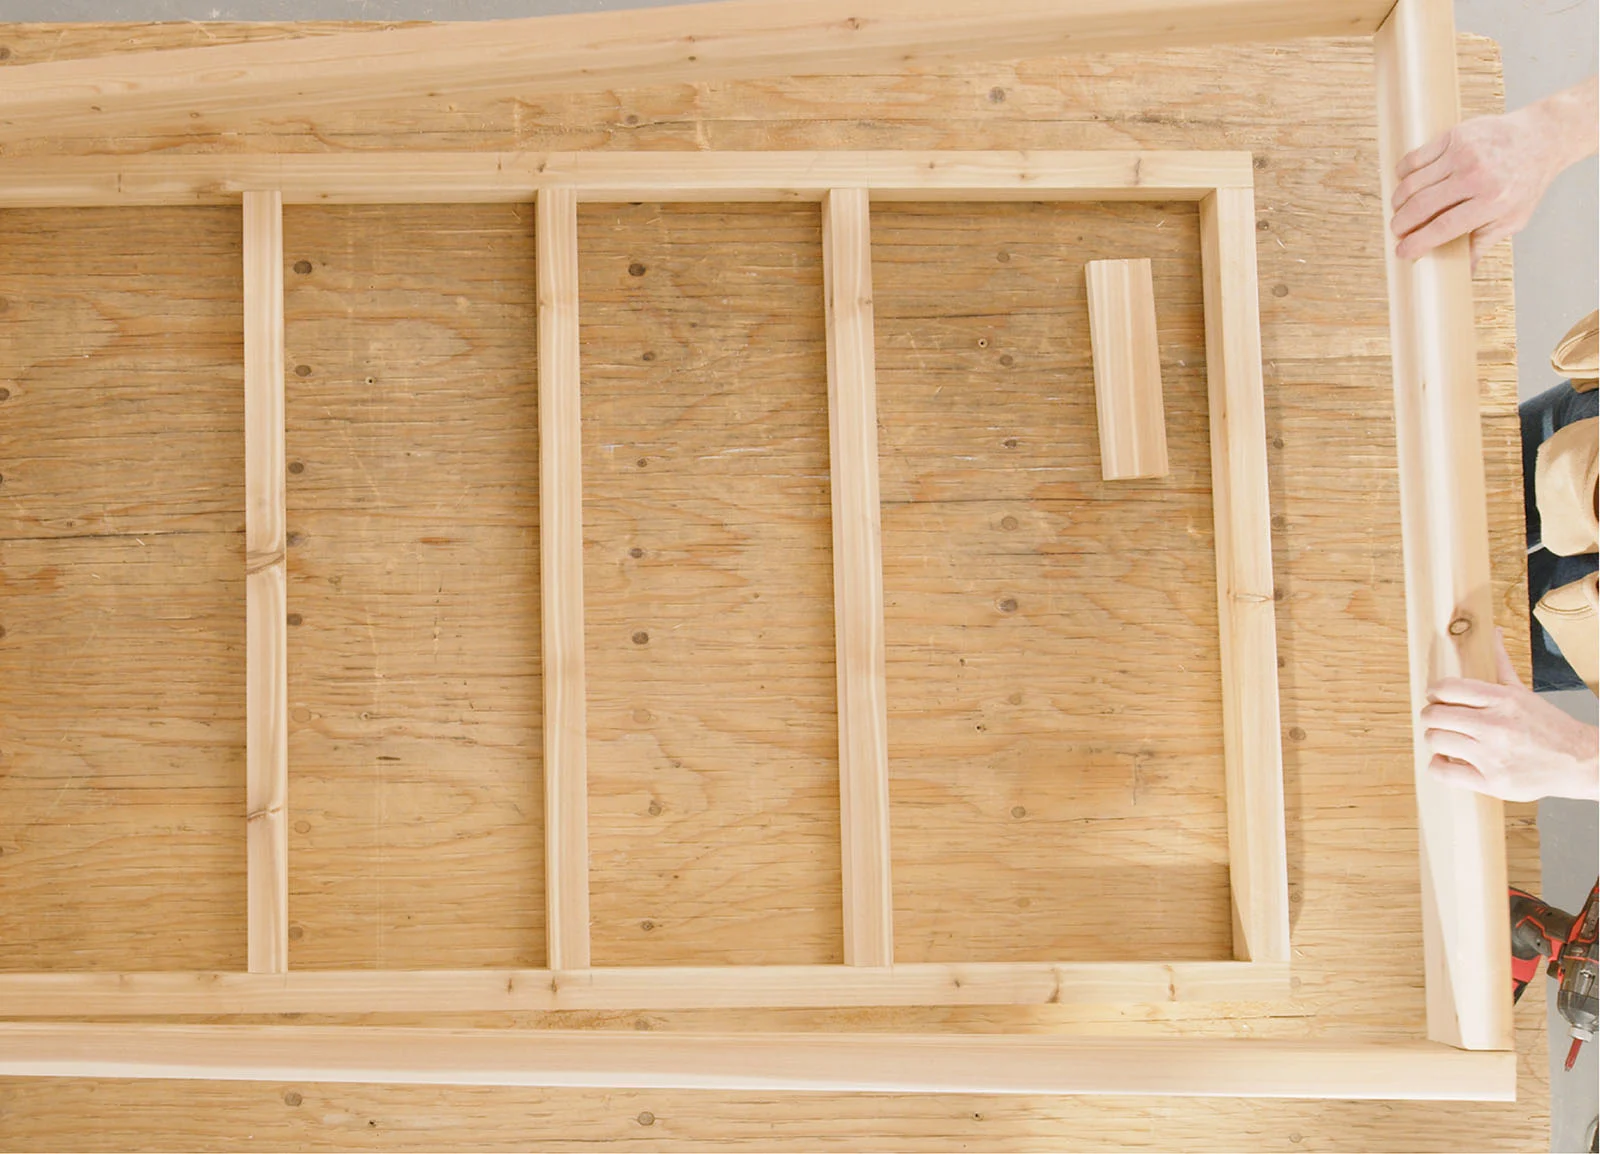
10. Measure (we used a scrap piece of cedar to do this) and inset the 2" x 2" ladder frame 5/8" from the outer edge of the face of the main frame. Screw into place around the entire frame.
11. Start attaching fence boards to create your gate’s design, beginning with the lower right corner.
12. Create a triangle end on your first 1" x 3" cedar board by cutting two 45° angles. Countersink and screw the piece into the corner of your ladder frame.
13. Using a piece of 1/4" scrap plywood as a spacer, mark along the edge of the space to determine the short length of your next piece.
14. Using that measurement as the short side of your next piece, cut two 45° angles on either side. Countersink and screw the board into the frame.
15. Repeat this process until you reach approximately halfway to the opposite corner.
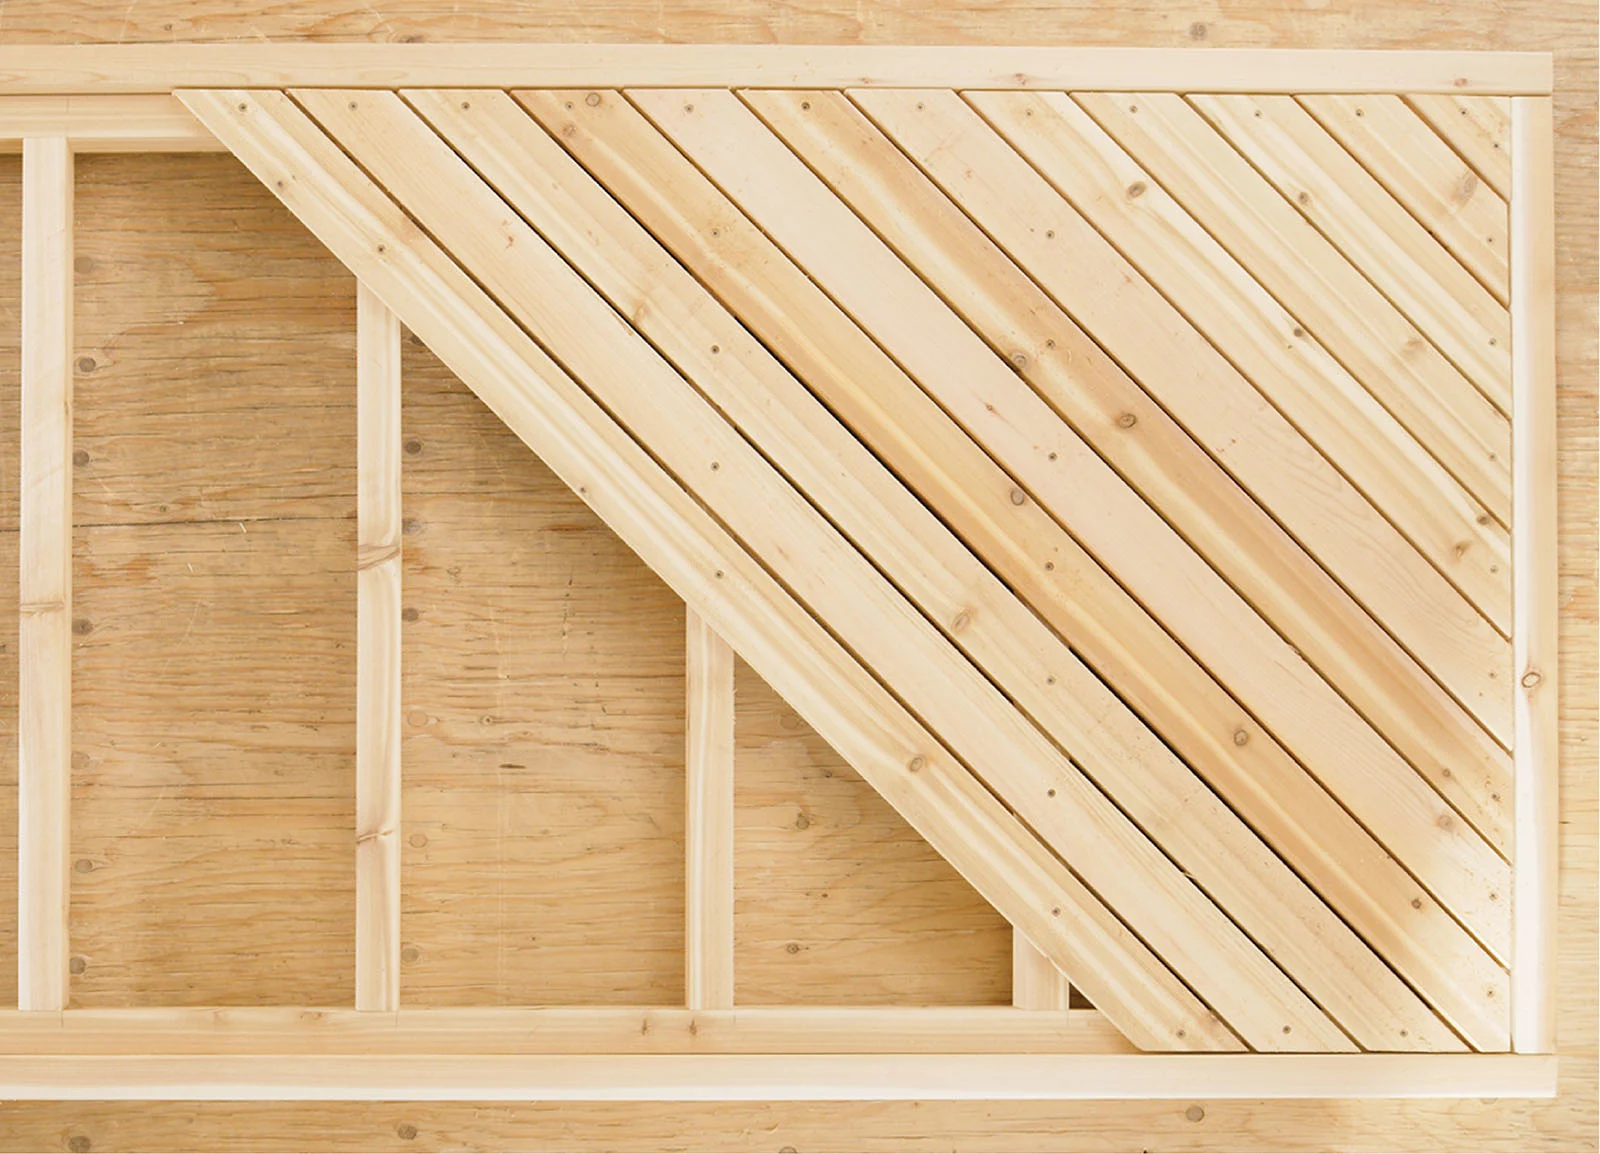
16. On the back of the ladder you will add three 2" x 2" support pieces. Measure and cut three 14-1/2" pieces, with 45° angles cut on both sides, angled in the same direction. Countersink and screw them in between the ladder rungs, along the last diagonal piece to support the perpendicular edges.
17. To create the upper vertical design, start from the top right corner and cut the end of a 1" x 3" board into a triangle in the same way as in step #12. Countersink and screw into the frame.
18. Again, using a 1/4" piece of scrap plywood as a spacer, measure along the longest side; that piece will be the shortest side of your second piece.
19. Your second, third and fourth piece will also be cut with two 45° angles on either side as you did earlier.
20. For the fifth piece, place the 1/4" spacer and measure along its short edge. Now cut one end at a 45° angle and the opposite end at 90° to meet the diagonal edge of the bottom design. Screw securely in place.
21. Repeat this process until you have filled in the ladder frame with cedar pieces.
22. To complete the design, you will picture frame the gate. For this, take your 1" x 6" cedar pieces which you had cut earlier and build your frame. Countersink and screw it onto the face of the gate.
23. Screw in the gate handle at your desired height.
24. Determine the placement of your gate hinges on the gate. We recommend heavy duty hinges since this gate is very heavy. Countersink and screw in your hinges.
25. Now you are ready to hang your gate. This is a two-person job as the gate is heavy and you will need someone to help hold it while you secure it in place.
Total time: 6 hours
Difficulty: Intermediate

