Barbie™ Bedroom Makeover with Home Hardware!
We are beyond excited with the way this bedroom makeover turned out! This is the year of Barbie and you won’t find anyone who loves Barbie more than these little ladies!

I discovered that Home Hardware has a huge selection of everything we would need to Barbie-fy the girls' bedroom. They even have the latest Barbie™ Dreamhouse ™! But the greatest thing we discovered was that BeautiTone has created a signature Barbie™ Dreamhouse™ Collection of paint! You heard me right – 13 paint colours inspired by Barbie’s personas to spark your imagination and transport you into the world of Barbie! Our favourites are Dreamhouse (ST010) and Kind and Brave (ST009). We also chose a coordinating colour Glow Up (ST006) to give the space some extra energy!
Here’s What you Need*:
Paint Roller Set - including a cut-in brush.
BeautiTone Pure Interior Latex Paint
We used the shades 'Dreamhouse' light pink (ST010), 'Kind & Brave' medium pink (ST009), and 'Glow Up' yellow (ST006)
For Palm Trees:
(2) 4’ X 8' 1/4” Plywood - Good One Side (ask your local Home Hardware team)
(1) 1' X 3' Pine Board - Cut into twelve 2” pieces
Construction Adhesive
Jig Saw
Sandpaper
Pencil
*Lumber may vary depending on your location. To see all options, use our Store Locator to find the Home Hardware Building Centre or Home Building Centre closest to you.
Here’s How We Did It:
Painting: First, I painted the whole room using the colour Dreamhouse. This room was my first ever free-hand mural and I think it turned out pink-tastic! To start the mural, I created a paper sketch of the wall and windows to do a basic layout of where I wanted to put my wavy lines. Then, I used my cut-in brush to paint in the wavy lines in the three colours from the BeautiTone Barbie™ Dreamhouse™ Colour Collection. I left a blank space between each wavy line for the white outline paint to go in last; this way I can get a crisp finish with the white. Have fun with the design and repeat this process for 2 or 3 coats of paint as desired. The Glow Up colour required a third coat of paint.

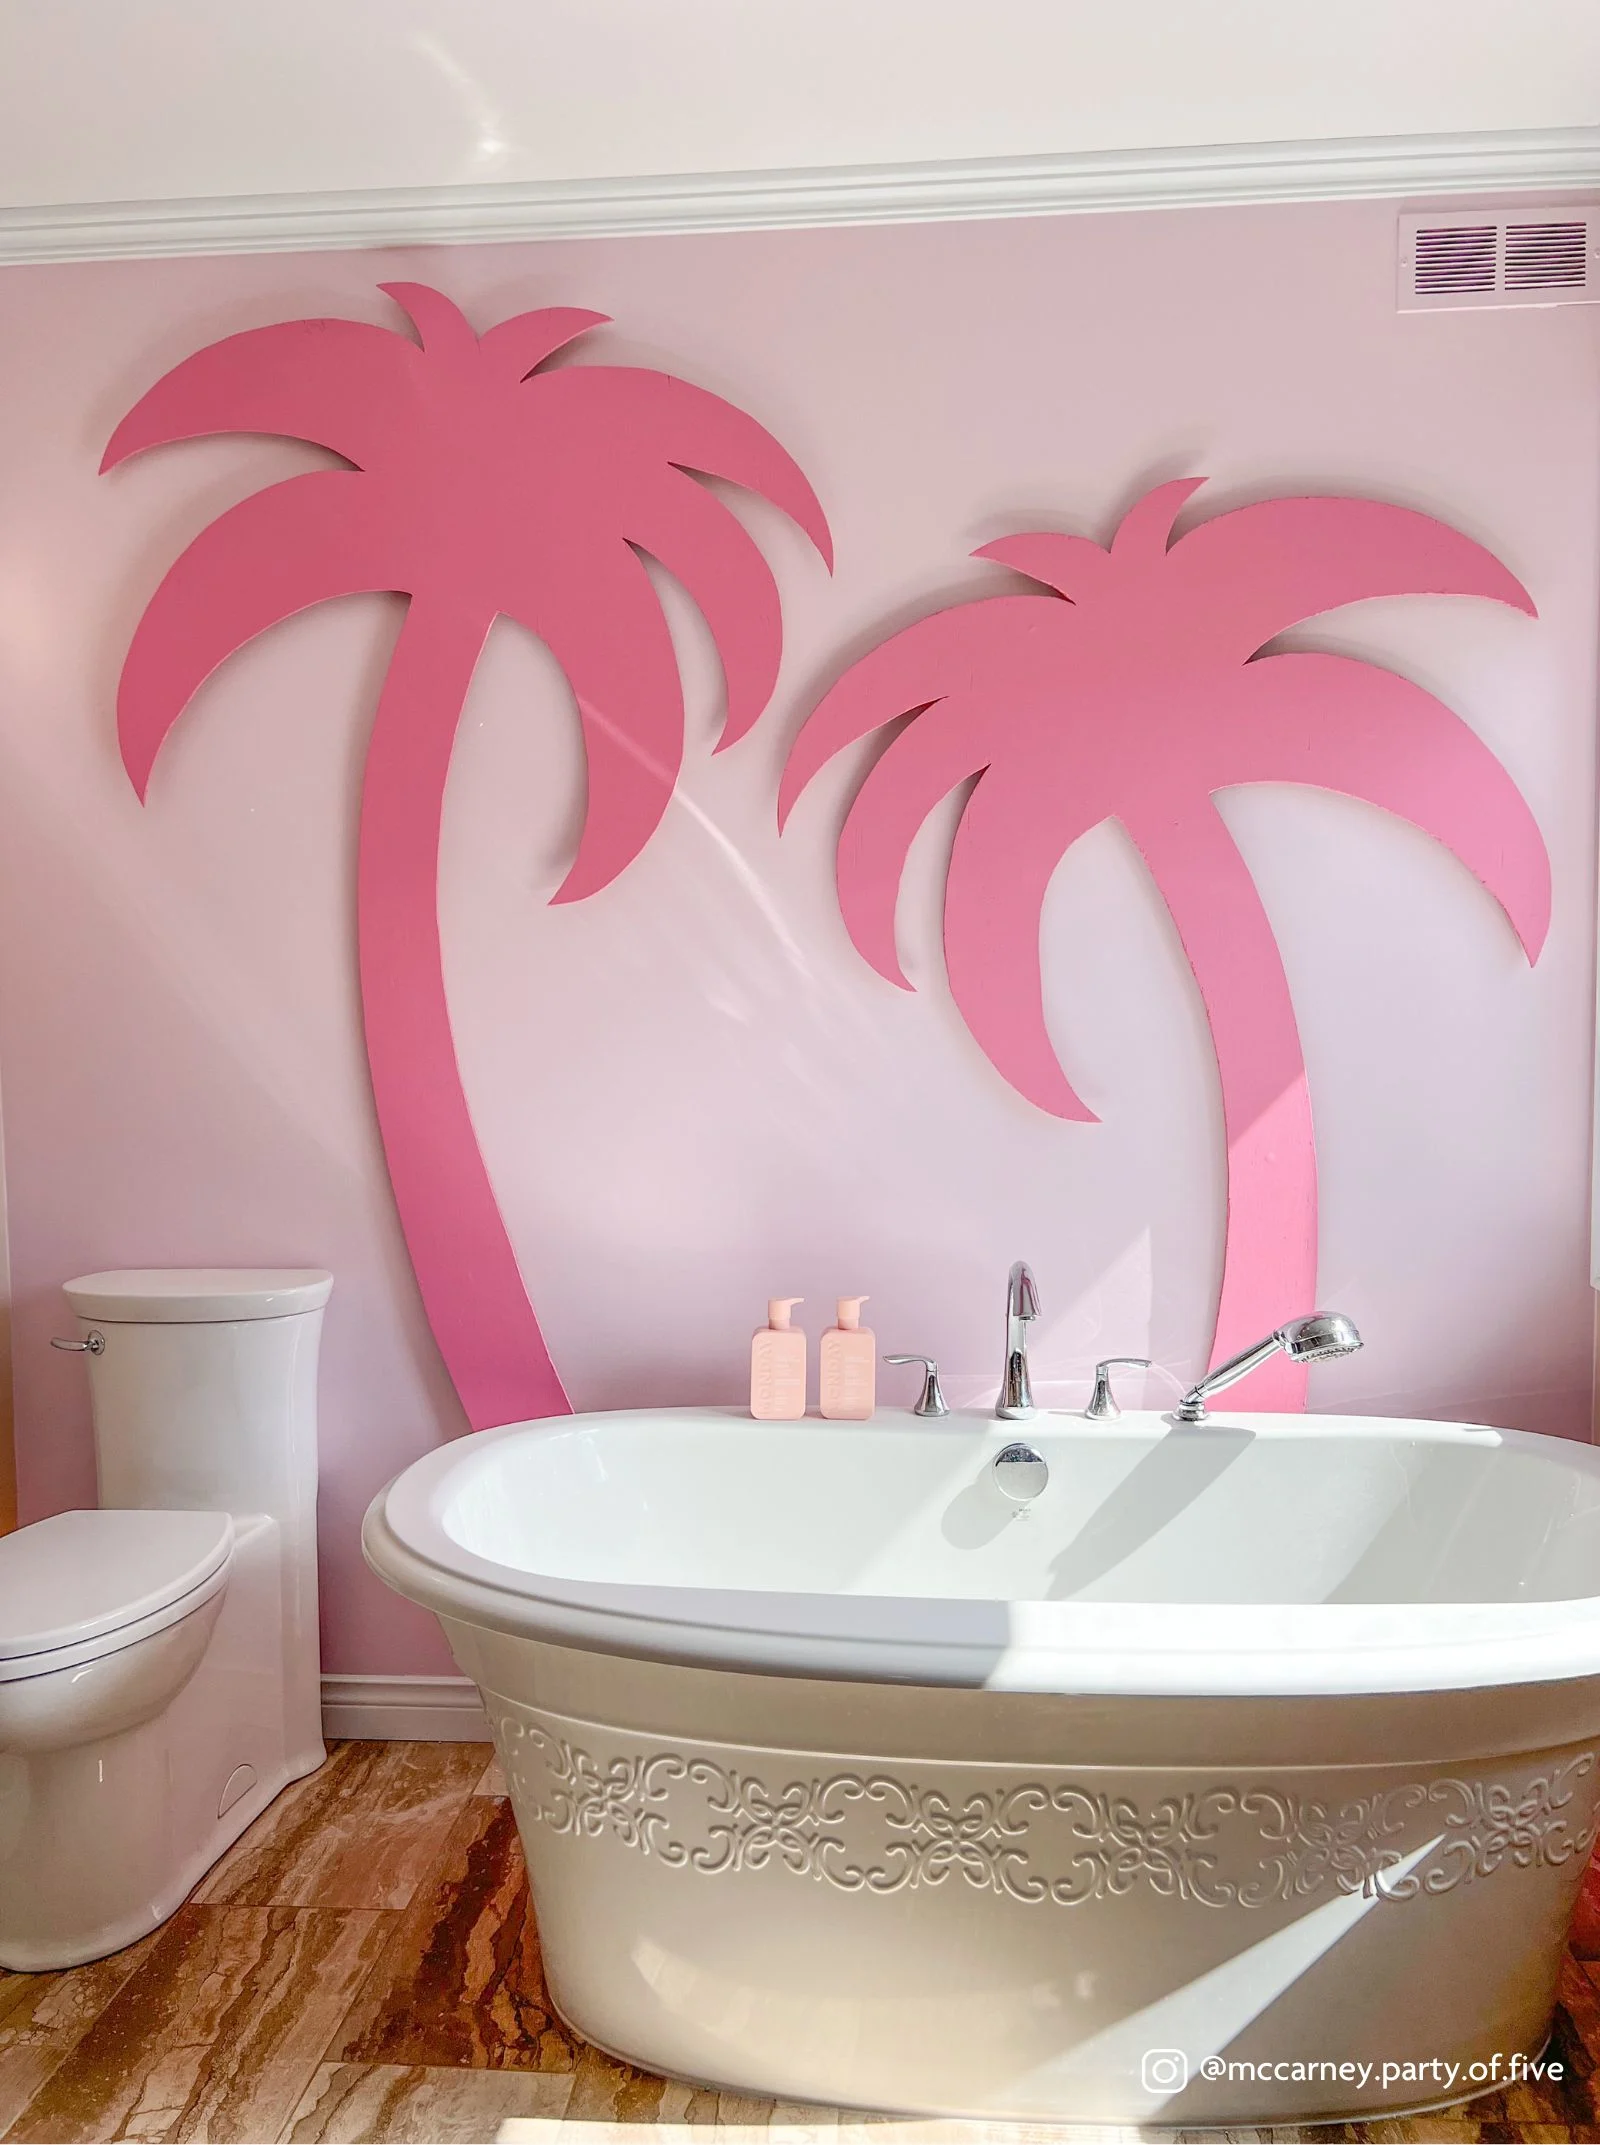
Palm Trees:
Step 1: Lay your 4' by 8' ¼” plywood with the smooth surface up to start. Use a pencil to draw out your initial palm tree design. We used clip art from Google Images to find our favourite cartoon "Barbie" style palm trees, for inspiration.
Step 2: Use your jig saw to cut out your design. Save your excess pieces for upcoming Christmas crafts - you know we will be! ;)
Step 3: Use sandpaper or your electric sander to smooth out the edges.
Step 4: Now it's time for your 12 spacer pieces (1 piece 1' by 3' pine cut into twelve 2” pieces) These small pieces of wood will be used to make your palm trees stand out from the wall and will create a nice drop-shadow affect. Simply space these out through the trunk and leaf portion of your palm tree. Secure them with screws and your construction adhesive.
Step 5: Painting! The most fun stage of the palm tree project for us! We let the girls participate in this stage and it was a great little 'sneak peek' for them. We used the small size roller that came with our BeautiTone roller kit for the tops, and a small artist paintbrush for the sides. Our colour choice was Kind and Brave (ST009).
Step 6: Securing to the wall. We used our construction adhesive to secure the spacers to the wall and pressed them into place. The adhesive dries almost instantly, so you will need to have two people handy for this job! Now it's time to enjoy the new Barbie™ Dreamhouse™ inspired bathroom!


There we have it! If you dream it, you can be it! We really loved this bedroom makeover, the new space is one that the girls can enjoy for years to come. I hope playtime never ends; but for now, while they're little - we can play all day in "the pink room". Check out your local Home Hardware for the BeautiTone Barbie™ Dreamhouse™ Colour Collection and everything else you need to make your Barbiecore dreams a reality.
Visit us at @mccarney.party.of.five on Instagram for videos of this process and other fun DIYs. This Barbie likes to create ;)
