Here’s How to Tile a Kitchen Backsplash
Update Your Kitchen for Less
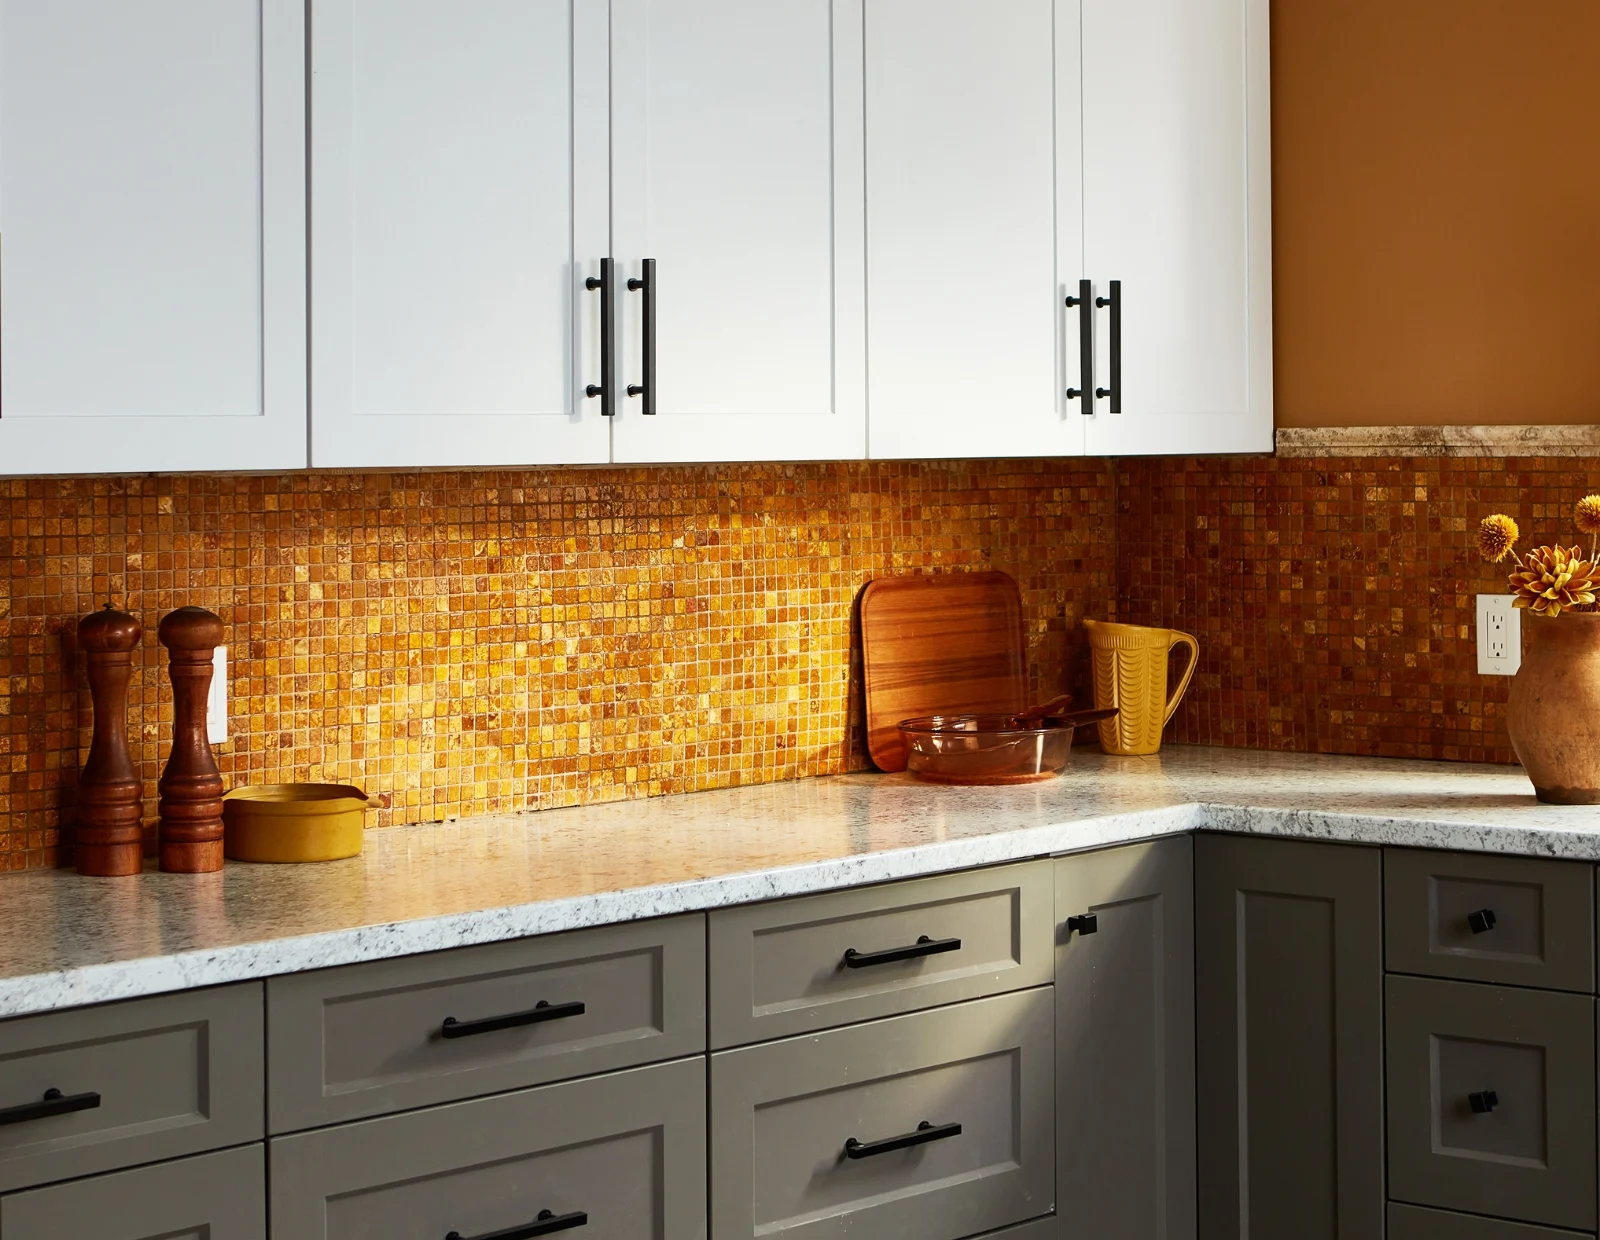
Adding a new backsplash is a fantastic way to give your kitchen a fresh look without breaking the bank. If you're keen on learning how to tile and want to save some money by doing it yourself, you're in the right place.
What You'll Need
Steps
Step #1: Measure Twice, Order Once
Before diving into the project, it's essential to measure the space where your new tiles will go. When ordering tiles, add an extra 5-10% to account for cuts and breaks.
Tip: When measuring your space, divide it into rectangles to calculate the area of square footage.

Step #2: Safety First
Cut off the power supply before working around electrical outlets. If you're unsure or uncomfortable with electrical work, it's best to call a professional electrician.
Step #3: Tile Selection & Layout
For this kitchen upgrade, we've opted for a classic 3” x 6” subway tile in an offset pattern. Before starting, dry lay a few tiles to ensure a seamless layout without any awkward slivers.

Step #4: Tackling Tile Cuts
Cutting tiles can seem daunting, but it's a crucial part of the project. A tile cutter can achieve simple straight cuts, while more complex cuts may require a wet saw for precision. Gather your tools, including a wet saw, grinder with a tile blade, tile nippers, and a tile file, to handle various cutting needs and edge finishing.
Tip: If you’ve used a table saw before, don’t worry you will be good to go with a wet saw.

Step #5: Applying Adhesive
Using a trowel, apply premixed adhesive to the wall in smooth, even strokes. Remember, less is more when it comes to adhesive application.

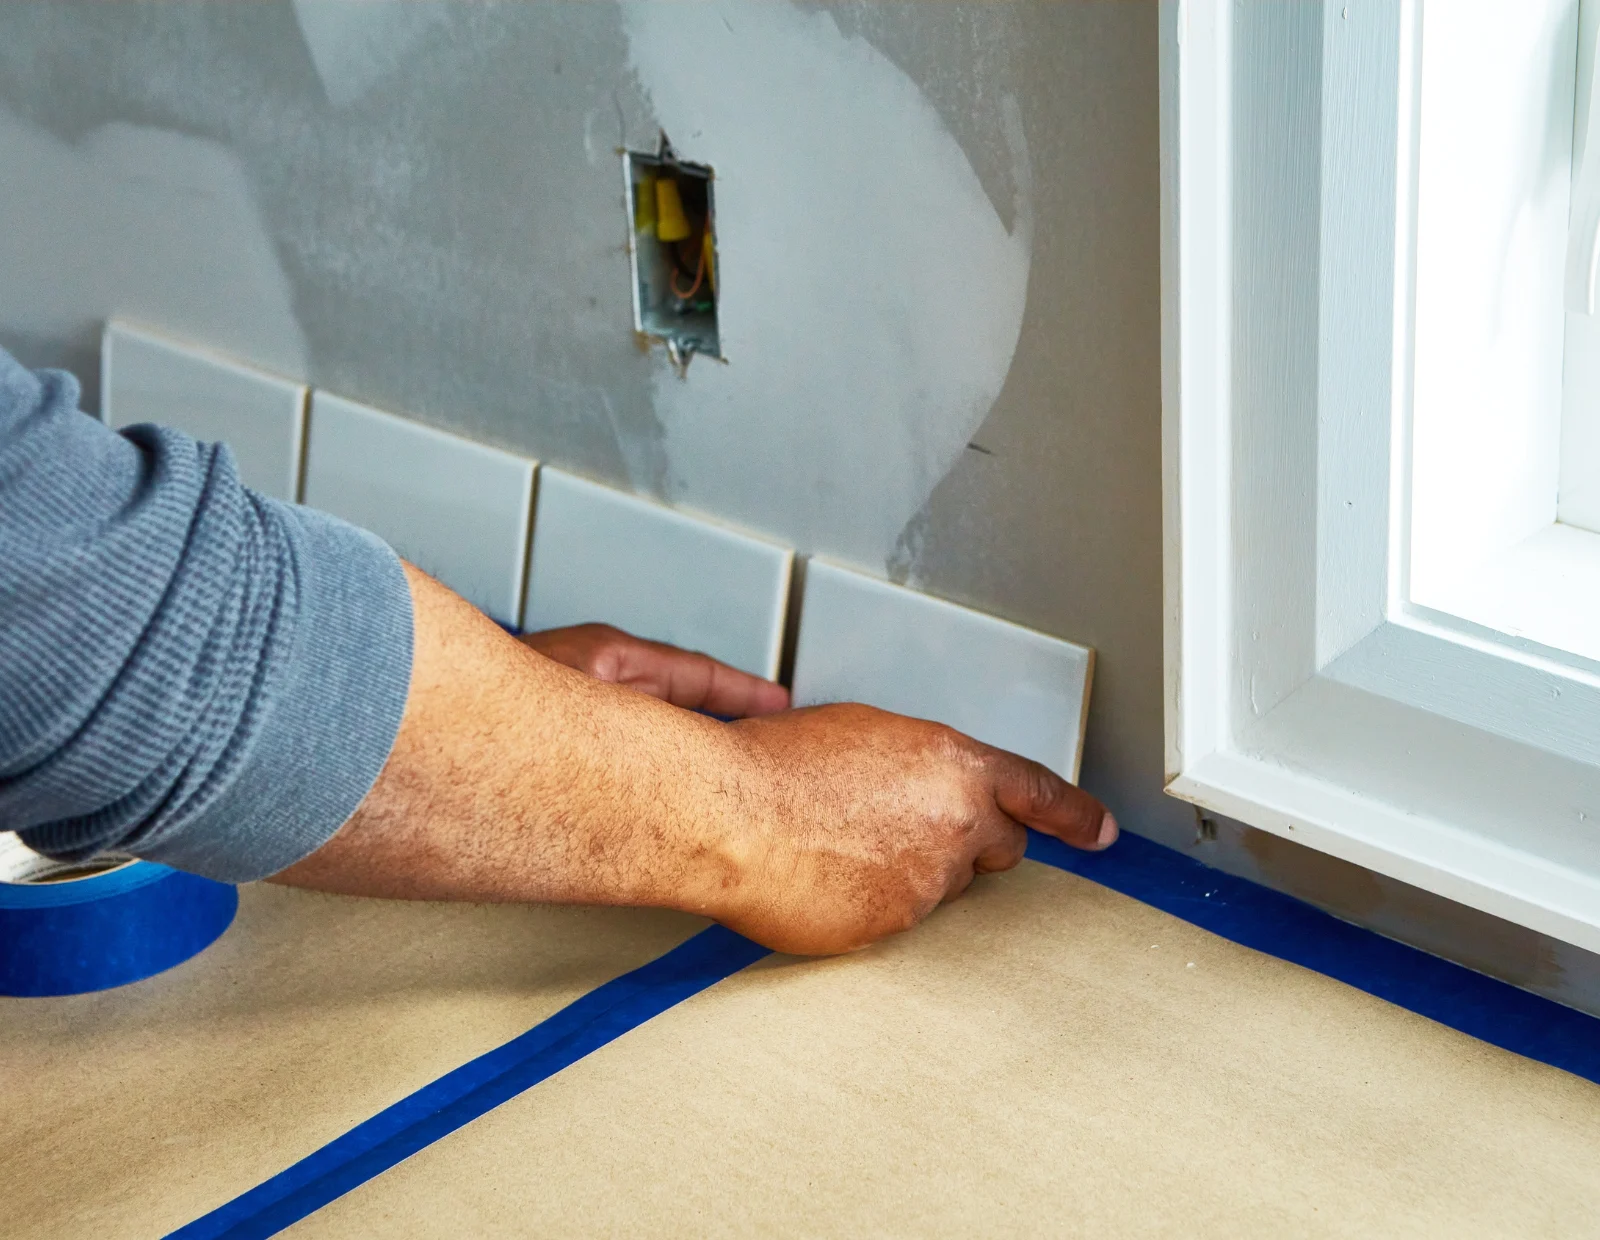
Step #6: Ensuring Level Installation
Utilize a laser level to ensure the first row of tiles is perfectly level. Adjust as needed, keeping in mind the addition of caulking against the counter to conceal any imperfections.
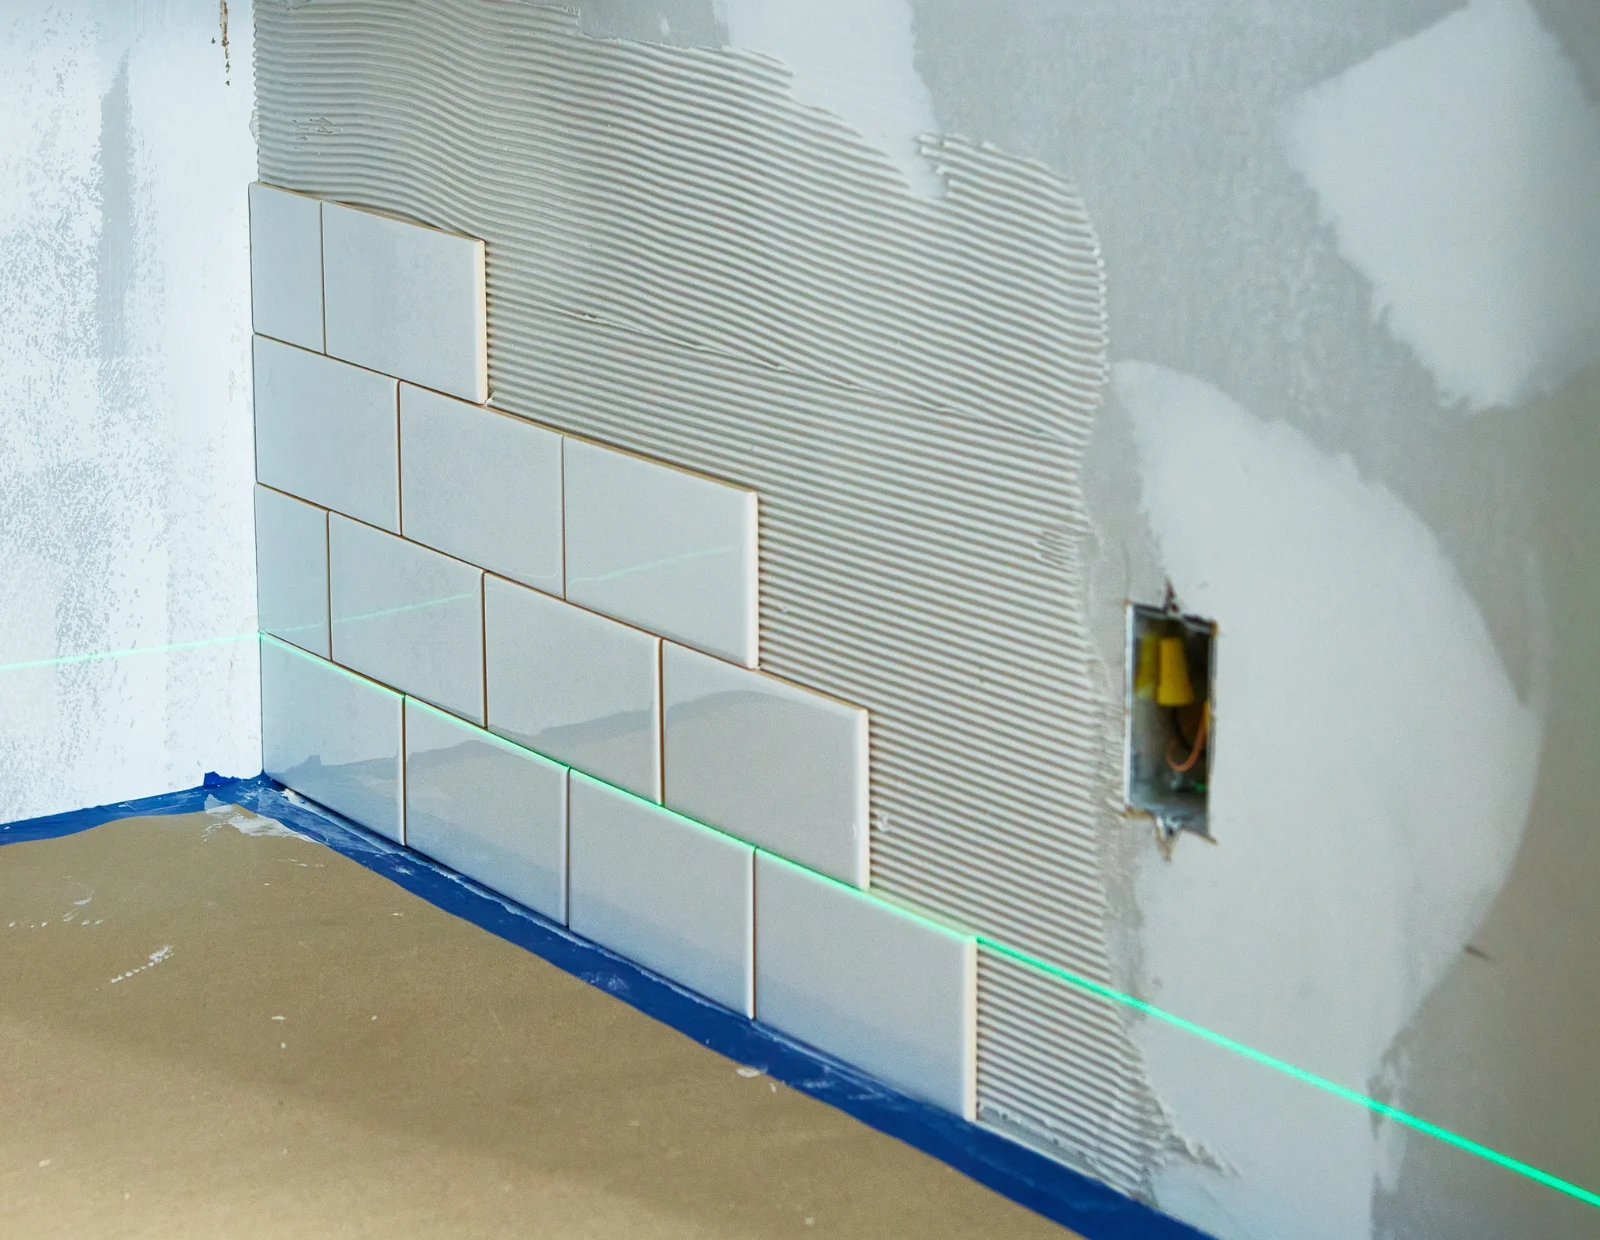
Step #7: Placing & Spacing Tiles
Begin placing tiles in sections, using spacers to maintain consistent spacing. Adjust tiles while the adhesive is wet to achieve the desired layout. Step back and admire your work! Wipe away excess adhesive and make any necessary adjustments before allowing the tiles to set.
Tip: Tiles should set for 24-48 hours.

Step #8: Grouting the Backsplash
Once the adhesive has dried, remove spacers and apply grout using a float. Spread the grout evenly, filling all gaps between tiles, and wipe away excess grout. To remove grout residue clean tiles with a damp sponge, using circular motions for thorough cleaning.
Tip: Allow the grout to set for 24 hours.

Step #9: Finishing Touches
To ensure clean caulking lines, apply tape along the counter and wall junction before caulking. Once the caulking has set, carefully remove the tape to reveal your beautifully finished backsplash!

Step #10: Job Well Done
You did it! Your kitchen now boasts a stunning new backsplash, all thanks to your hard work and dedication. Take a moment to bask in the satisfaction of a job well done.