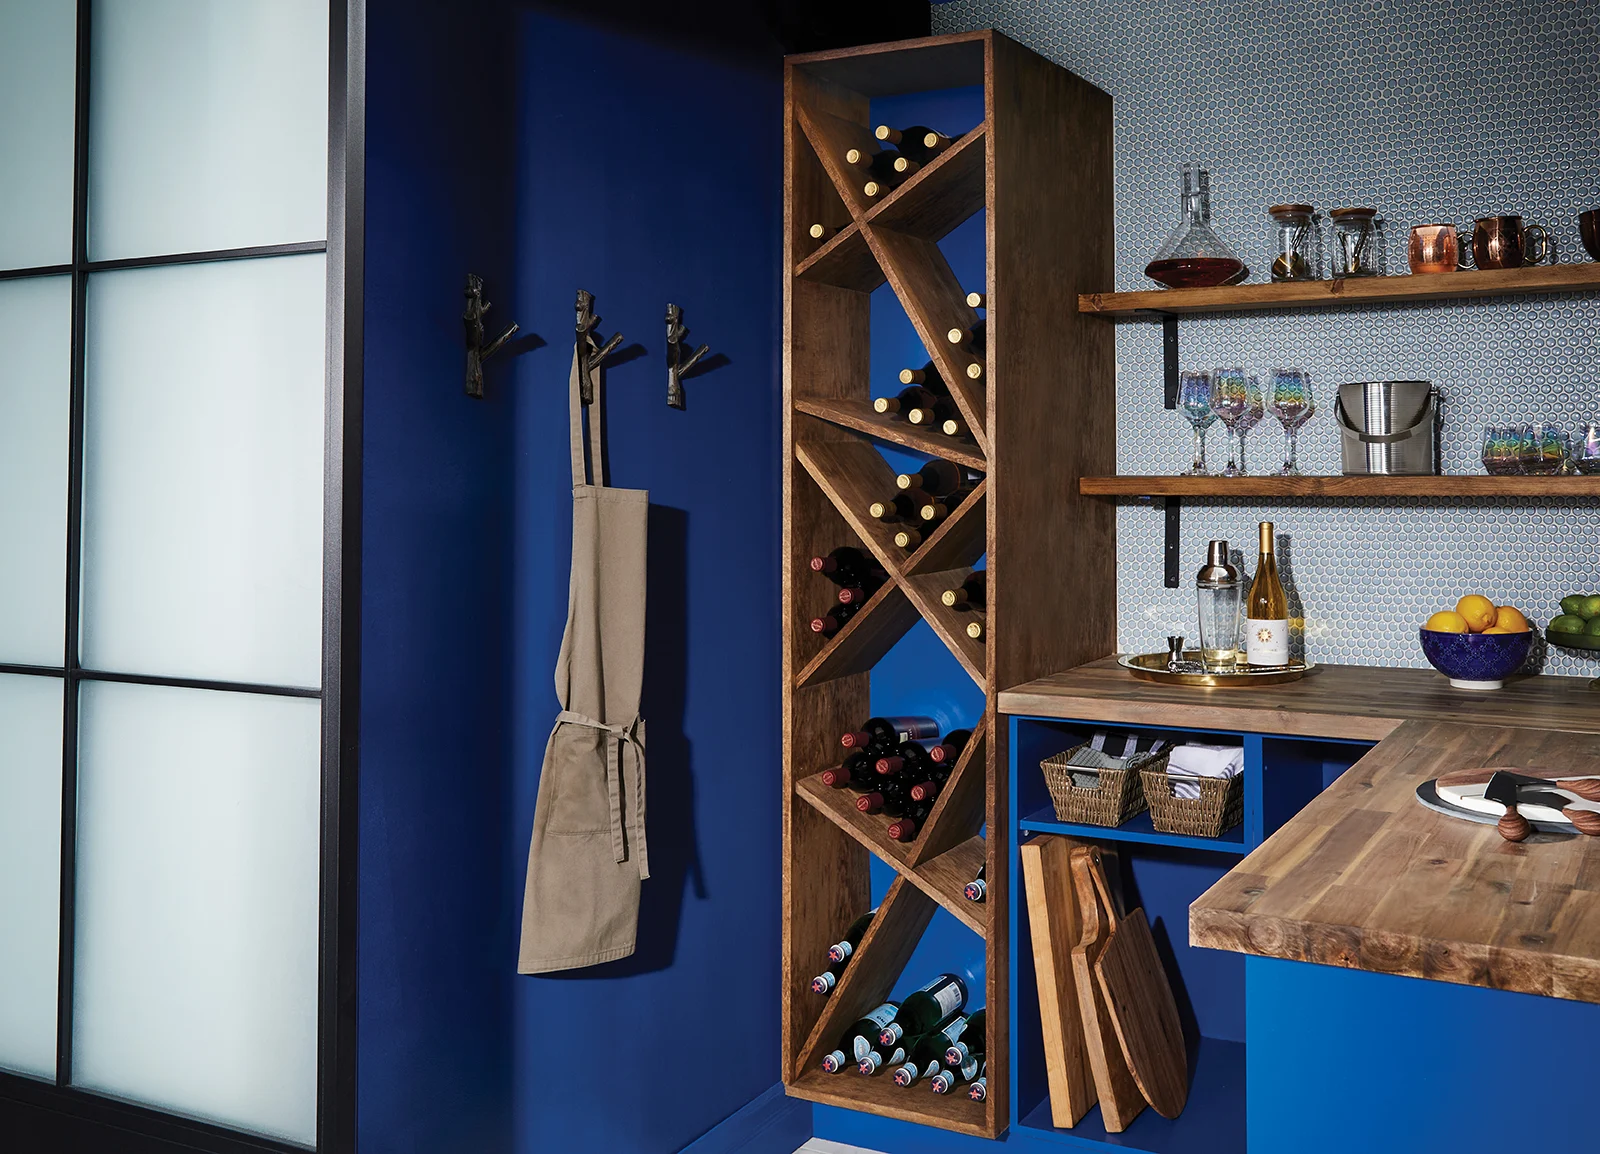
Here’s How to Make a Beverage Rack
For those who love to entertain and host, this project has you in mind. Our DIY wine rack can be added to an existing section of cabinetry or fit into a reclaimed space like an underused closet. Either way, it will be a bonus in terms of storage and organization. Whether you’re prepping for a get-together and storing an assortment of your favourite local wine and sodas or simply looking for a solution that will nix countertop clutter, this is a stylish addition to any kitchen, pantry or dining room.
What You’ll Need*:
Supplies
(1) 3/4" Maple Veneer Plywood Sheet
(1) 1/4" Hardboard Sheet
Maple/Birch Edging Tape
Carpenter’s Glue
1-1/2" Wood Screws
1-1/4" Brad Nails
Masking Tape
220 Grit Sandpaper
BeautiTone Interior Paint (we used Too Blue Hue)
Minwax Stain (we used Provincial)
Finishing Nail
Tools
Pencil
T Bevel Angle Finder
Iron
Flush True Bit 1/4" Shank for Router
Putty Knife or Spatula
*Our full assortment of building supplies is available at Home Building Centre and Home Hardware Building Centre locations. To unlock our catalogue of building supplies online, please select your local Building Centre.
Here’s How
For this project, we are building an 18" x 80" x 12-1/2" beverage rack which is intended for installation within a larger kitchen cabinet or pantry but can also be used as a stand-alone rack. Our design consists of a tall box with a modern-looking, asymmetric arrangement of shelves which allows for divided areas to hold an assortment of different types of bottles, from wine to soda and all of your favourite beverages in between.
Steps:
Assemble all the materials and tools for your project.
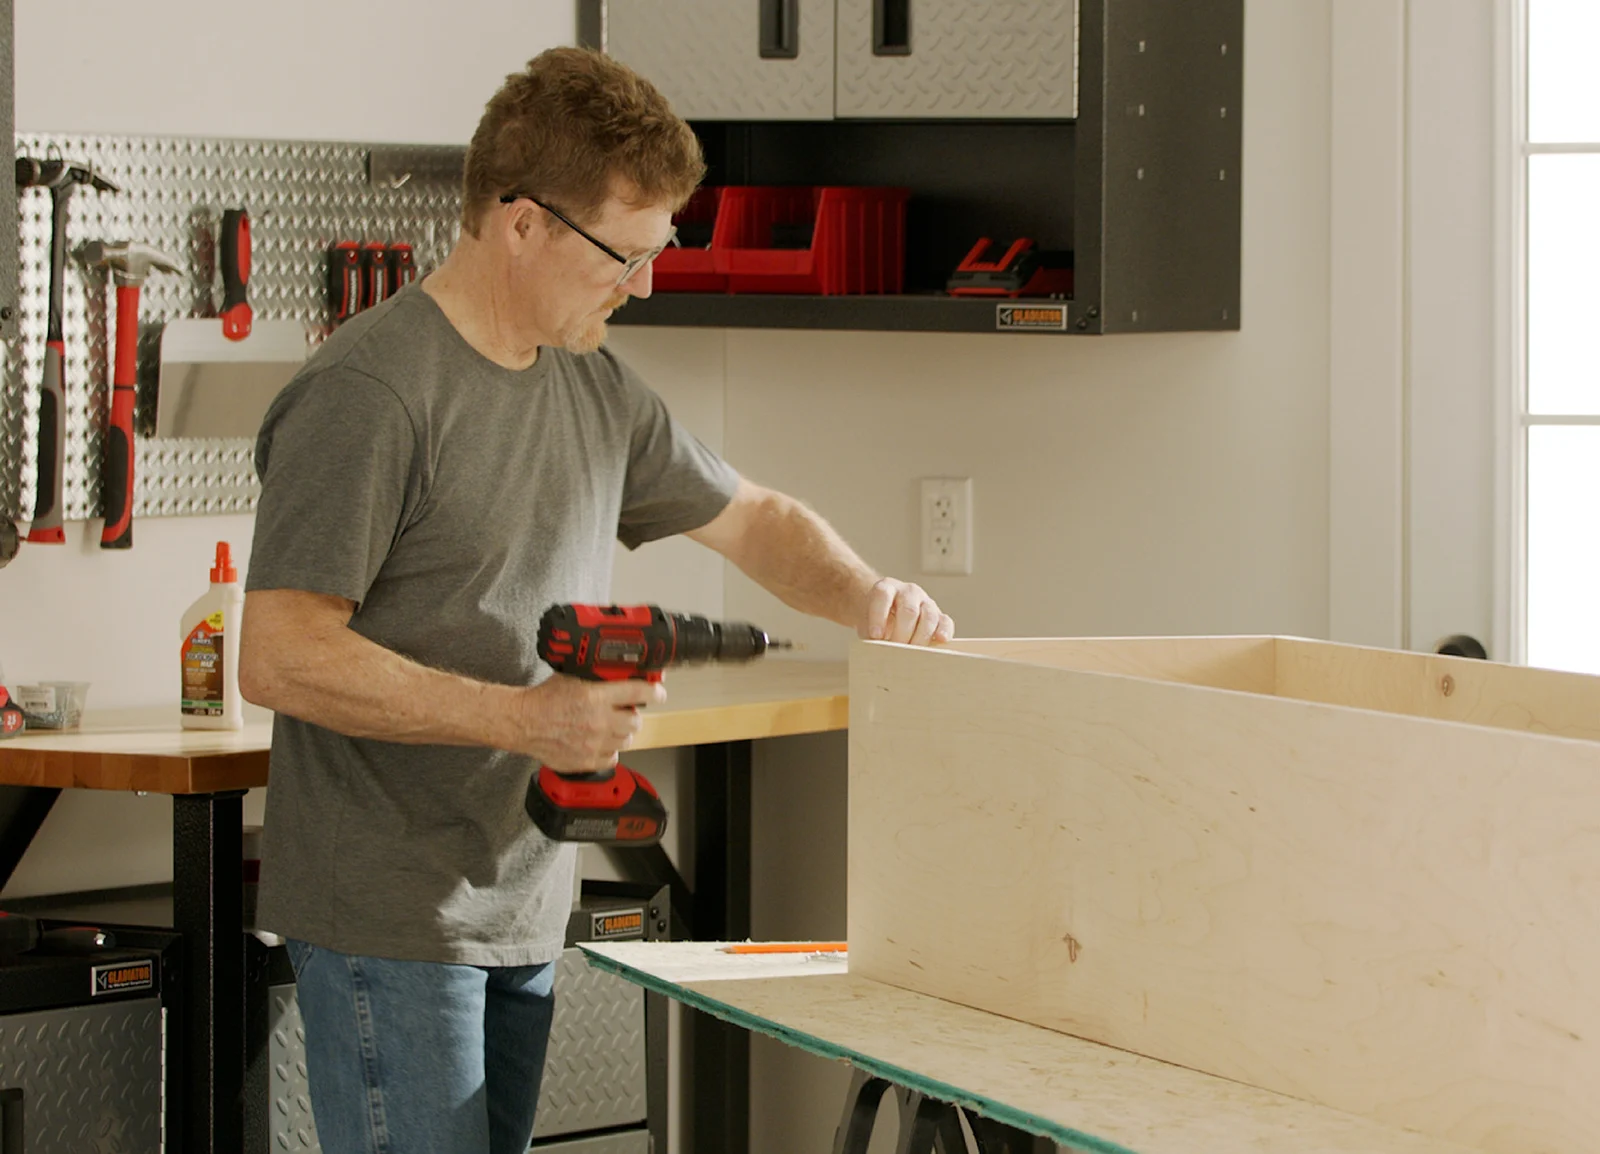
Measure, mark and cut your wood. For this rack, you will require the following plywood pieces to build the box:
(2) 18" x 12-1/2" (for the top and bottom of the rack)
(2) 80" x 12-1/2" (for the sides)
You will also need to measure, mark and cut one piece of hardboard:
(1) 80" x 18" (for the back of the rack)
For the shelves of the rack, you will require the following pieces of plywood:
(1) 32-1/2" x 12"
(1) 34" x 12"
(1) 25" x 12"
(1) 24" x 12"
(1) 19-1/2" x 12"
(1) 19" x 12"
(1) 17" x 12
3. For the inside back of the wine rack, paint the 80" x 18" hardboard piece your desired colour. Set aside to dry.
4. To build the open box frame, take your two 80" x 12-1/2" sides and your two 18" x 12-1/2" top and bottom pieces; glue, countersink and screw them together.
5. Once the back hardboard panel is dry and the frame is assembled, apply glue along the top edge of the frame. With finishing nails, nail on the hardboard to form the back of your rack.
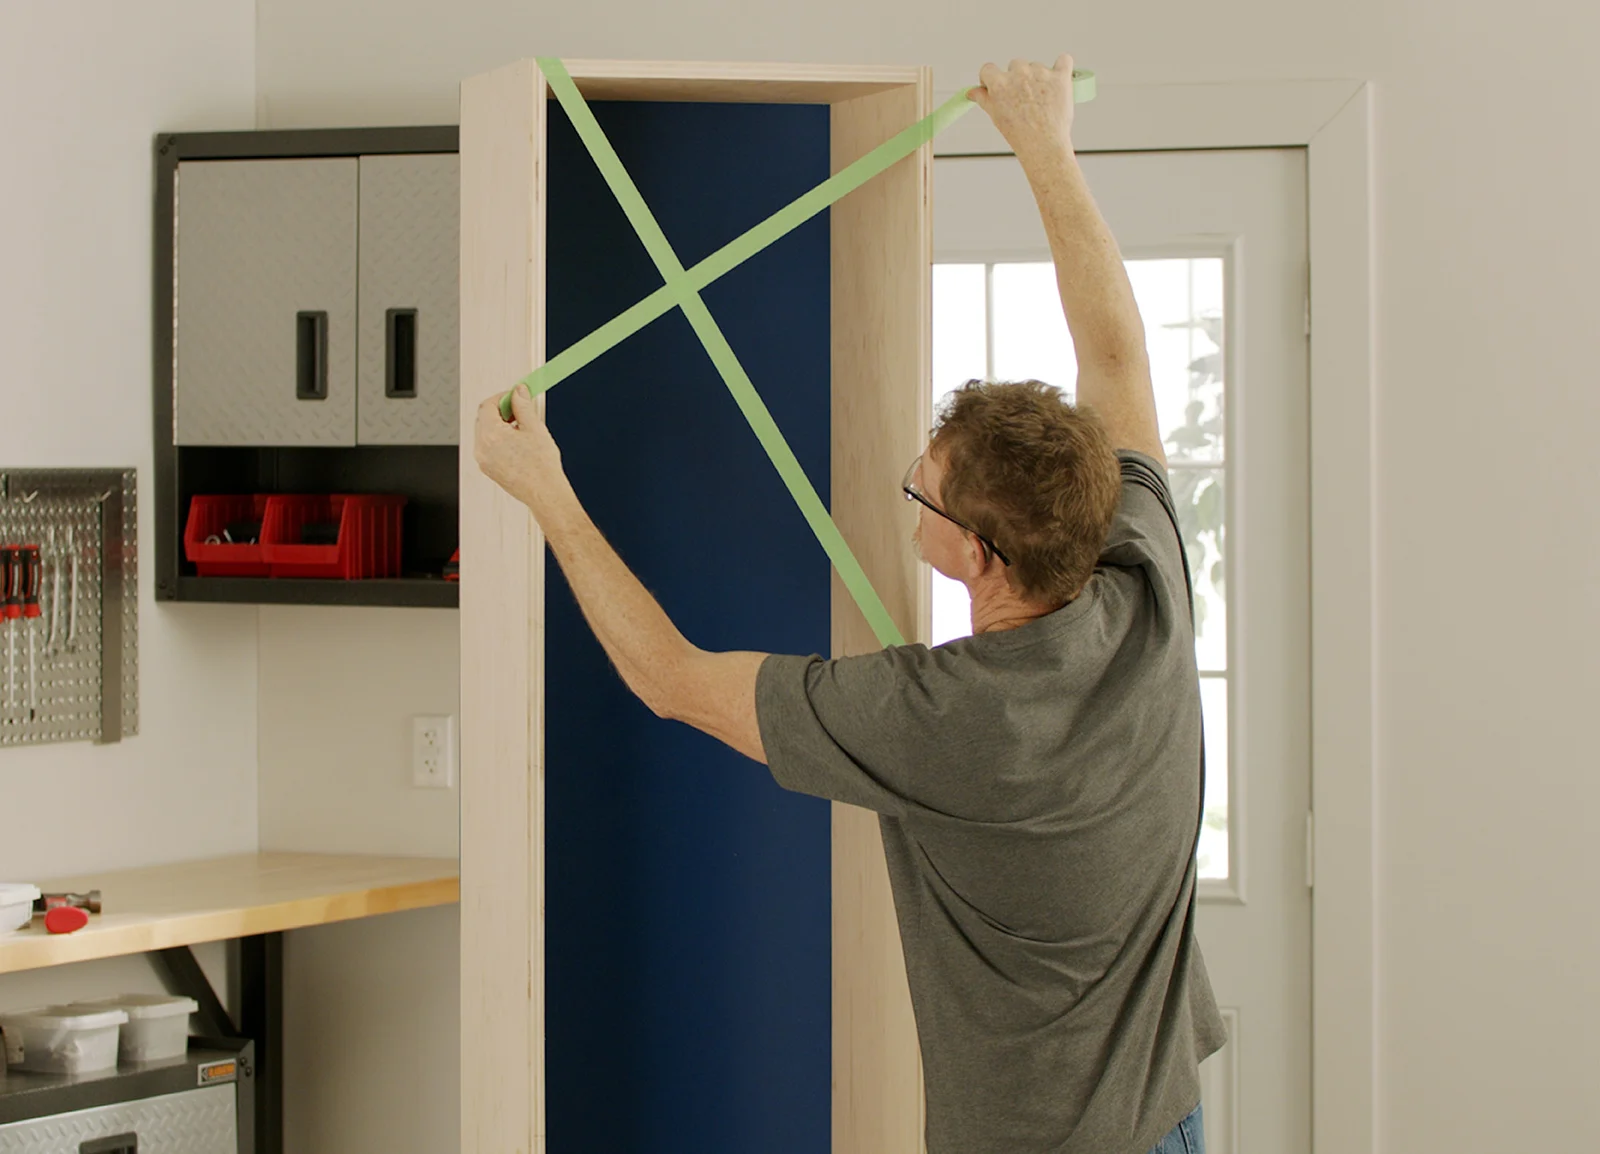
6. Turn rack upright on the floor. Plan out the placement of the shelves with masking or painter’s tape. Ensure there are no tiny shelves where nothing will fit.
7. Mark the placement of your shelves with pencil where the corners meet or where the shelves butt the inside walls of the cabinet. Now you can remove the planning tape.
8. Use a piece of wood to line up your pencil marks. Find the angles where each shelf meets the inner side of the box using the angle finder. Now, measure the distance between your marked pencil lines, then cut your wood to your required lengths and angles.
9. Measure and cut all shelf pieces to length.
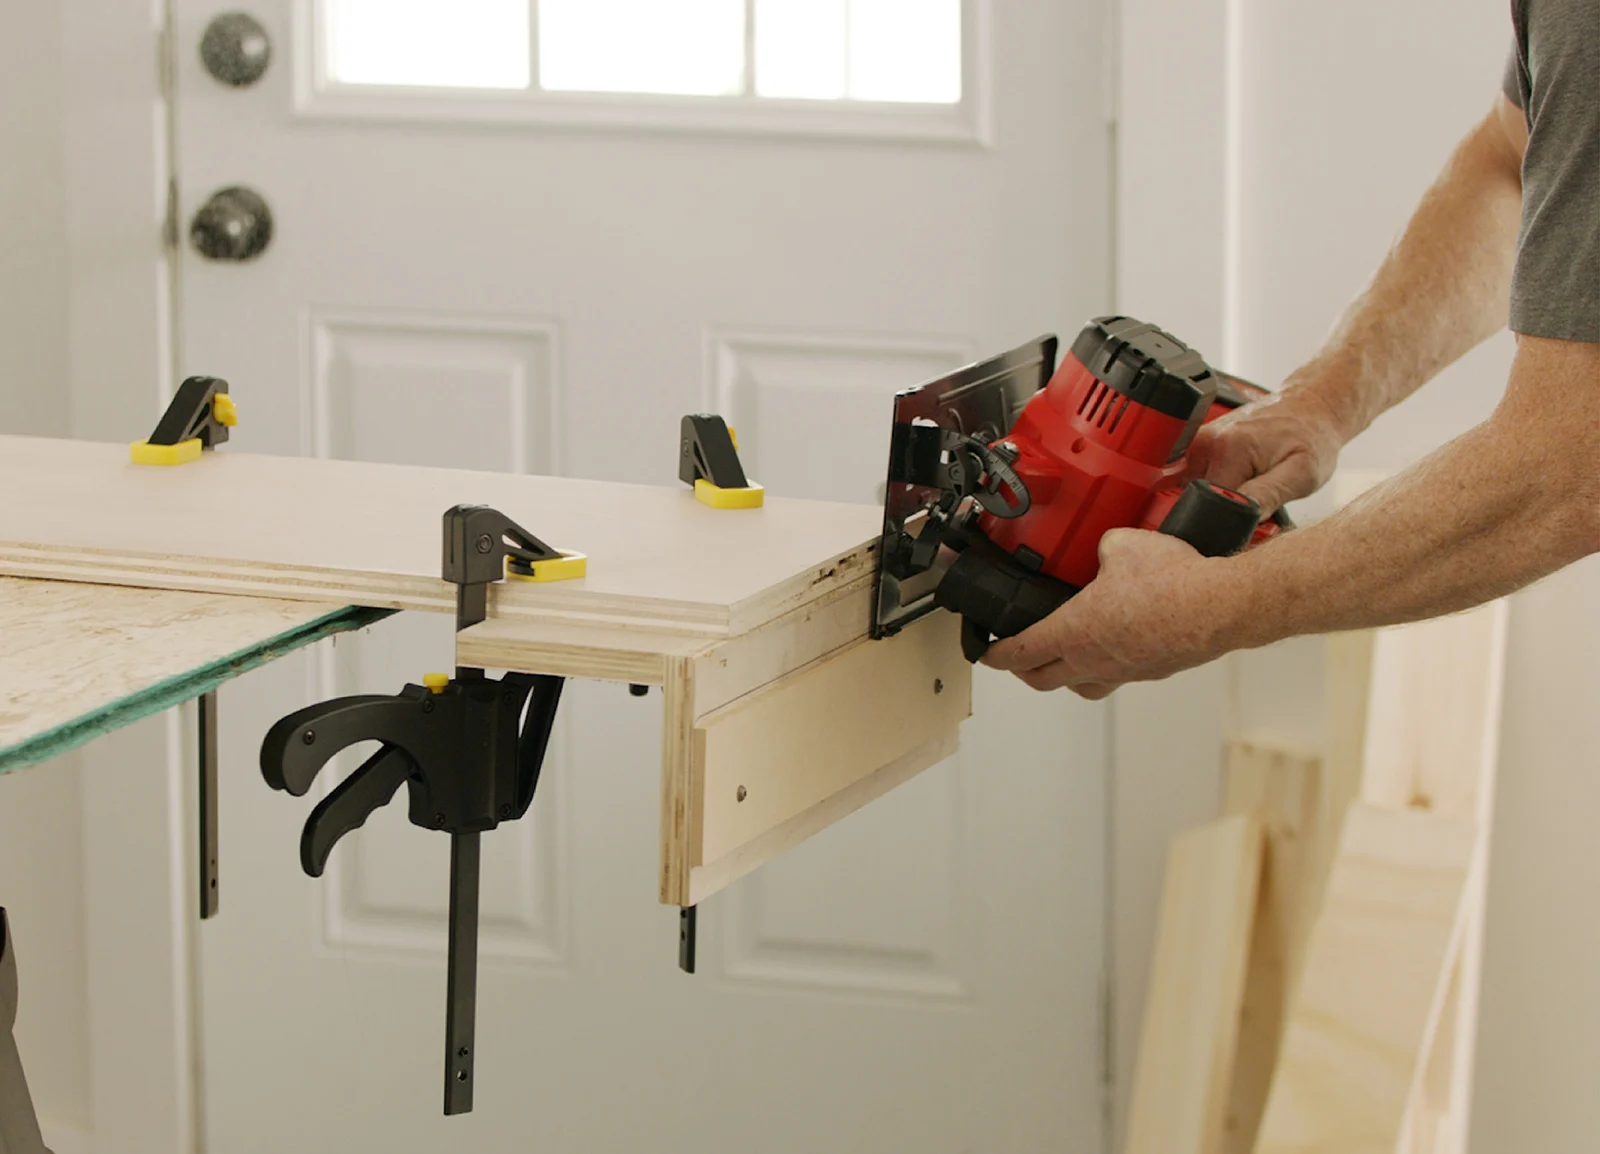
10. To cut the angled shelves, you will need to build a jig to allow you to cut the ends of each shelf at precise angles so that it fits neatly into place within the rack. Make these angled cuts with a circular/skill saw using your jig as a guide.
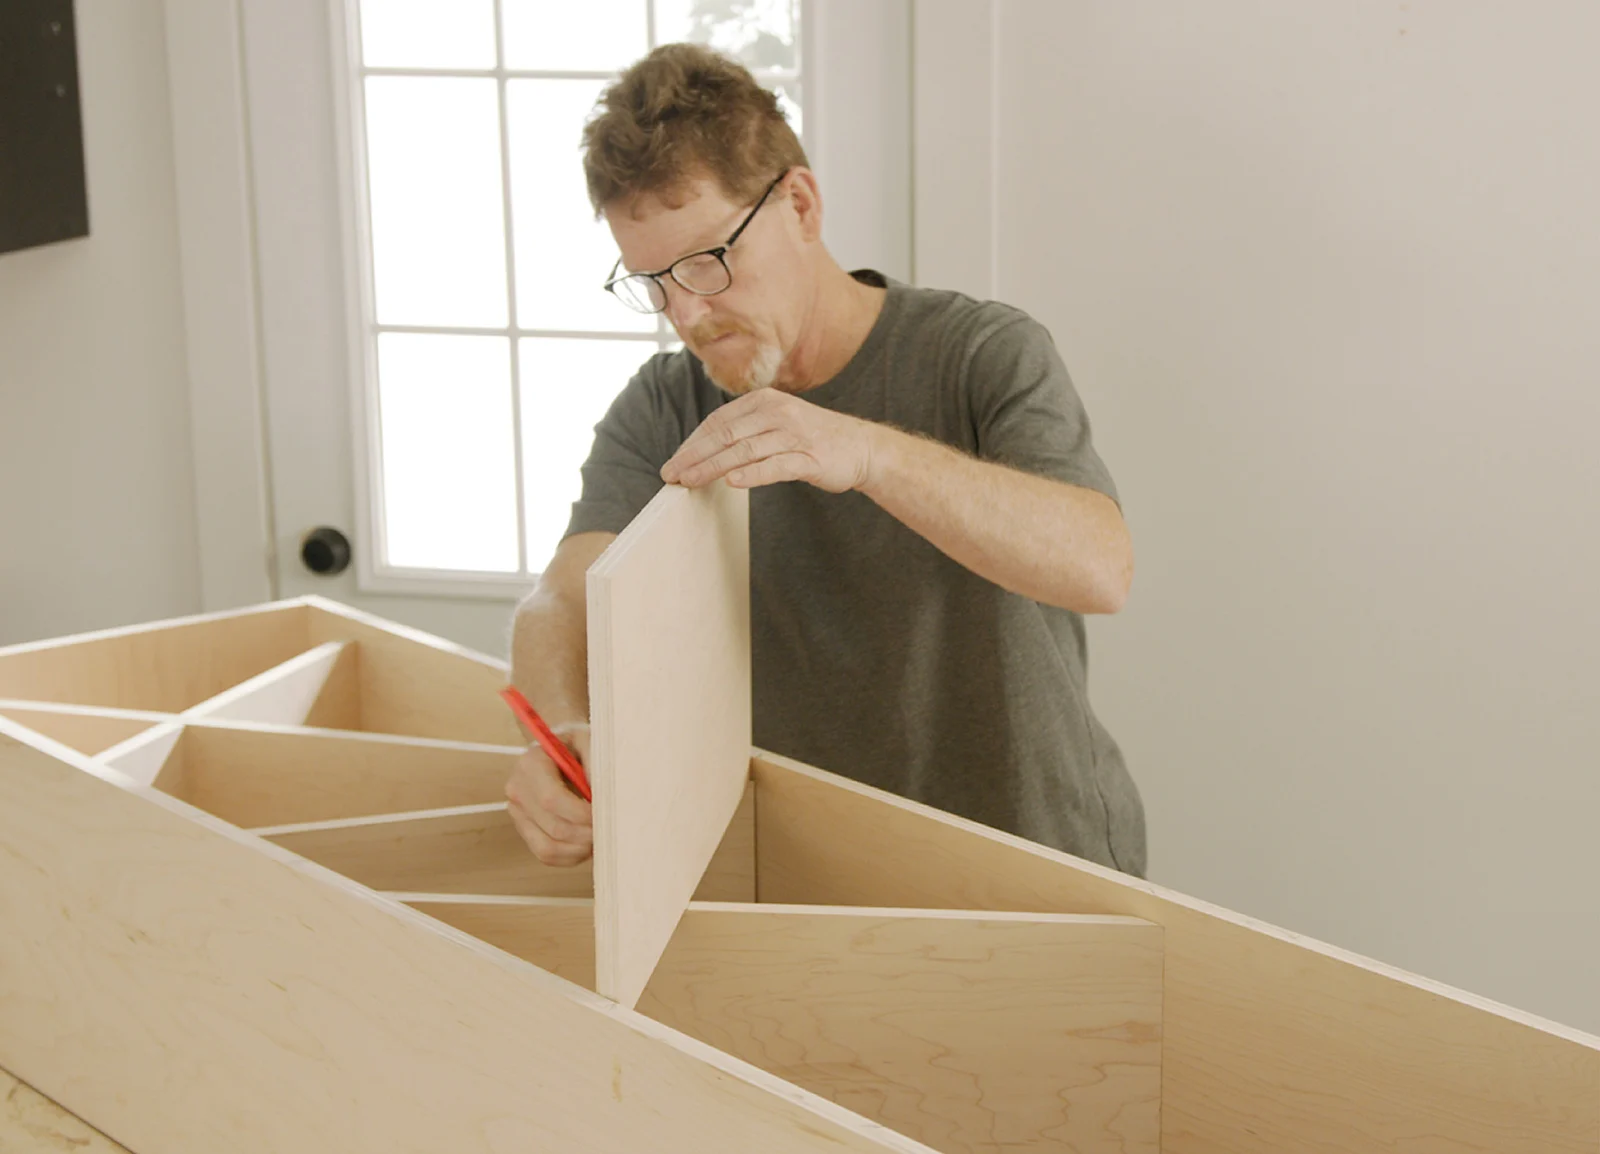
11. Once cut, dry-fit the shelves, to make sure they fit lengthwise. To create the shelf intersections, fit in one piece then line up the other on top and mark with a pencil where the shelves intersect.
12. The design of your rack is created with intersecting shelves. You need to build these in pairs and then insert them into your box. To do this, measure, mark and cut slots on each shelf that extend just over halfway from one side into the centre of the board; then do the same on the other shelf that it will intersect with. (This pair of shelves will slide together to form an X.) Use a circular saw and then a jig saw to carefully cut out each slot.
13. Next, we are applying edging tape to the shelves to give them a polished look. To do this, cut edging tape a bit longer than each shelf length. Apply a strip to each front-facing shelf edge using a hot iron. Trim so that it is flush at the end of each shelf. Repeat process for all shelves. Trim so that it is flush at the end of each shelf. Repeat process for all shelves.
14. Router any excess tape off with flush trim bit.
15. Use sandpaper to smooth the taped edges. Wipe clean.
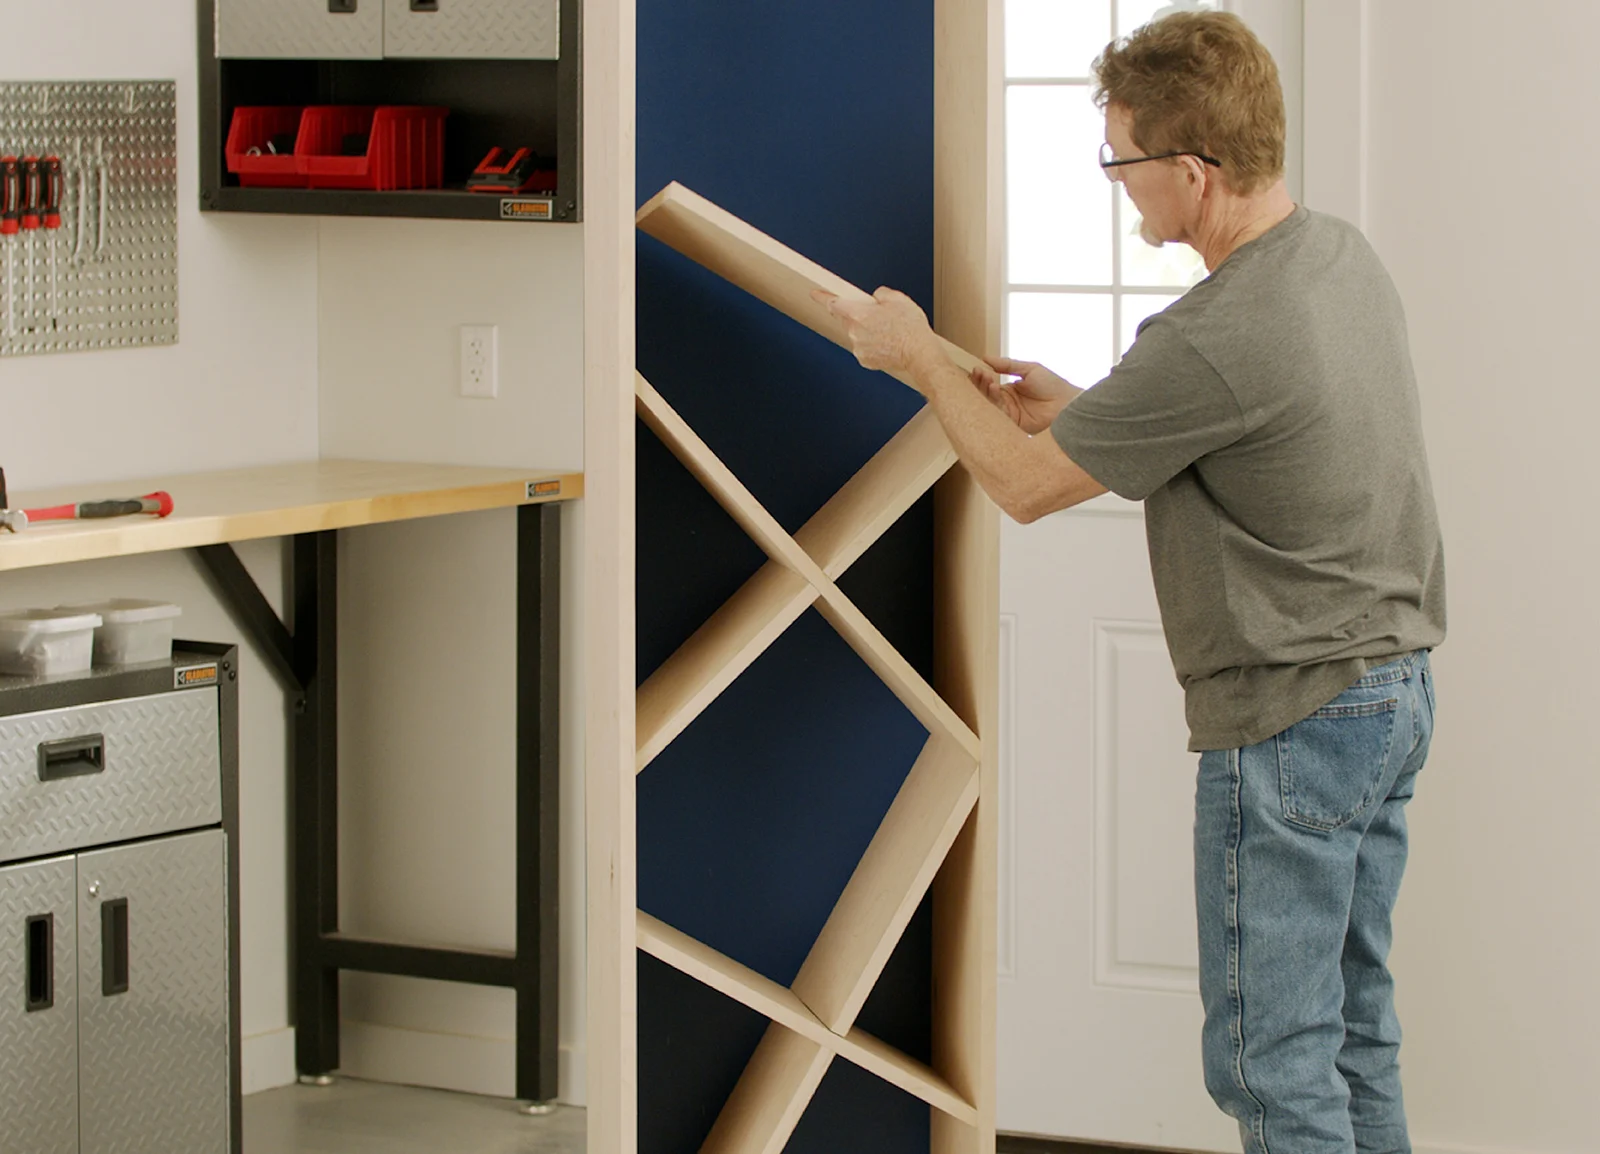
16. Put the shelves together in their X formations and insert them into the box. Countersink and screw all shelves in place, working from the outside inward. Repeat until all shelves are secured in place.
17. Fill all holes and imperfections with wood filler. Smooth and let dry.
18. Use a palm sander to sand smooth all surfaces of the rack.
19. Paint, stain or apply a clear-coat finish to the inside surfaces and shelves of your rack.
20. Pop in your favourite bottles and get ready to greet your guests with a fully outfitted pantry.
Total time: 8 hours
Difficulty: Advanced