Here’s How to Make a Living Wall Herb Garden
If you’re a foodie and love to cook, this DIY project is perfect for you. Creating your very own indoor herb garden will mean you can have easy access to your favourite herbs all year round. Find a sunny spot in your kitchen and let’s get to work. With a few basic building supplies, this indoor living wall can easily be executed as a weekend project.
What You’ll Need*:
Supplies
5/8" Plywood Sheet
1" x 6" Pine (8' length)
1-1/4" Wood Screws
2 Large D Rings
Silicone Caulking
Water-Based Clear Coat Varathane
36" Wide Landscape Fabric
1 Large Industrial Garbage Bag
Variety of Herbs
Tools
Glue
Pencil
Stapler
Box Knife
*Our full assortment of building supplies is available at Home Building Centre and Home Hardware Building Centre locations. To unlock our catalogue of building supplies online, please select your local Building Centre.
Here’s How
For this project, we are building a living wall herb garden that is 15" wide x 24" long (height) x 3" deep. Its relatively shallow depth is ideal for growing herbs such as parsley, chives, oregano, basil, thyme, mint and rosemary. The project is built in two parts: You will build the planter box first and then frame it on the front and sides for a polished, final finish.
Steps:
Assemble all the materials and tools for your project.
Start by choosing the location for your living wall herb garden. Measure and determine the size that you would like to build. Plan out your project.
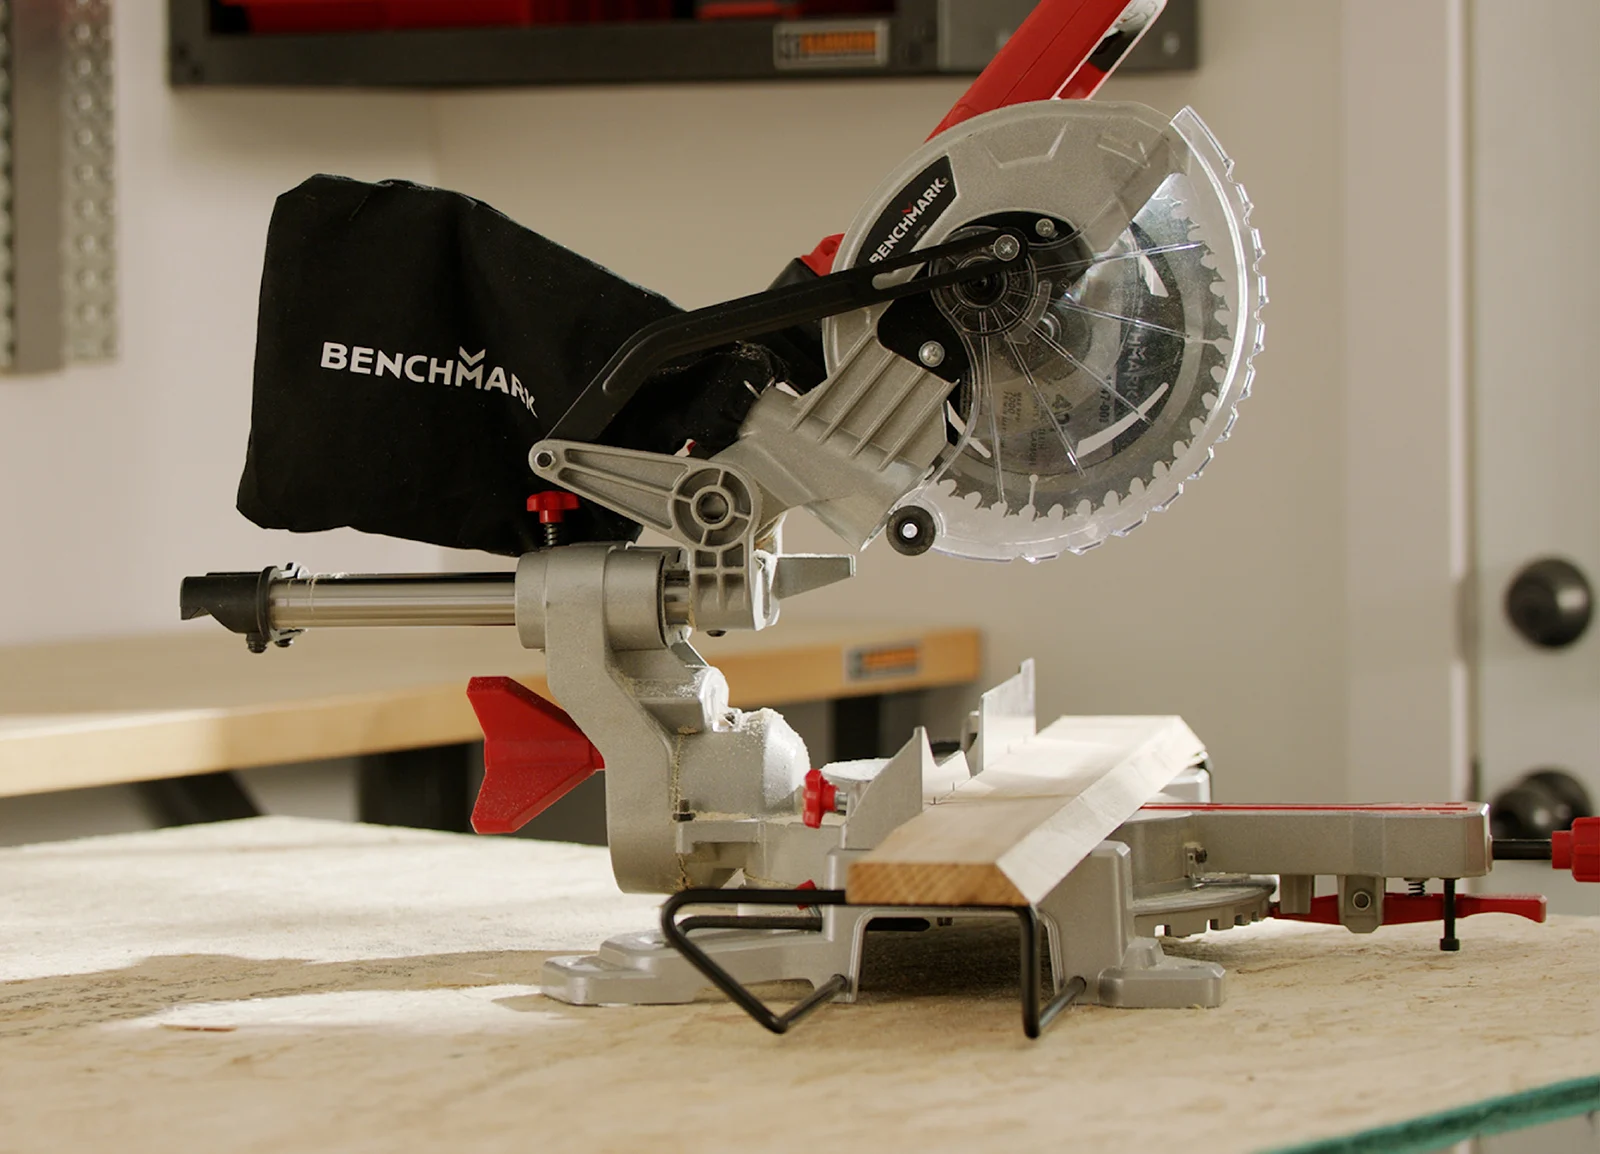
Measure, mark and cut your wood. You will require the following plywood pieces to build a 15" wide x 24" long (height) x 3" deep planter box:
(2) 13-1/2" x 2-1/2" (for the fronts)
(2) 24" x 4" (for the long sides)
(2) 13-1/2" x 4" (for the short sides)
(4) 13-1/5" x 3" (for the troughs)
(1) 22-3/4" x 13-1/2" (for the back)
Measure, mark and cut the following pieces of pine for the frame:
(2) 15" x 2-15/16" (for the fronts)
(2) 15" x 4-3/4" (for the short sides)
(2) 25-10/16" x 4-3/4" (for the long sides)
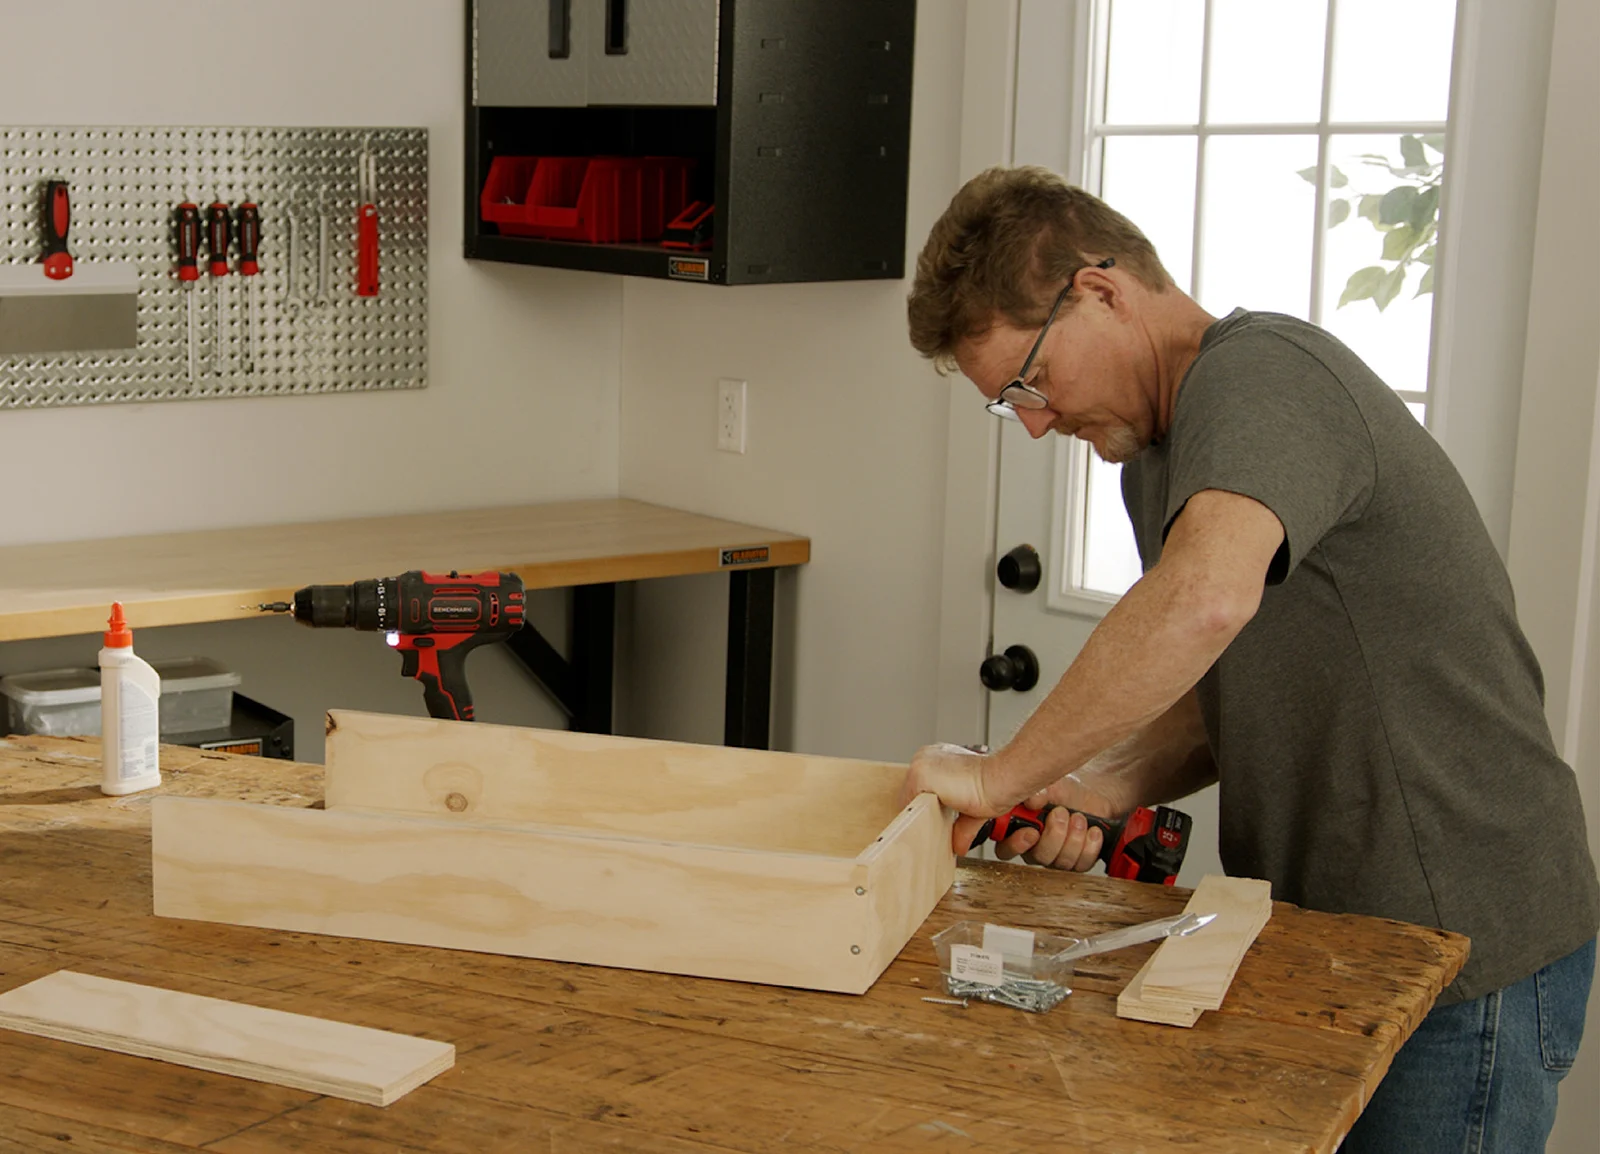
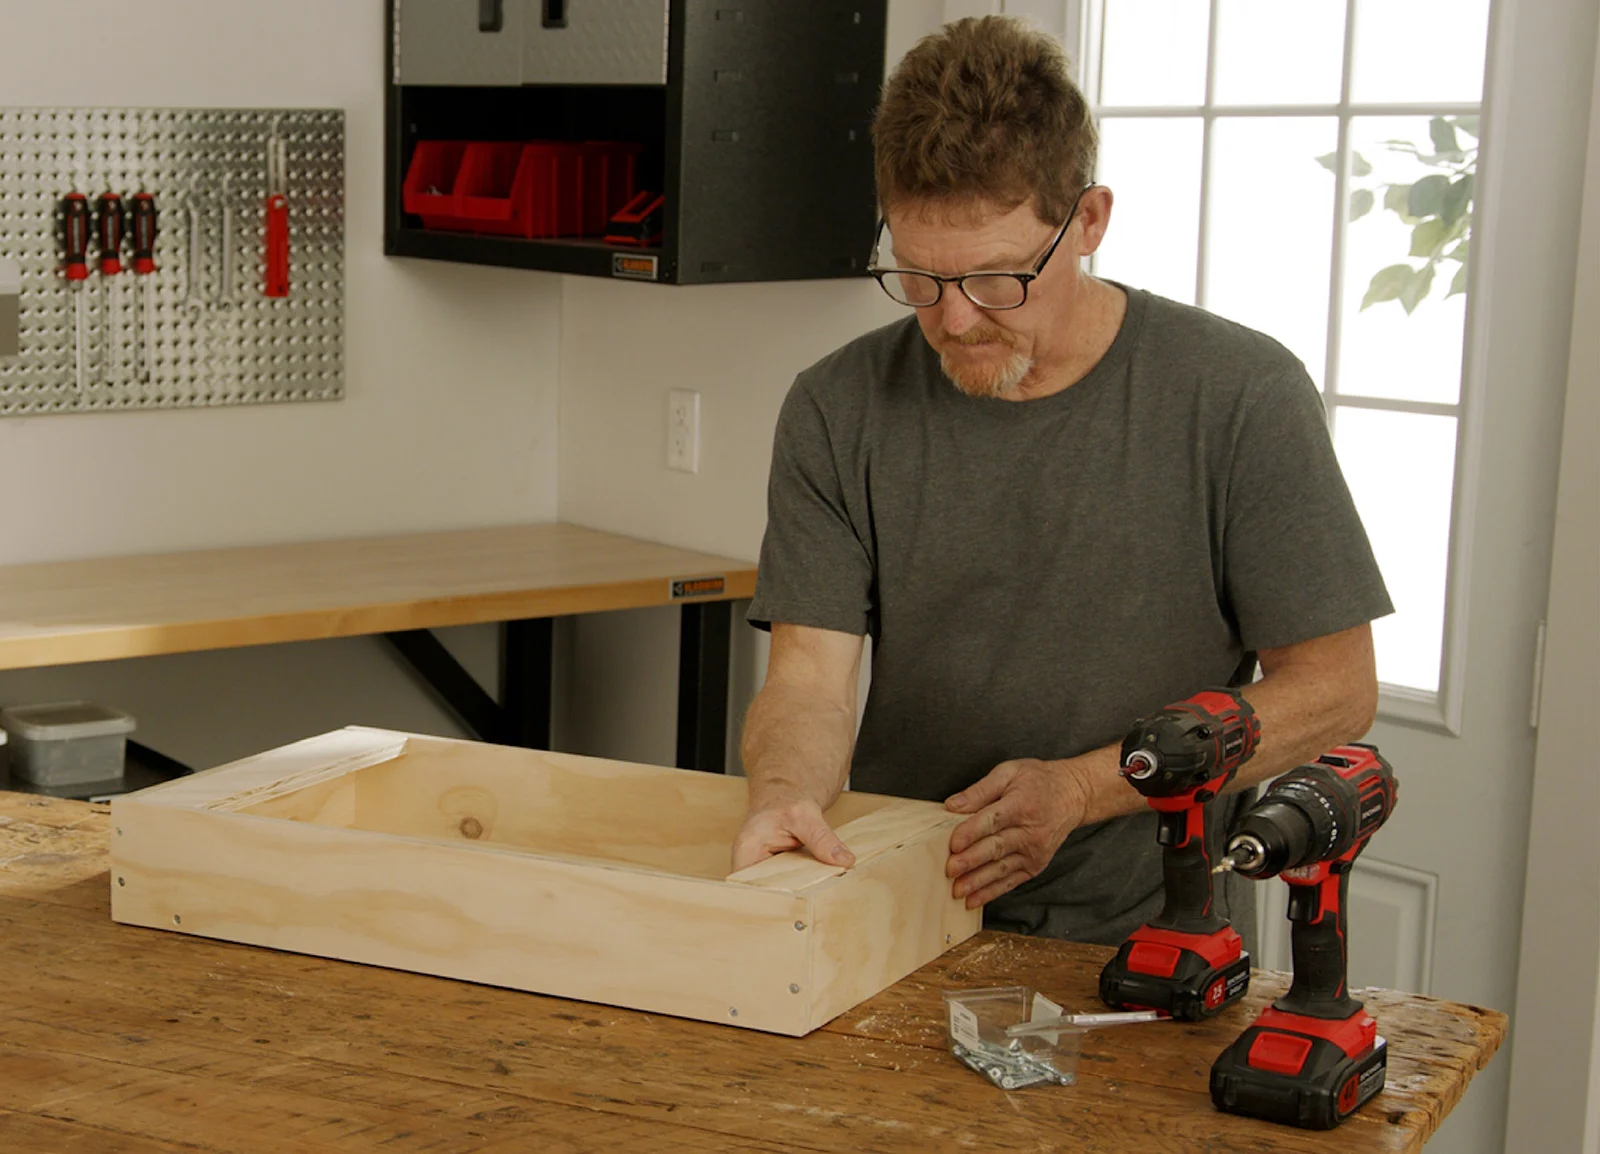
4. To build the planter box, lay the two 24" x 4" long plywood sides and the two 13-1/2" x 4" short plywood sides around the 22-3/4" x 13-1/2" back plywood piece. Glue, countersink and screw the sides together.
5. Remove the 22-3/4" x 13-1/2" back plywood piece and add glue around the edges. Position back in place, countersink and screw together.
6. Attach the two 13-1/2" x 2-1/2" front plywood pieces onto the box, facia like. Glue, countersink and screw together.
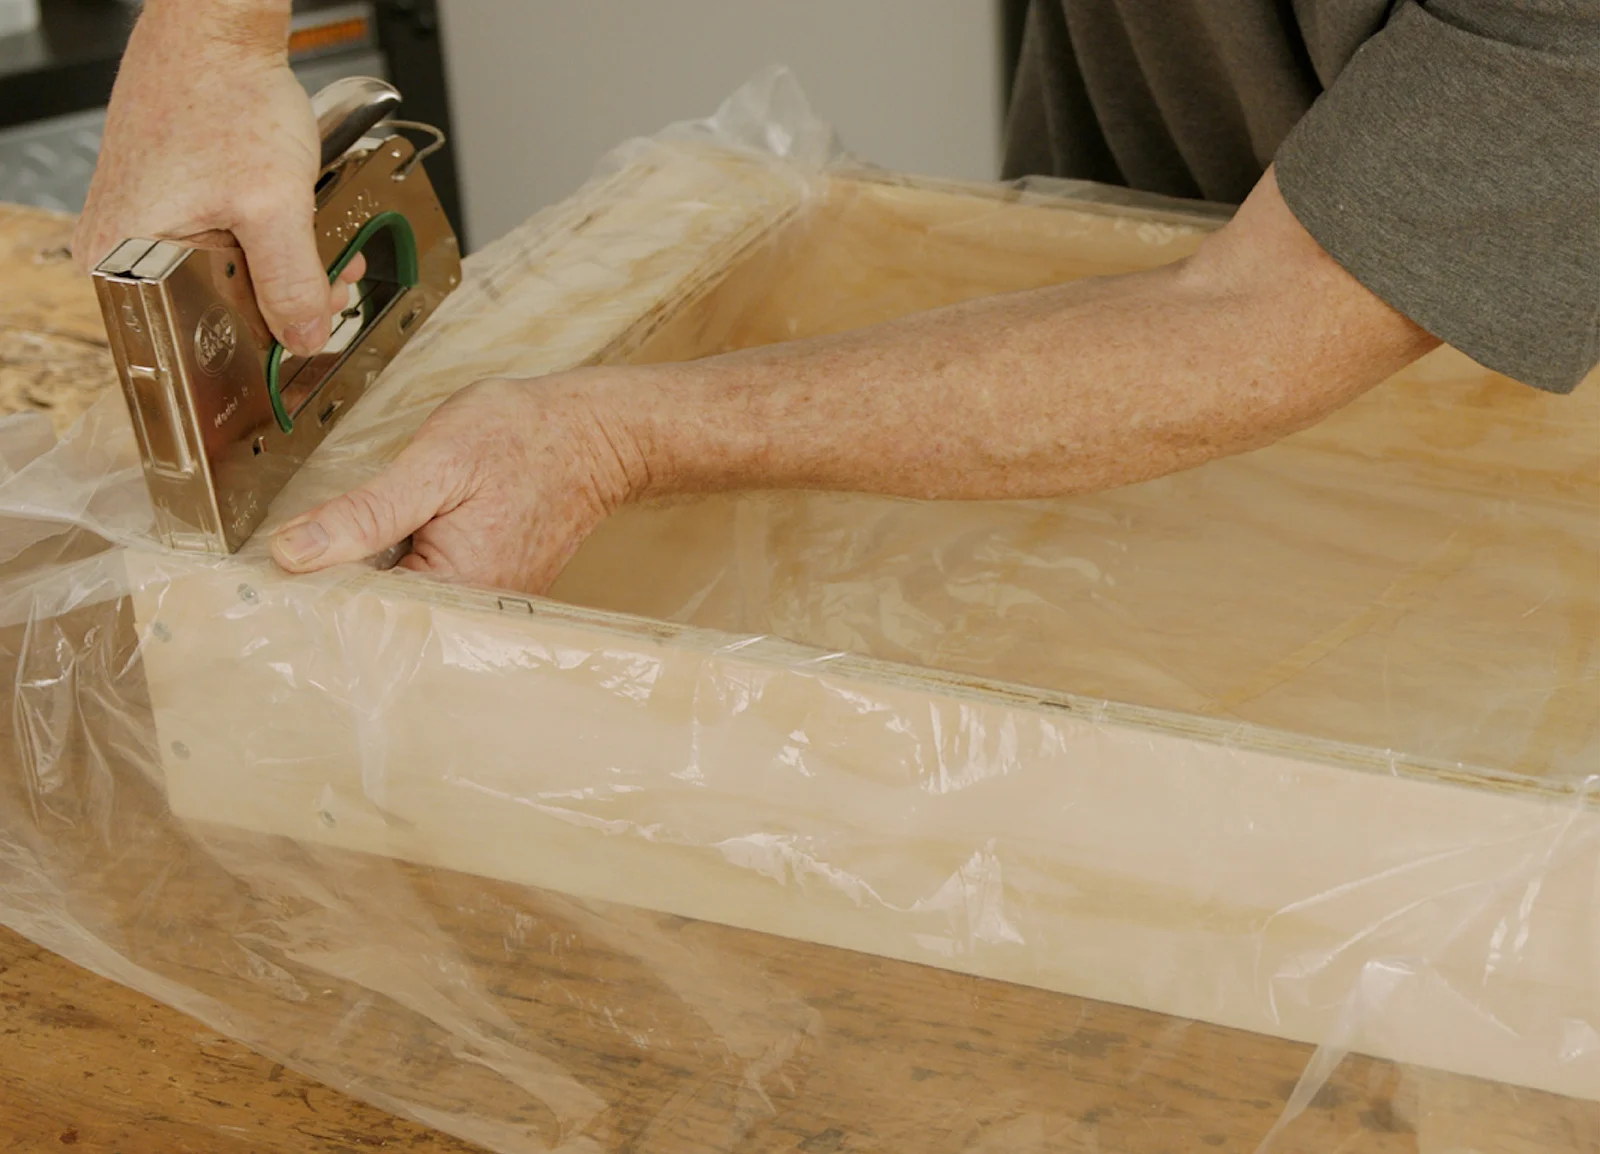
7. Next, waterproof the box. Caulk the seams of your box with silicone. Apply silicone to the flat walls of the box too. Line the inside of the planter box with heavy-duty plastic and staple in place. Ensure all staples are well attached using a hammer. Use a utility knife to cut plastic to size; slice away any excess.
8. Measure and mark the placement for the troughs; position approximately 3-3/4" apart and place at an angle of approximately 35° to 45°. There will be a gap at the back of the troughs to allow for water to flow. Countersink and screw each trough in place from the outside using two screws on each side.

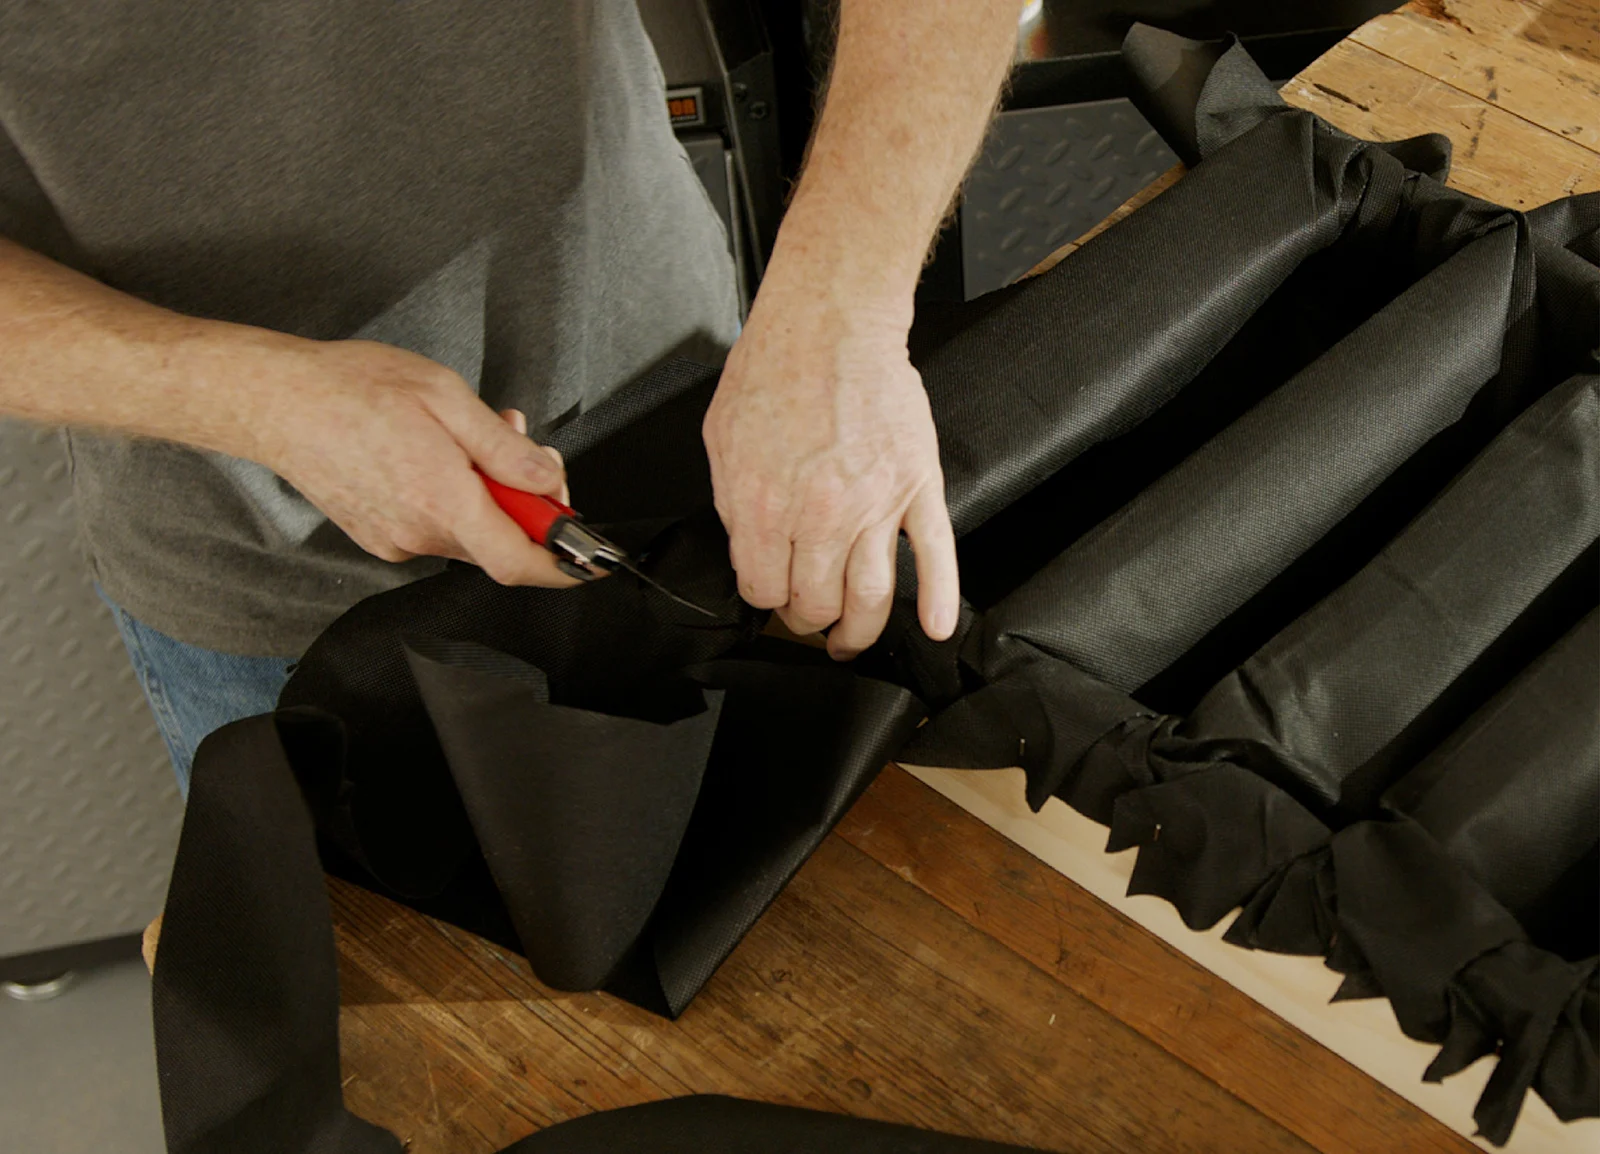
9. Line the box with landscape fabric. Tuck the fabric around each trough. Using stainless steel staples (that won’t rust), staple the cloth in place and cut away excess fabric.
10. Create the pine frame for your planter box. Take the two 15" x 4-3/4" short pine sides, two 25-10/16" x 4-3/4" long pine sides, and attach them around your planter box. Glue, countersink and screw together.
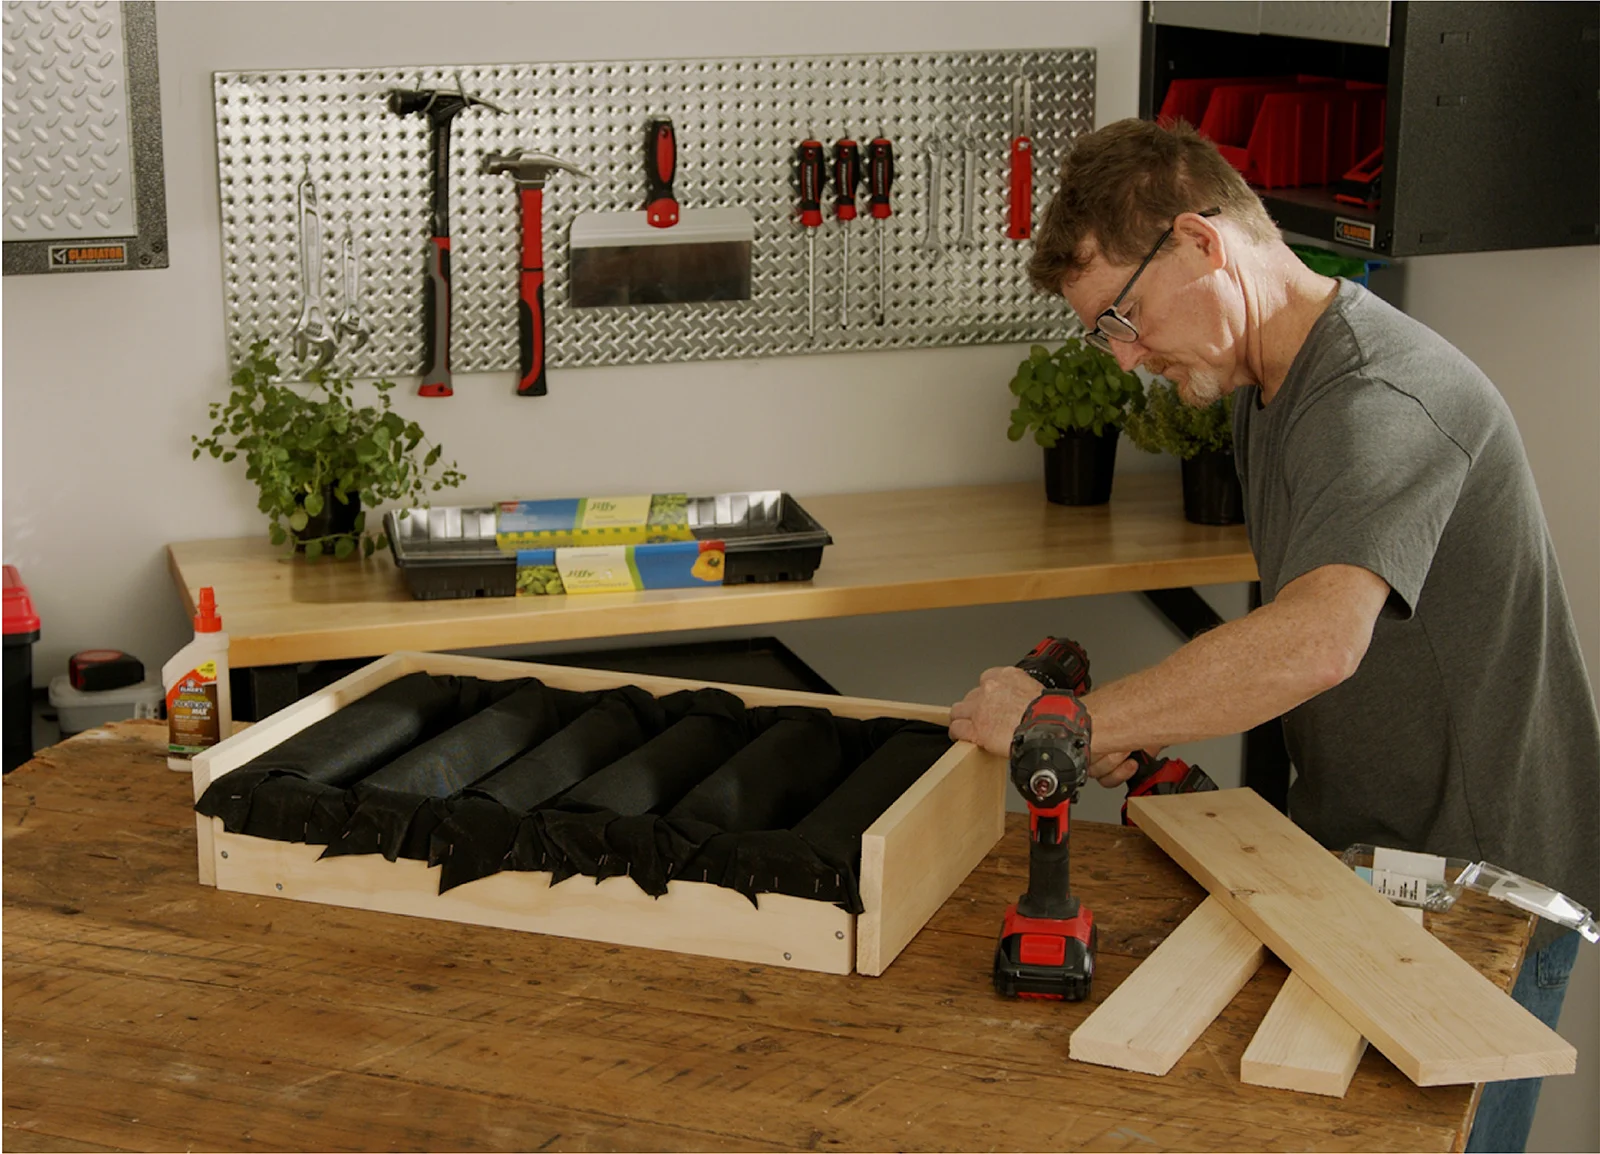
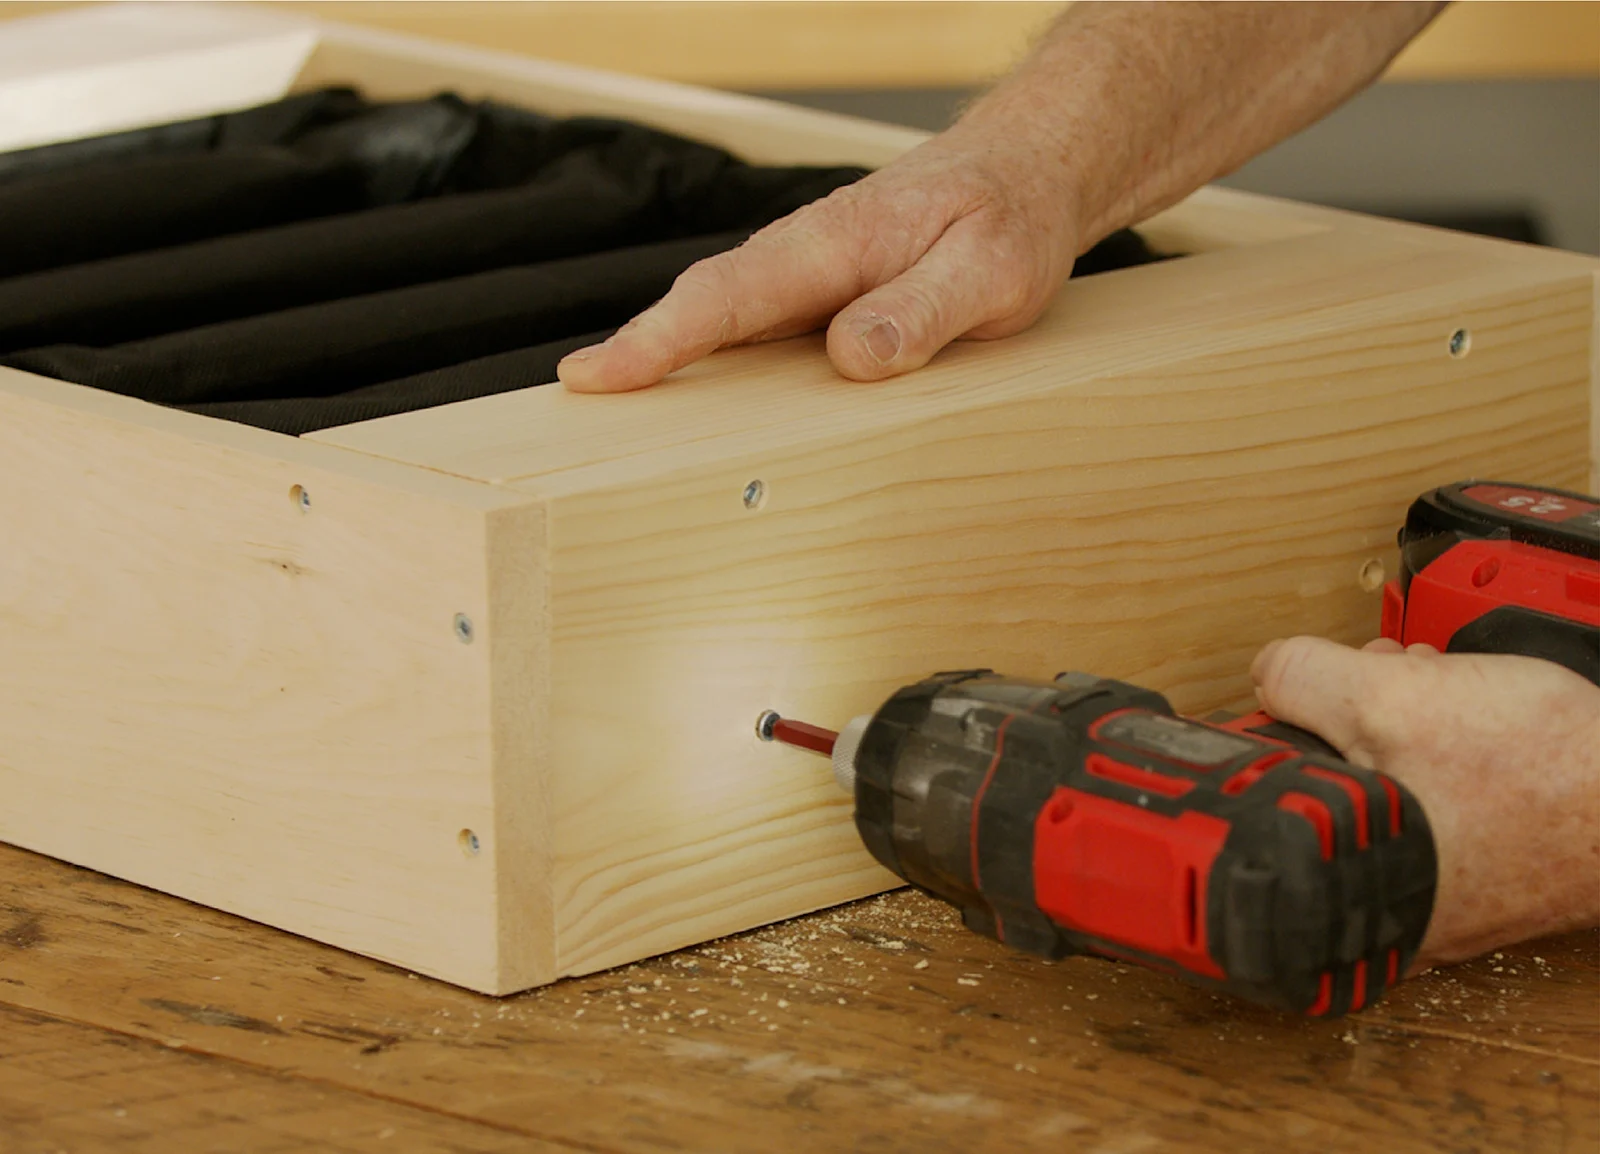
11. Next, attach the two 15" x 2-15/16" pine front pieces, facia like; glue, countersink and screw together. Add additional screws top and bottom to secure the outside pine pieces to the inside plywood pieces, countersink first.
12. Fill holes with wood filler, smooth with putty knife and let dry.
13. Use a palm sander to sand all sides. Wipe clean. If desired, apply a protective clear coat finish or stain to match your décor.
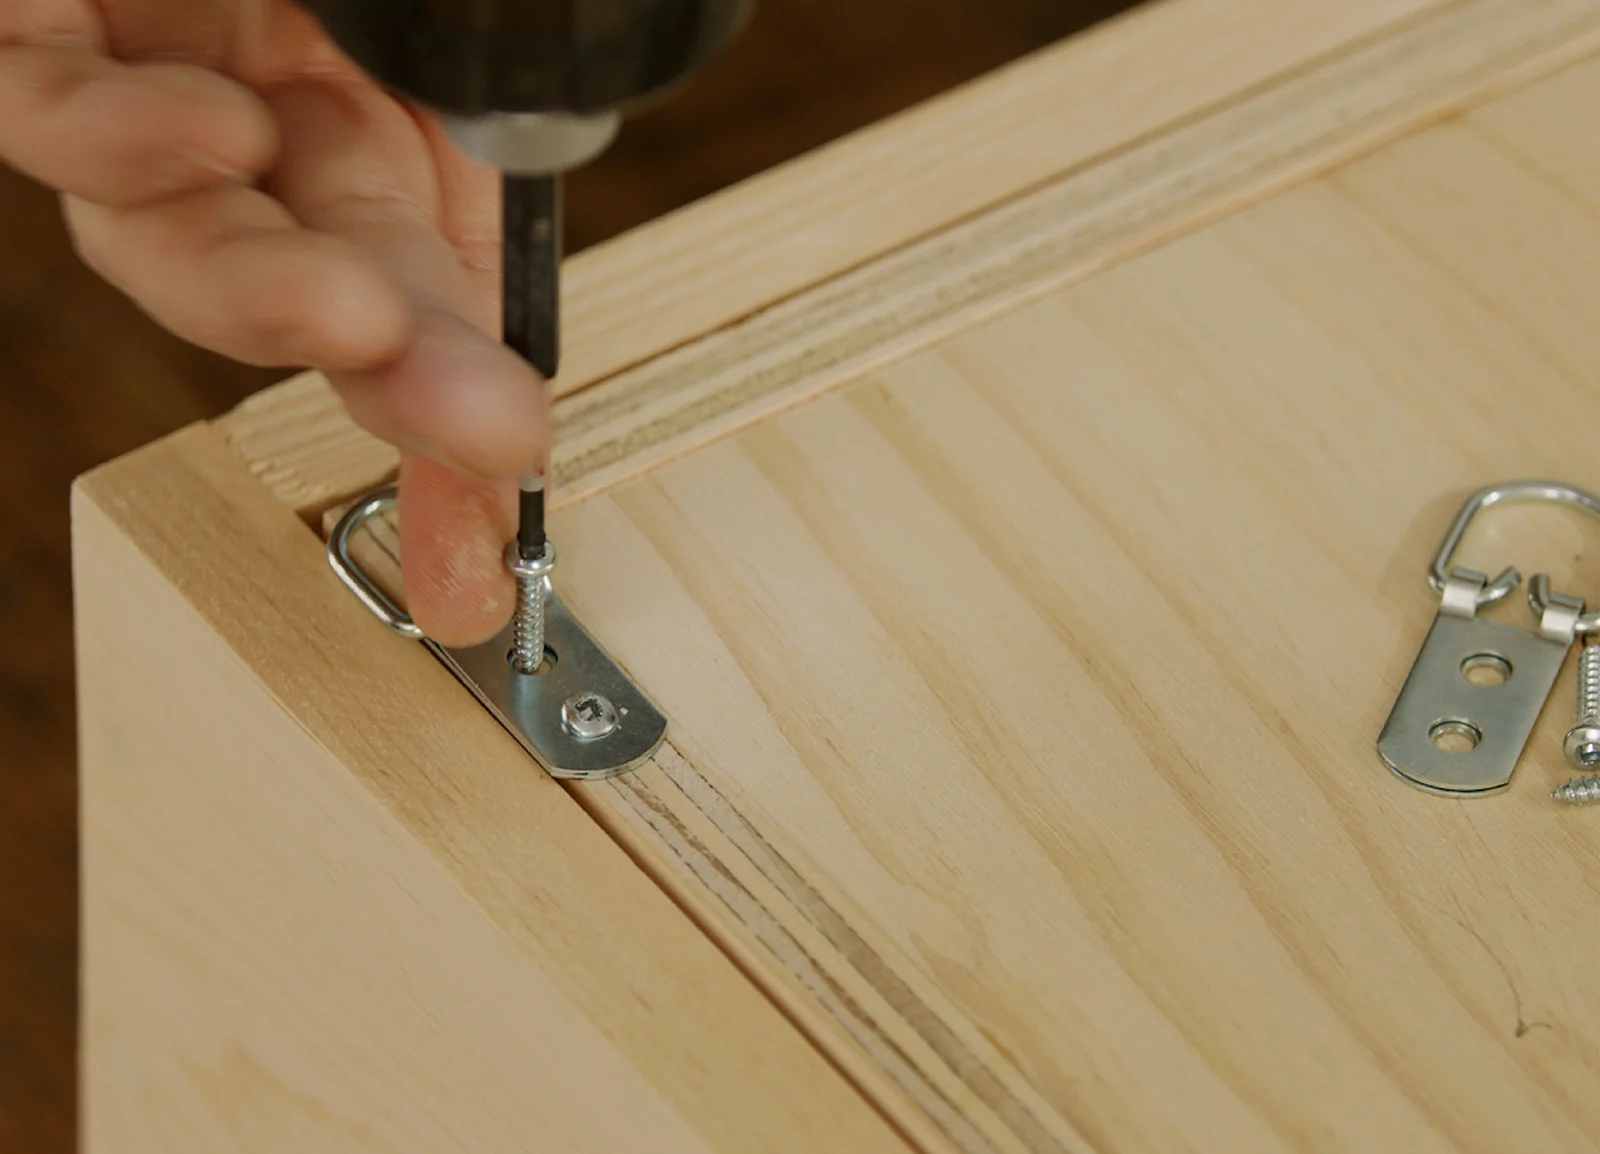
14. Once complete, add hanging hardware of your choice to hang your planter. For hooks, we are using D rings.
15. Now you are ready to plant. Try growing seeds using our starter kits and get ready to watch your garden grow.
Total time: 5 hours
Difficulty: Intermediate
