Here’s How to Build a Firewood Holder
Today’s outdoor living spaces wouldn’t be complete without a fire pit, fireplace or chiminea to gather around and keep you cozy into the evening hours. If you love the authentic wood-burning experience, this DIY firewood holder is meant for you. Simple yet graphic, it will help keep your firewood dry and ready. By doing so, it will also extend the use of your backyard throughout the spring, summer, fall – and for the die-hard outdoor lovers, through the winter too!
What You'll Need*:
Supplies
(2) 1" x 12" Utility Pine (8' length)
1-1/4" Deck Screws
BeautiTone Wood-Shield Exterior Stain
(4) Metal Legs (Plumbeeze Nipple Floor Flange and Black Cap)
(4) Metal Corner Brackets
Tools
*Our full assortment of building supplies is available at Home Building Centre and Home Hardware Building Centre locations. To unlock our catalogue of building supplies online, please select your local Building Centre.
Here’s How
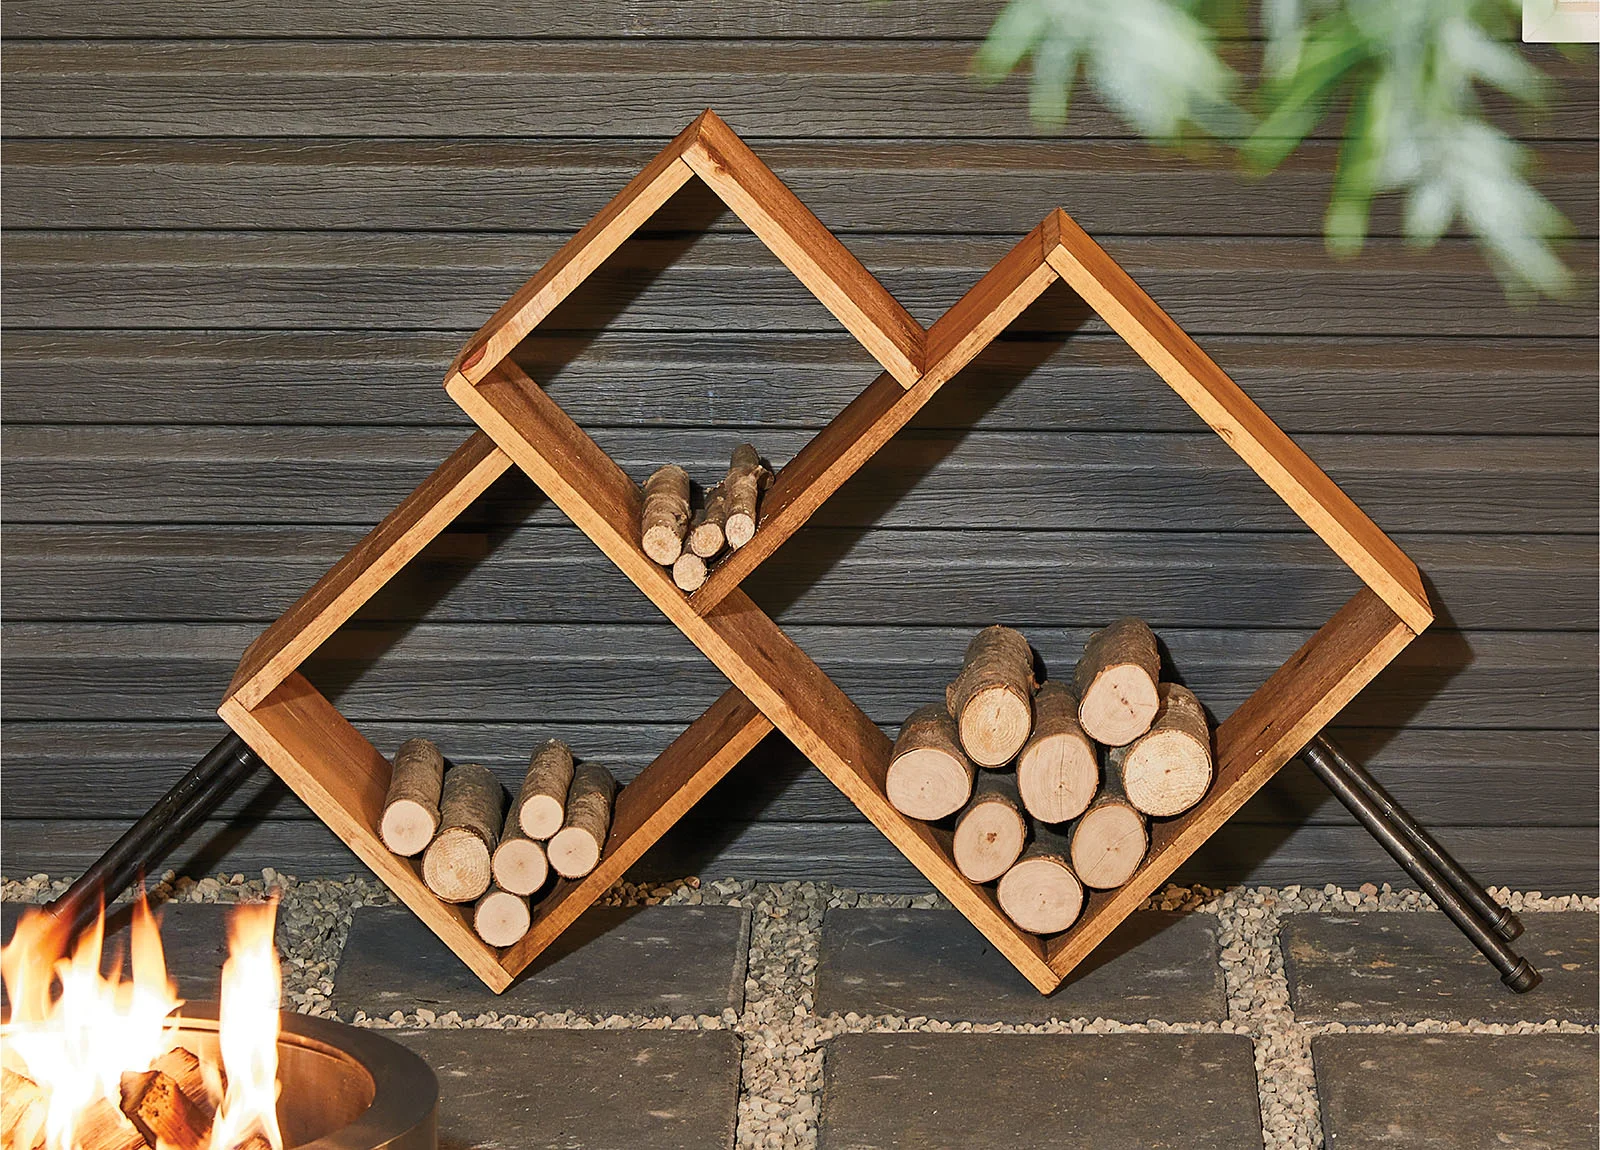
For this project, we’re building a firewood holder that is 45-3/4" wide x 32" tall x 12" deep. The design consists of three open boxes of different sizes: small, medium and large, attached together in an asymmetric fashion. The boxes are screwed together and the completed rack itself sits on the ground, secured and balanced with four legs. If you love its rustic style, this simple design also looks great inside.
Steps:
1. Assemble all the materials and tools for your project.
2. Measure, mark and cut your pine to the following lengths:
(1) piece at 32"
(1) piece at 20"
(1) piece at 15"
(1) pieces at 12"
(1) piece at 11-1/2"
(2) pieces at 18-1/2"
(2) piece at 13-1/2"
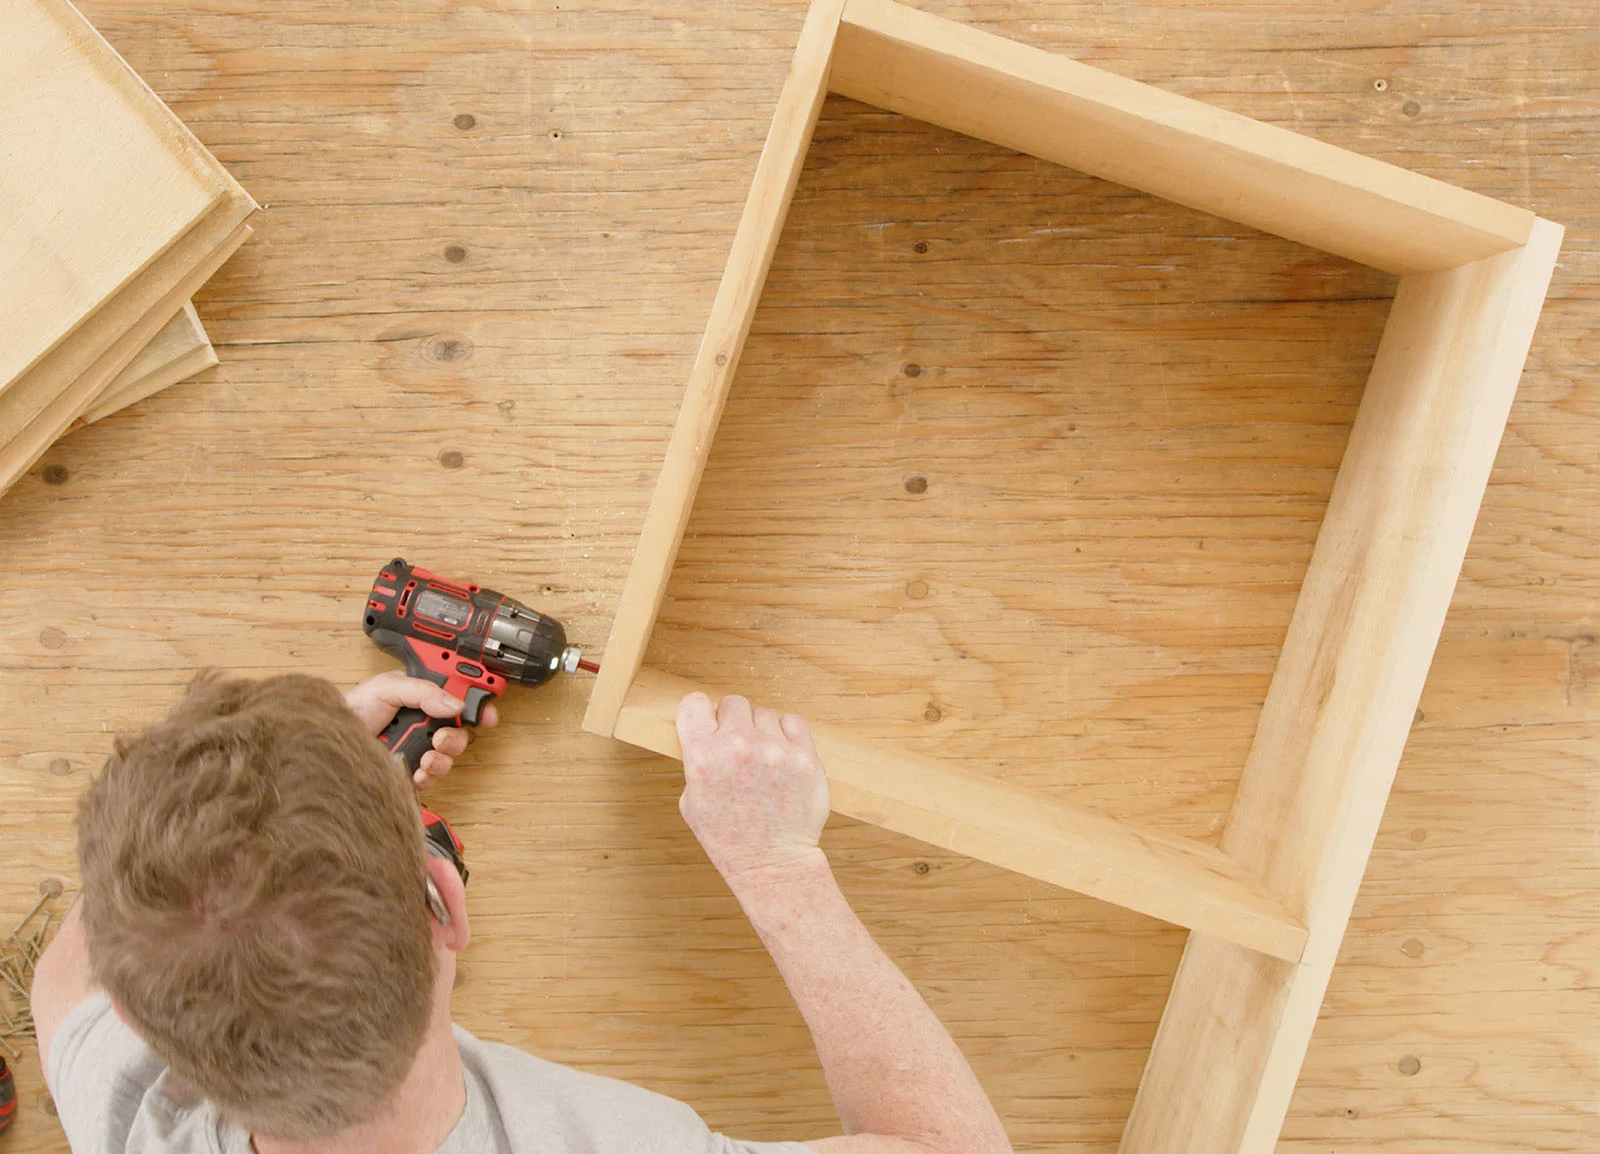
3. Start by building the large box. Position (1) 18- 1/2" piece against the 32" piece; countersink and screw through the 32" piece to attach. Position the 20" piece against the 18-1/2" piece; countersink and screw through the 20" piece to attach. Measure and mark 20" from the edge of the 32" piece. Using the square, draw a straight line from where you have marked.
Take the remaining 18-1/2" piece, position it against your pencil line; countersink and screw through the 32" piece to attach. To complete the large box: countersink and screw through the 20" piece to attach the 18-1/2" piece.
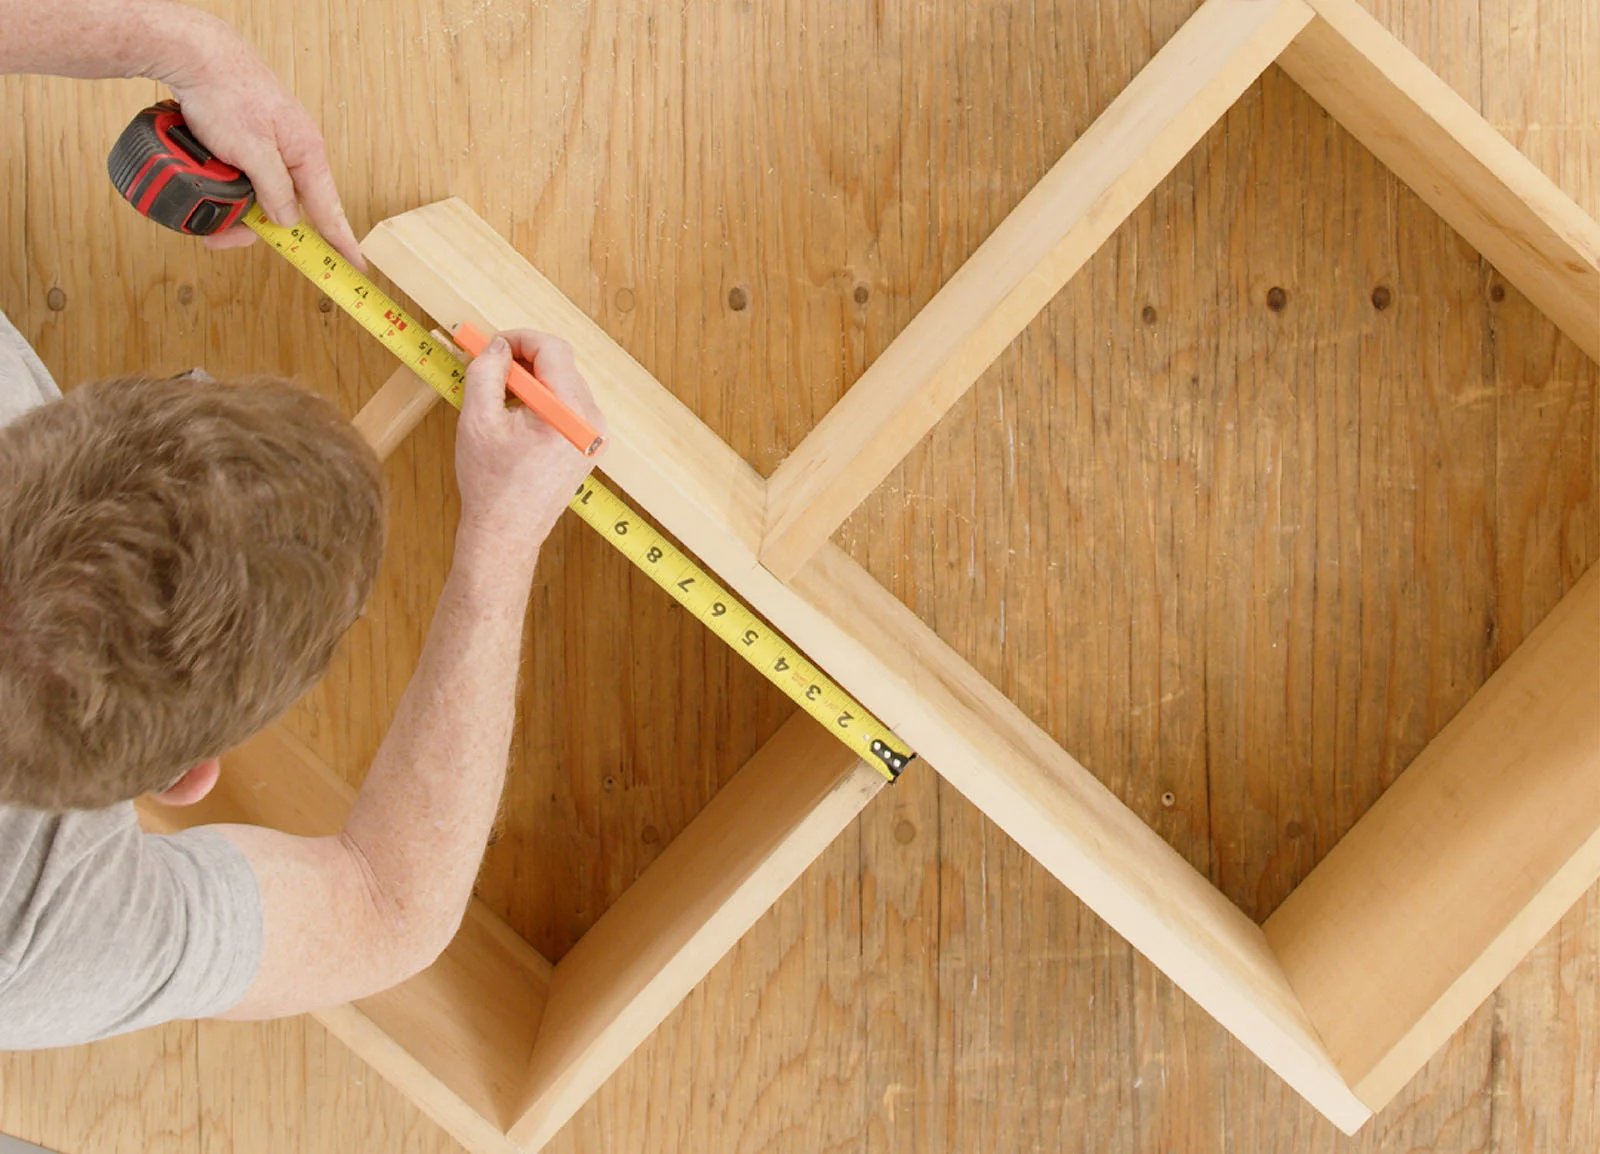
4. Next, build the medium box. Measure and mark 15" from the edge of the 32" piece. Using the square, draw a straight line from where you have marked on the side of the 32" piece. Position (1) 13-1/2" piece against your pencil line.
Position the 15" piece against the 13-1/2" piece; countersink and screw through the 15" piece to attach. Countersink and screw through the 32" piece to attach the 13-1/2" piece.
Take the remaining 13-1/2" piece, position it against the 15" piece; countersink and screw through the 15" piece to attach. Measure and mark 15" from the edge of the fully attached 13-1/2" piece.
Using the square, draw a straight line from where you have marked. Position the 13-1/2" piece against your pencil line; countersink and screw through the 32" piece to attach, completing the medium box.
5. Next, build the small box. Position the 12" piece against the 32" piece; countersink and screw through the 32" piece to attach. Position the 11-1/2" piece against the 12" piece; countersink and screw through the 12" piece to attach. Measure and mark 13" on the 18-1/2" piece, including the width of the 32" piece in the measurement.
Using the square, draw a straight line from where you have marked. Position the 11-1/2" piece against your pencil line; countersink and screw through the 18-1/2" piece to attach, completing the small box.
6. Use a palm sander to smooth away any imperfections or roughness.
7. Stain or paint; wipe excess stain away with a rag if needed. Let dry overnight.

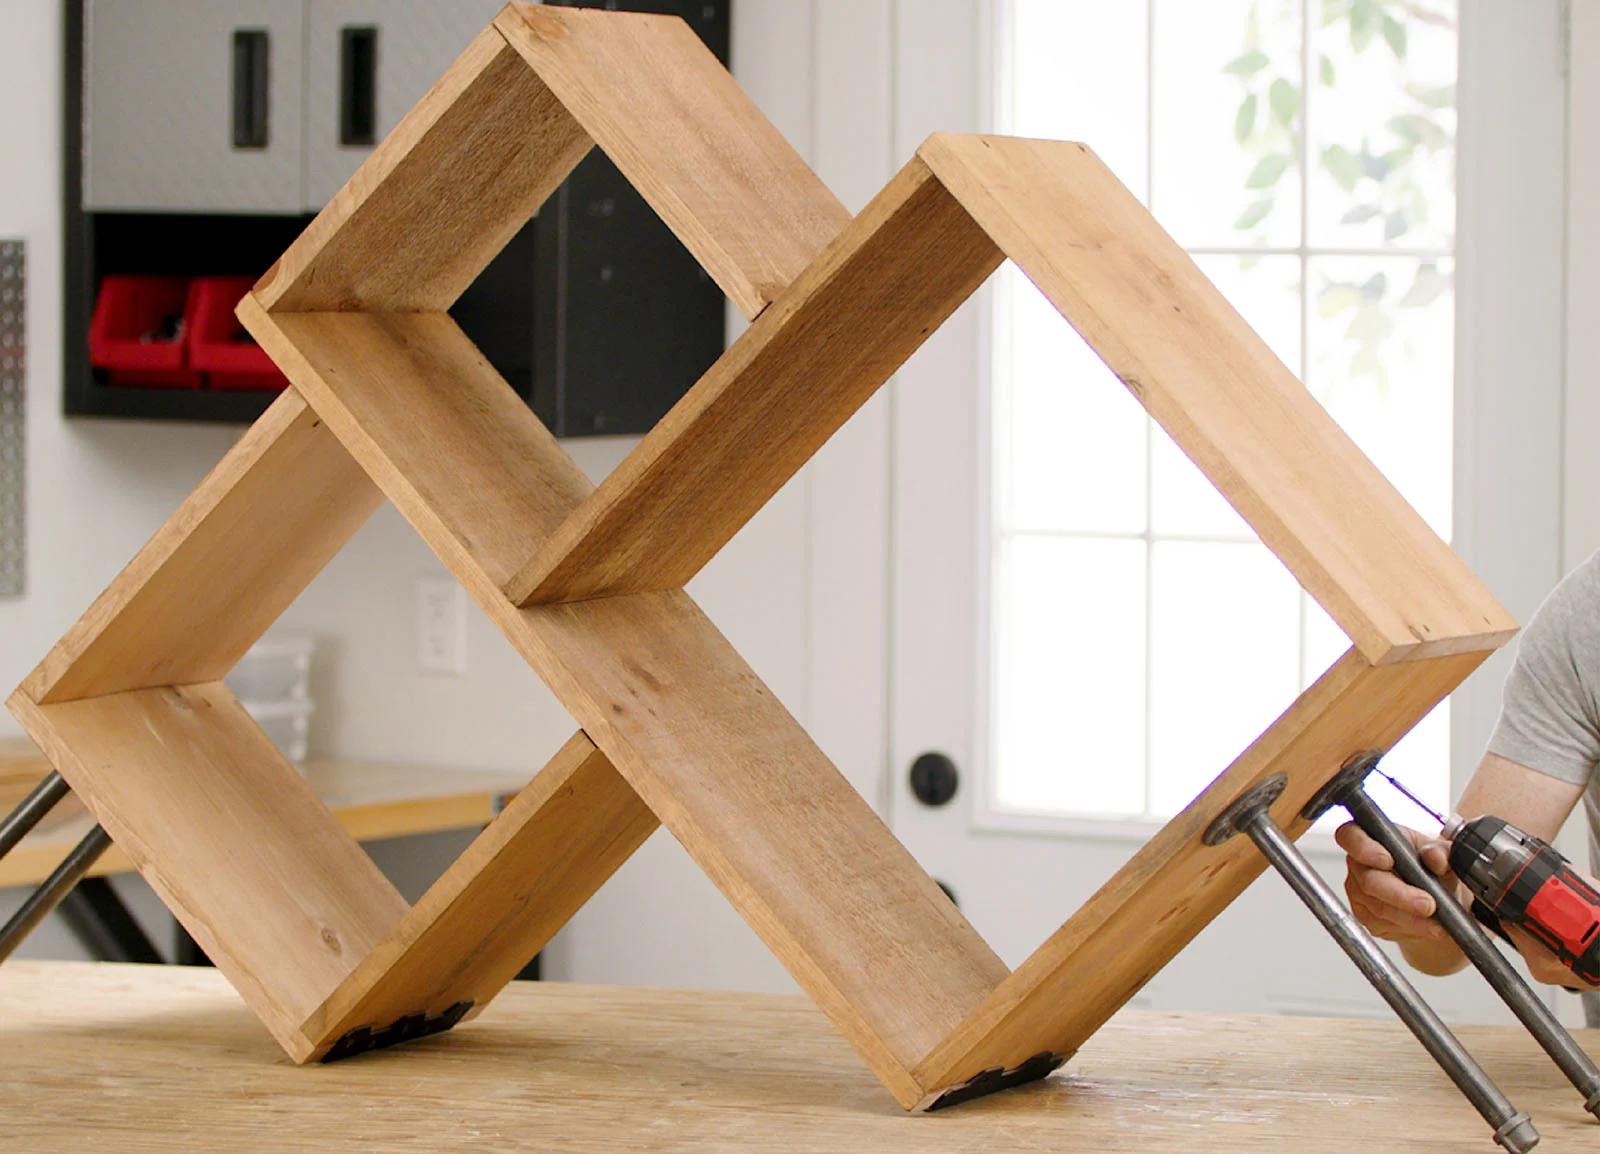
8. Attach the metal corner brackets on the two corners that rest on the ground; flip the firewood holder on its side, position the brackets and screw into place.
9. Assemble the legs. Screw each of the four legs into a base plate and add a bottom stopper. Position two legs on each side of the firewood holder and screw to attach.
10. Your firewood holder is now complete. Fill it with kindling and logs, and get ready to enjoy the warmth and the s’mores!
Total time: 4 hours
Difficulty: Beginner