Here’s How to Install Peel & Stick Vinyl Flooring
Until recently, reflooring your dining room or living room was a major undertaking. It was messy, time-consuming, and big intrusion on day-to-day life at home. It was also expensive—especially if you were using contractors and going with traditional wood. DIY expert Stephanie Thompson decided peel & stick vinyl flooring offered a quicker, cleaner, more cost-effective option that would still look great and last a long time. Follow her easy steps to install peel & stick vinyl flooring in your home.

Here’s What You Need:
Combination Square (to help with straight cuts)
Here’s How to Do It
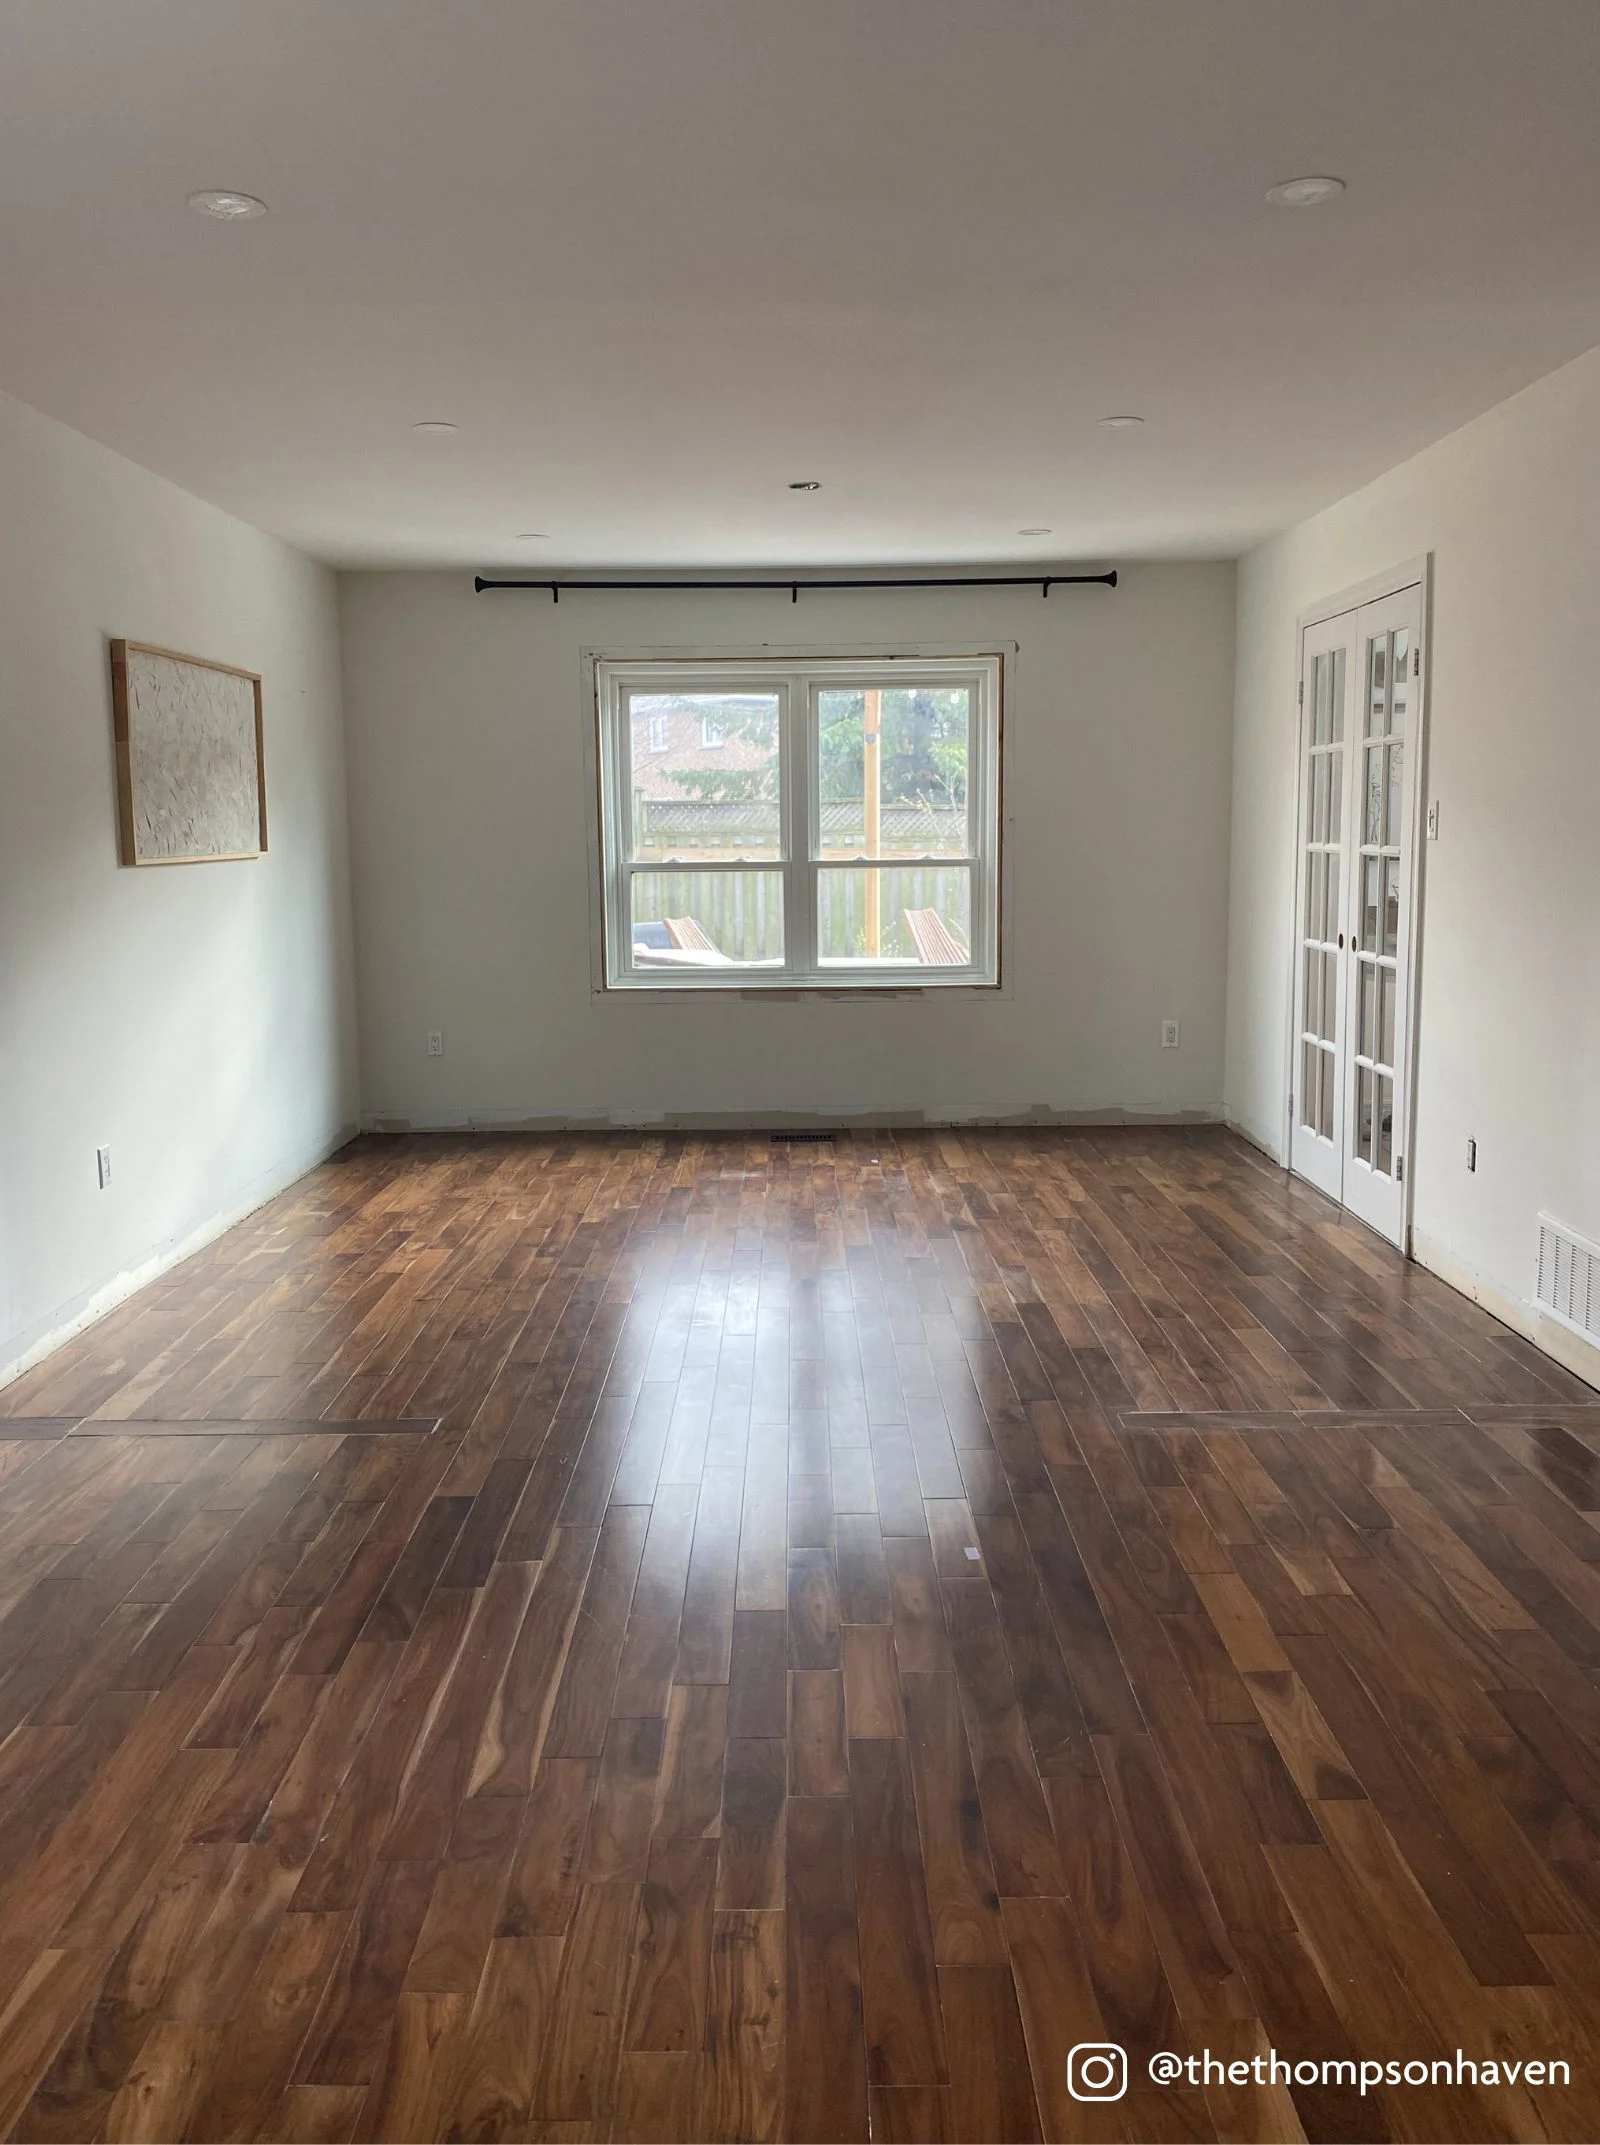
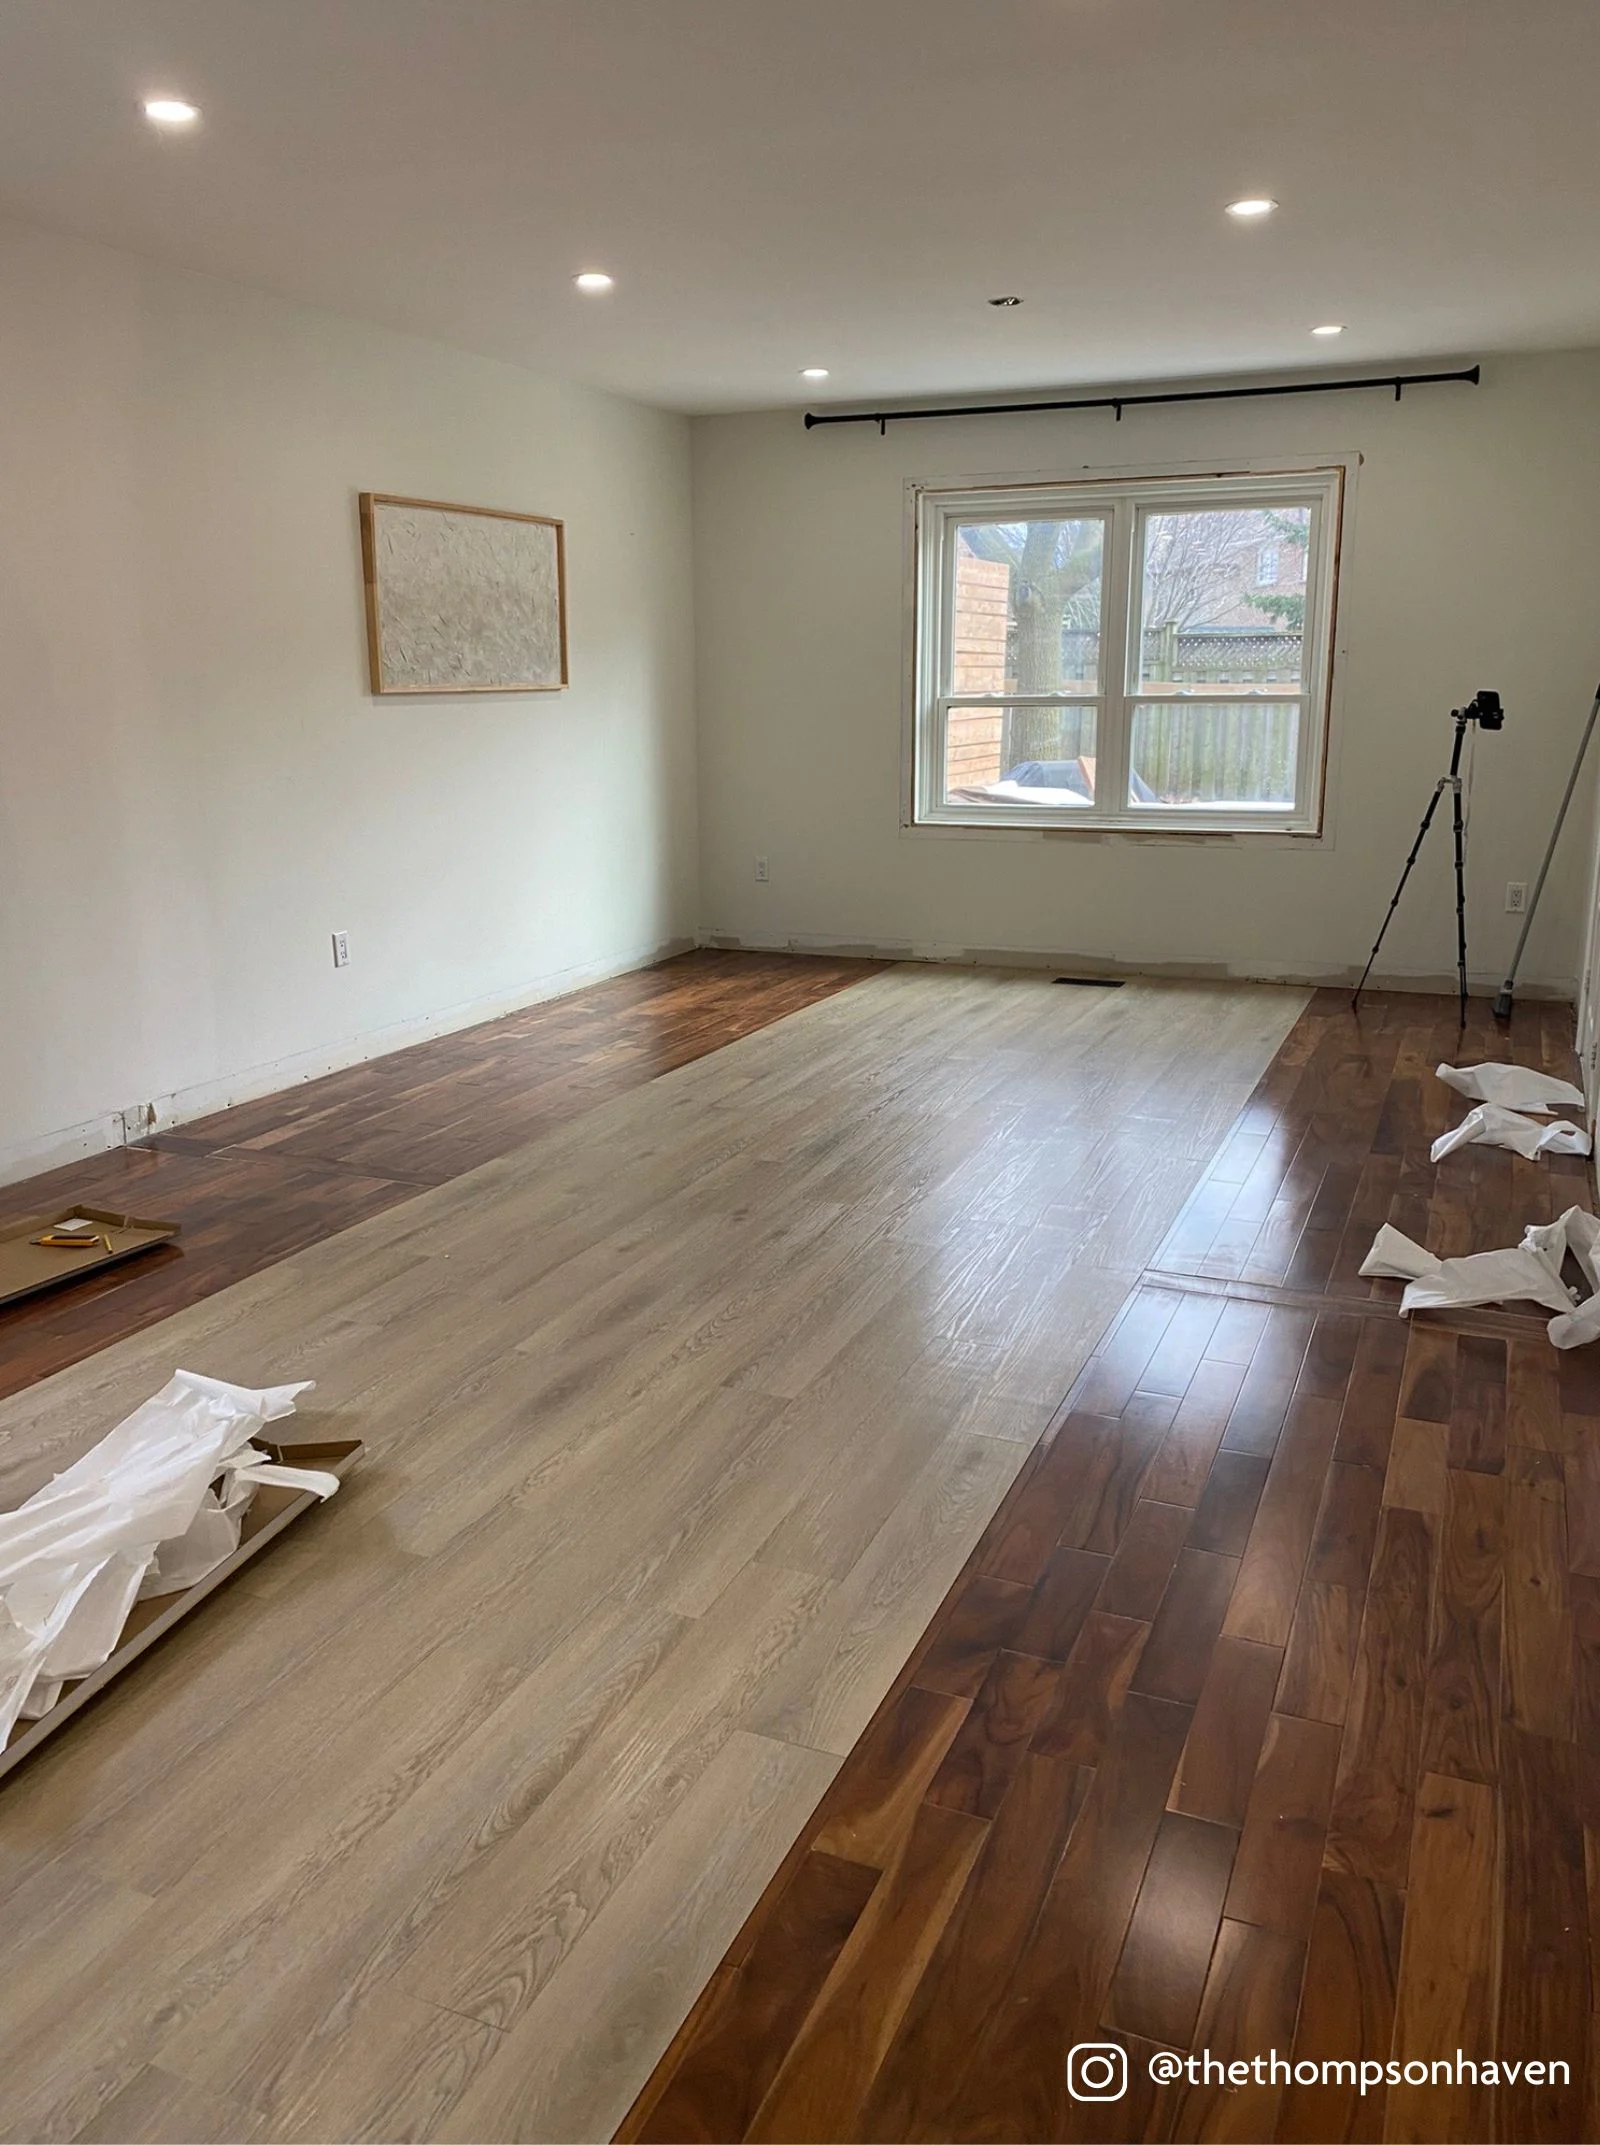
We’d been wanting to upgrade our dining/living room floor for a while. In addition to showing wear, the deep brown stain just made the room seem really dark. After researching different options, we decided to go with vinyl peel & stick vinyl flooring. First of all, it looks fantastic and realistically mimics the appearance of real wood. It’s also durable and scratch-resistant—a must for any home with kids and pets. Cost also factored in, as vinyl is much less expensive than hardwood or engineered wood. It’s also a lot less messy because you don’t have to tear up your old flooring: the vinyl can be laid on top of wood, tile or almost anything! Last but not least, vinyl flooring is very user-friendly. We’ve done plenty of DIY home projects, but we had never laid flooring before, and this process was super easy. We found this great vinyl flooring at our local Home Hardware, along with all the installation materials we needed.
Here’s Our Easy Installation Process
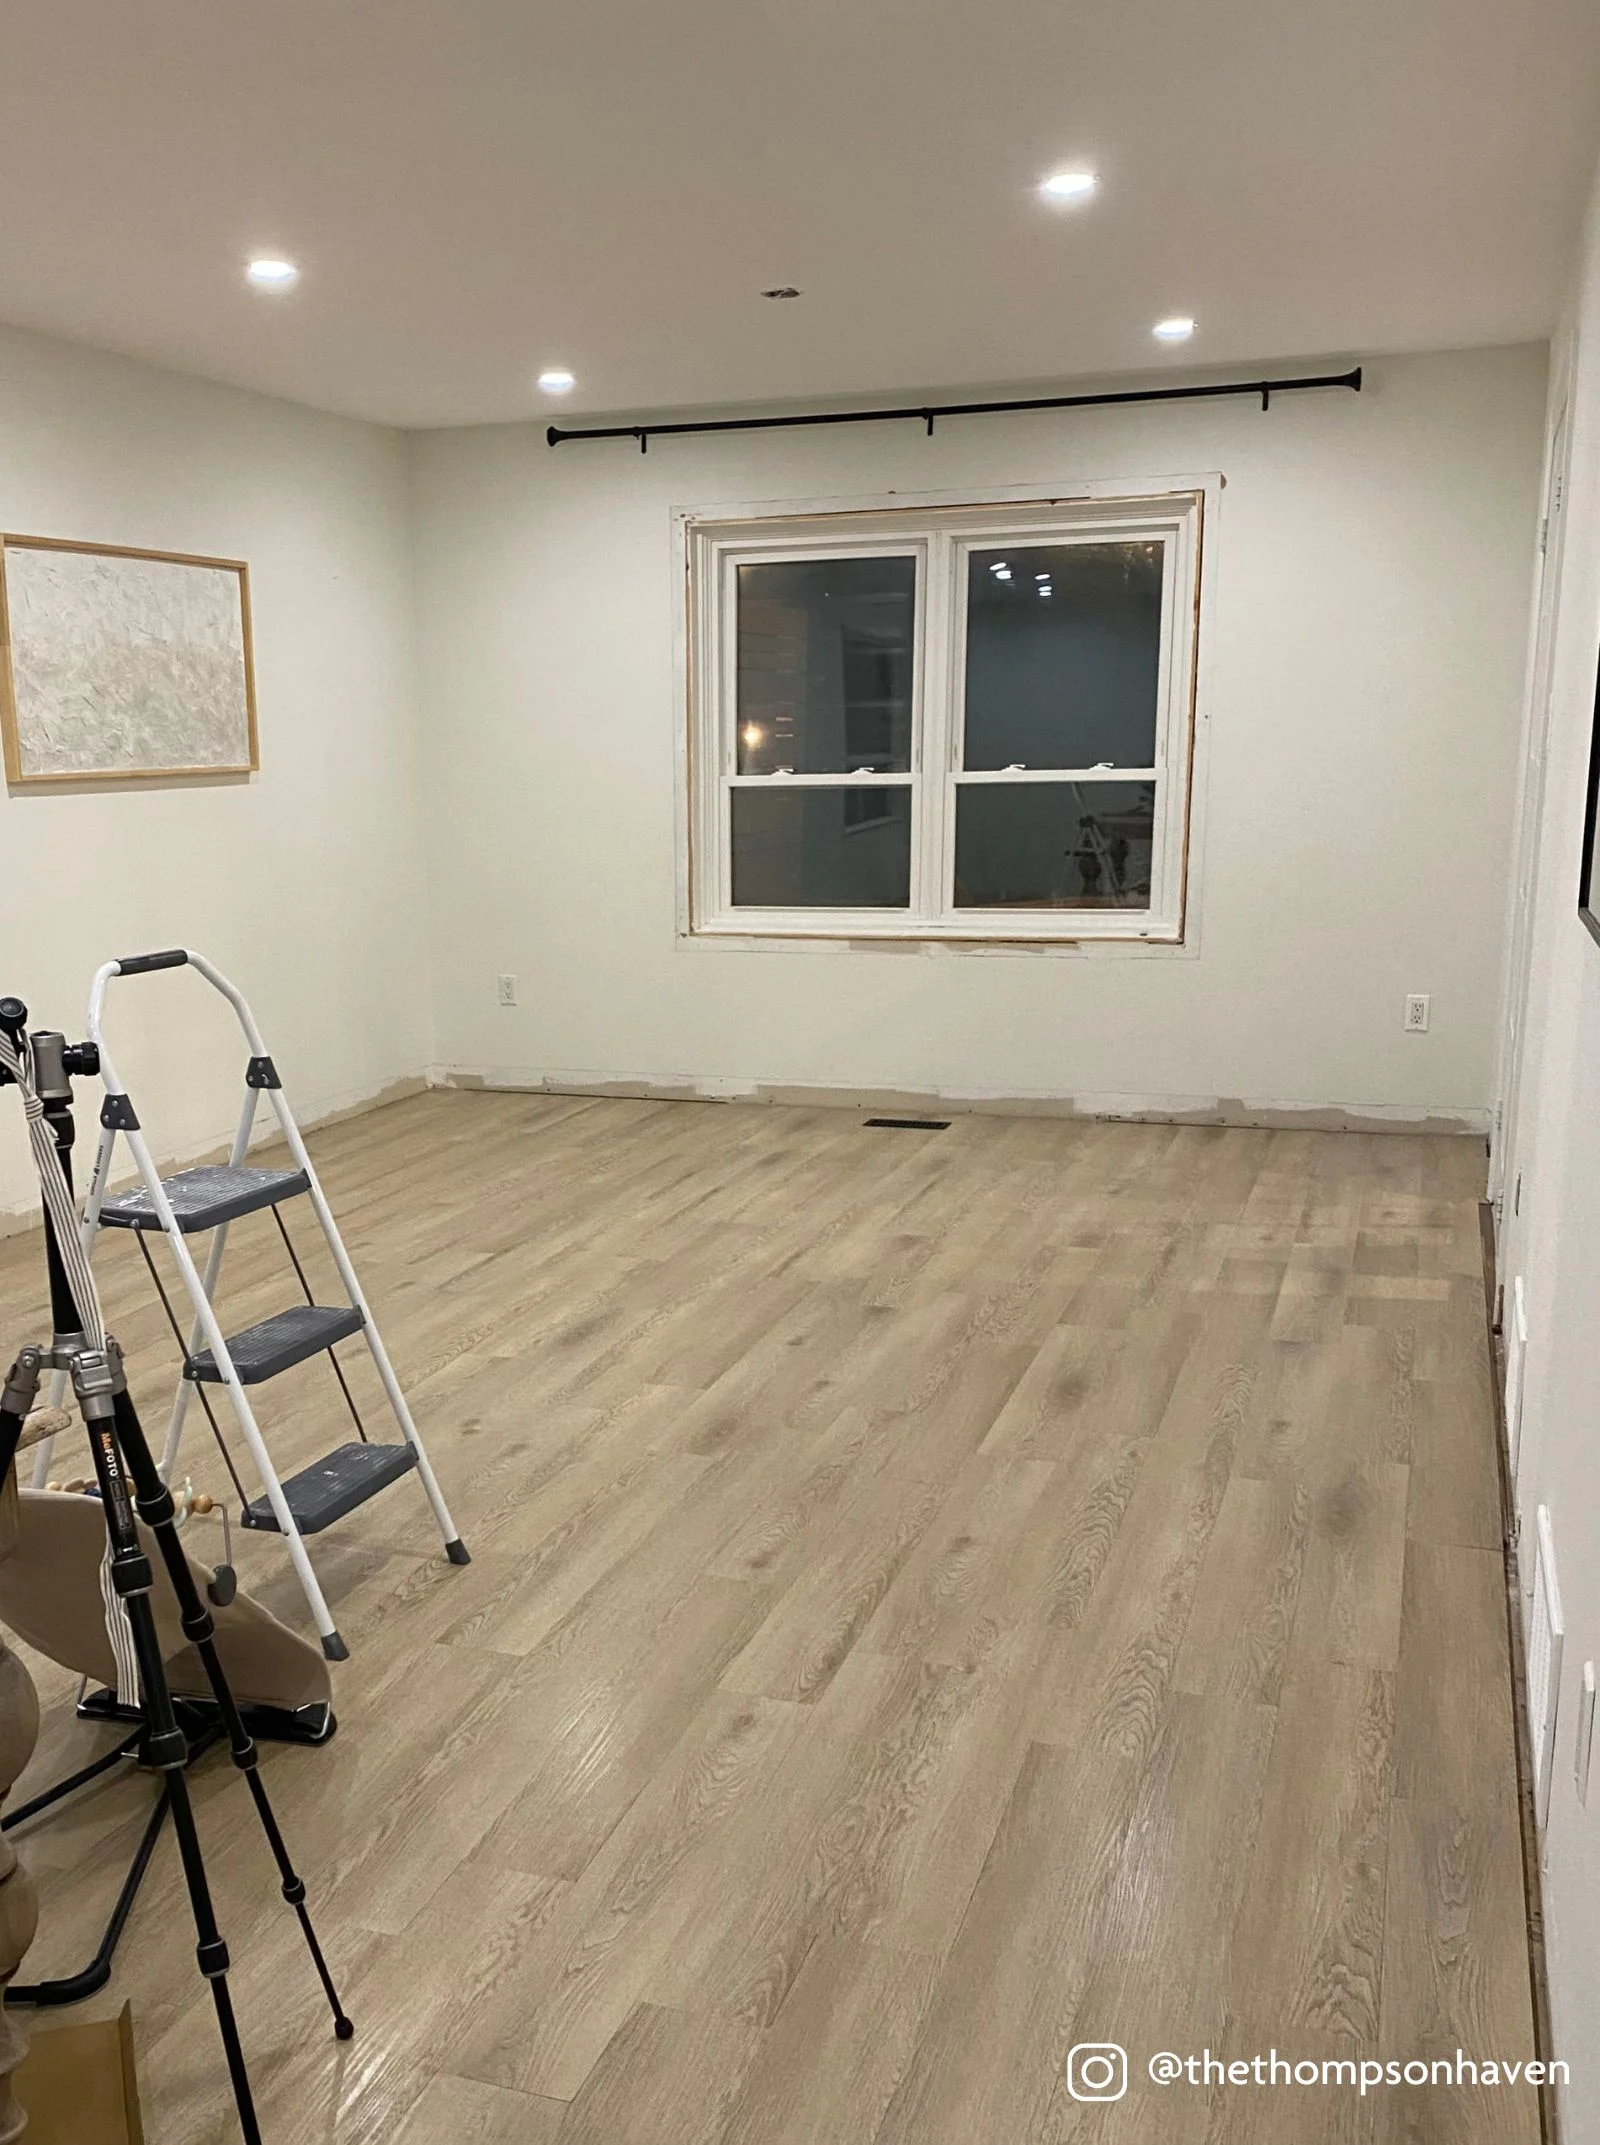
We started in the very center of our room and worked our way outwards toward each side doing a line at a time. This helped us to set our first line and ensure that it was straight and square in the room. To lay the flooring we used what is called the “staggering method”. This entails laying down one complete line, cutting the last piece to fit, and using the remainder of that piece to start the next line. We used the pencil and combination square to mark out the cuts, and the Olfa blade to score down the pencil line. Once complete we simply snapped the vinyl plank along the score line, then flipped it over and cut through the sticky backing paper. DIY tip: try to have the last piece in a line be at least a foot long or it will look awkward and not stagger nicely. For the final two lines against the wall we had to make some lengthwise cuts. There were a few imperfections in the cuts, but the baseboards covered these up.
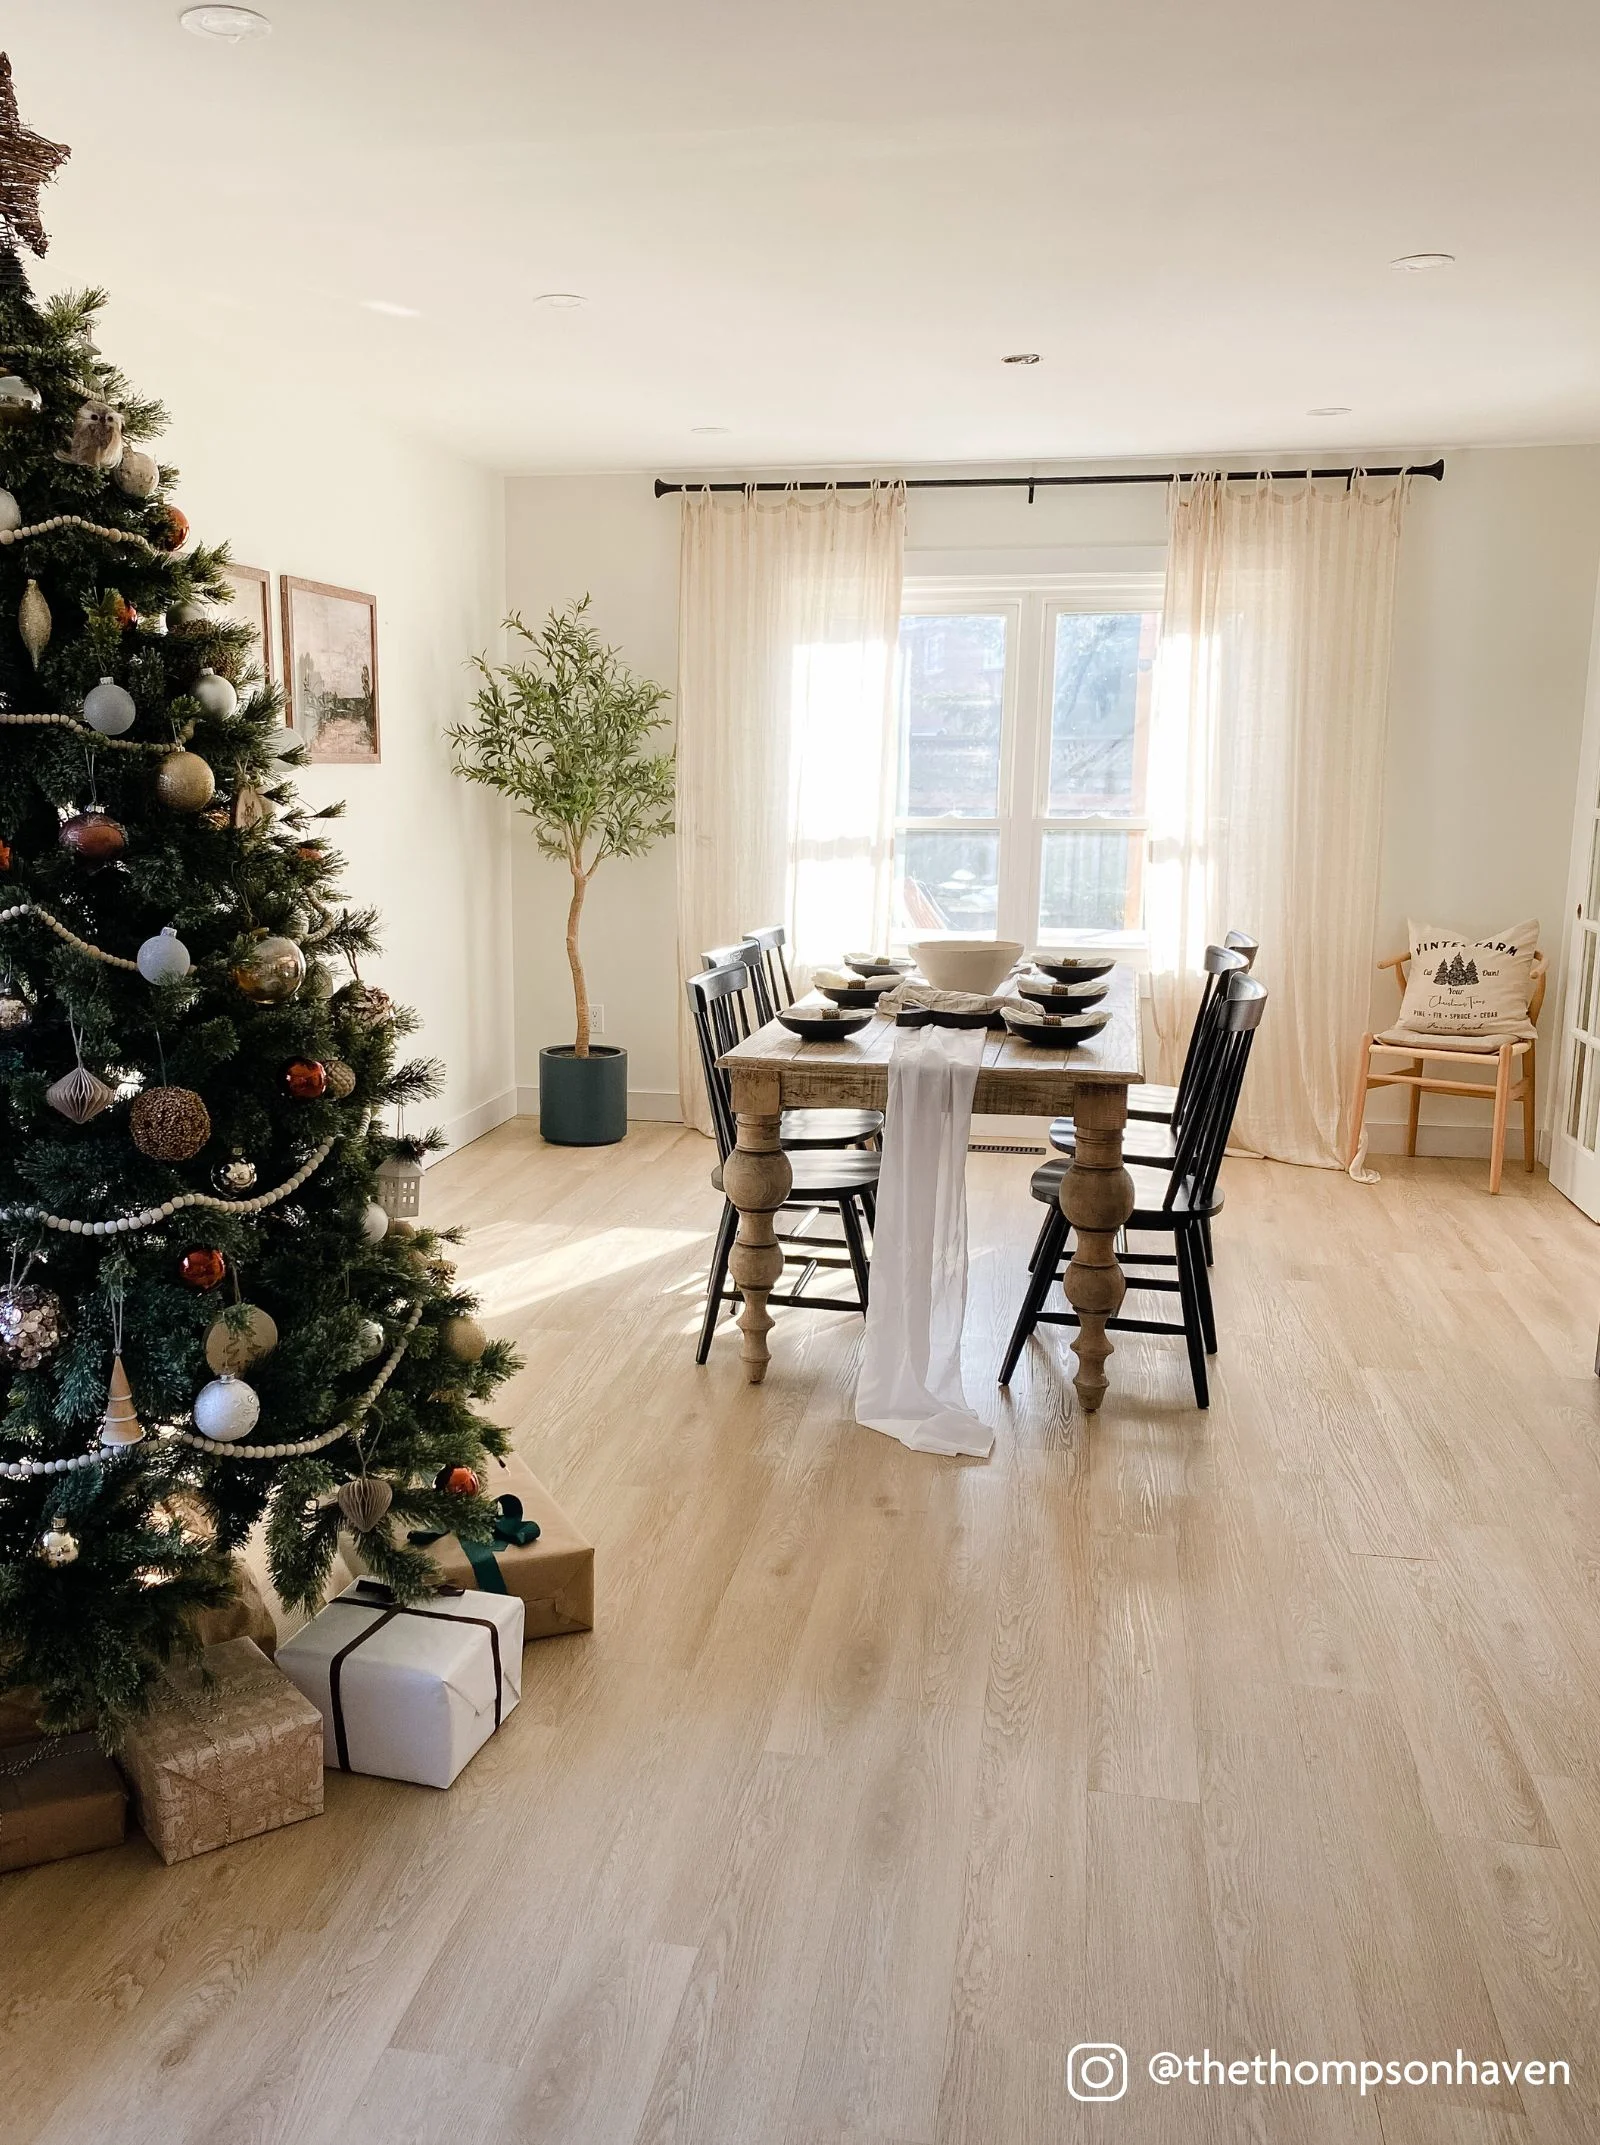
That’s it! The whole process was so easy, and actually a lot of fun to do. We love the detailed wood grain of our new vinyl flooring. The light tones of grey, white, and yellow create a much brighter environment and make the room seem happier overall.